
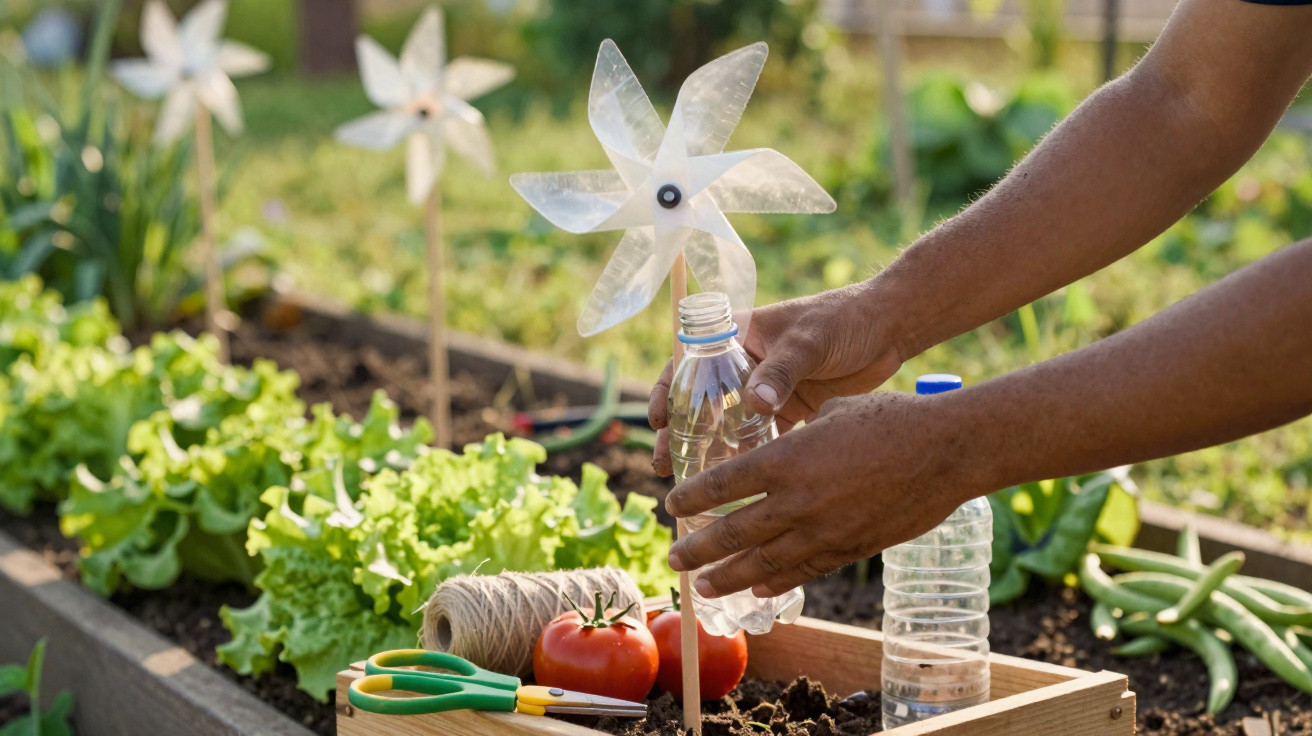
Looking after a home vegetable patch calls for effective ways to stop birds from damaging the continually growing leaves. An excellent use for recycled plastic bottles is an affordable alternative that encourages sustainable household recycling.
How does a homemade bird scarer work in the garden?
This homemade device operates entirely through the force of the wind, which keeps the structure moving. As air currents hit the cut flaps in the bottle, they create rapid rotation that frightens nearby flying animals.
The spinning action produces continuous light noises and visual reflections, preventing birds from approaching cultivated beds. As a result, delicate vegetables can grow safely without spending money on costly products or harmful chemical treatments.
Which plant could increase the value of your home?
Few people realise that choosing the right vegetation for the garden can considerably raise its market value… Read more
What materials are needed for the project?
To make this practical household bird scarer, you will mainly need a clean PET plastic bottle and dark insulating tape. These straightforward materials form the main body of the wind spinner and allow the side lines to be marked accurately.
You will also need sharp scissors to make precise cuts in the flaps, along with a heated piercing tool for the base. A sturdy piece of reinforcing steel will provide the ideal support, allowing the entire structure to spin freely.
To see how this recycled item is assembled in practice, watch the audiovisual content below. The full material from Leandra Martini’s YouTube channel demonstrates the exact steps for the project to protect your vegetable garden:
How should the flaps be cut into the bottle?
Start by applying strips of insulating tape vertically to define the exact space for the fourteen suggested markings. Carefully use a craft knife to make a small starter hole in the plastic, making it easier for the scissors to enter.
Next, cut along the marked lines, firmly following the sideways direction of each guide until reaching the specified end point in every section. Exactly three well-spaced vertical cuts are made, creating the openings that capture the strong wind.
Crucial assembly stages
Preparing the rotating structure
Follow this simple guide to ensure your bird scarer works correctly:
- Mark the fourteen strips with insulating tape to guide the cuts;
- Cut the side openings with very sharp scissors;
- Pierce the bottom of the PET bottle to insert the metal support.
How do you secure the wind spinner in the vegetable garden?
Once the side cuts have been completed and the flaps have been firmly folded by hand, make a centred hole in the lower base of the bottle. This round opening is used to fit the wire or reinforcing steel that will act as the rotating axis.
Place a sturdy wooden stake in the soil of the selected bed, then securely tie the metal bar vertically to it using strong cord. Slide the bottle on through the hole in its base, keeping the cap closed to maintain the stability of the homemade mechanism.
Installing this sustainable mechanism brings several immediate practical advantages for people growing organic food in urban homes. The main changes created by the bottles’ continuous movement are set out below as the main benefits:
- Immediate deterrence of birds that prey on delicate leaves;
- Smart reuse of household plastic waste;
- Creation of natural sounds powered by the wind.
What results can you expect from this simple trick?
By using this ecological solution, you will notice a considerable reduction in damage caused by wild animals to leafy crops. The constant spinning motion keeps invasive species away without physically harming them, fully preserving the biological balance of the home environment.
In addition, the initiative offers valuable lessons in practical recycling and the intelligent use of materials that might otherwise be wrongly discarded with general rubbish. Your garden will gain an efficient, durable and autonomous protector powered entirely by clean energy from the wind itself.


Comments
No comments yet. Be the first to comment!
Leave a Comment