
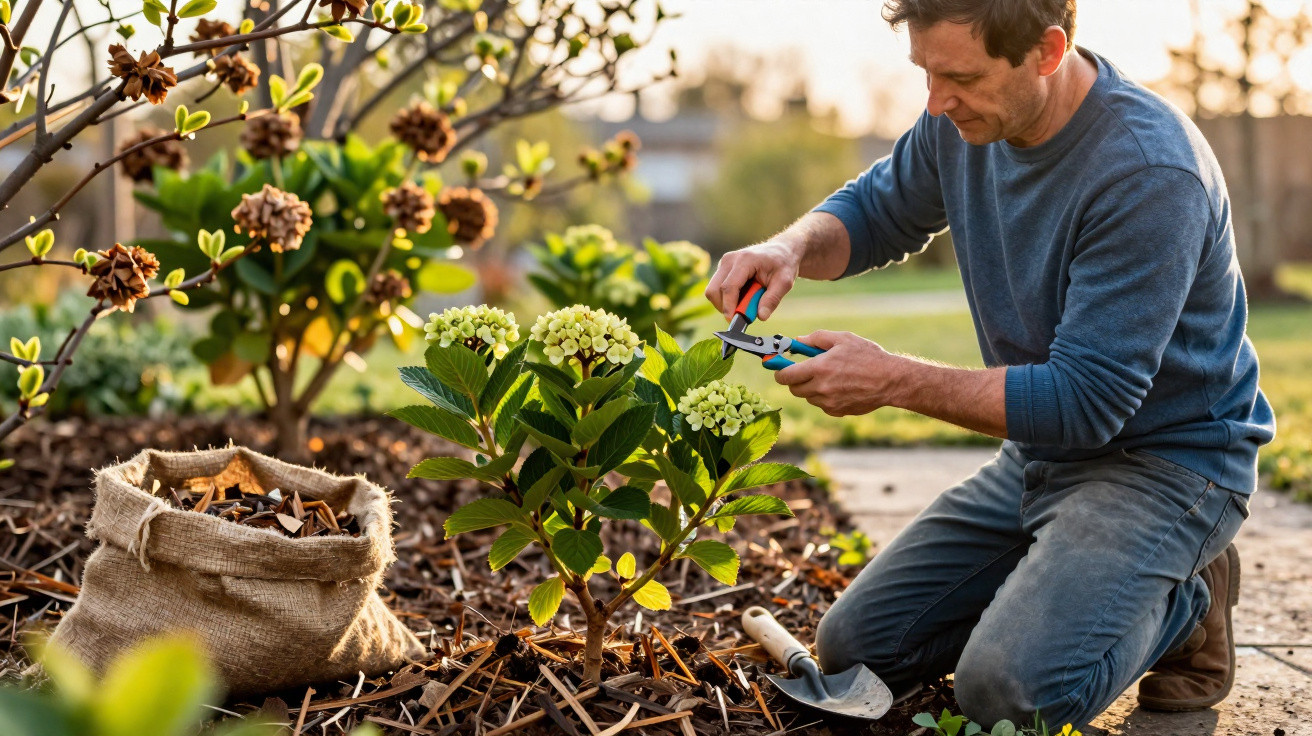
Many gardeners feed and water faithfully, yet still wonder why their hydrangeas flower less lavishly each year. British TV gardener Monty Don relies on a modest March routine: very selective pruning followed by a layer of mulch. It may sound unremarkable, but it changes how the shrub copes with frost, moisture and buds - and therefore how many flowers it produces.
Why March determines hydrangea flowering
Hydrangeas are considered easy-going, hardy plants and will grow even in partly shaded spots where roses have long since given up. Even so, many varieties are highly sensitive to pruning at the wrong time.
In particular, traditional mophead hydrangeas (Hydrangea macrophylla) flower on what is known as “old wood”. In other words, the buds for the following summer have already formed on the stems during the previous year, where they wait throughout winter.
Gardeners who tidy up in winter by cutting back every old flowerhead generously often remove the buds for the entire next season at the same time. The shrub may look neat and orderly in May, but can be disappointingly sparse in July.
“The crucial point with hydrangeas is rarely how much you cut - it is when and where you place the secateurs.”
Monty Don, along with fellow British gardener Alan Titchmarsh, therefore recommends a change of mindset: accept the winter rest period, leave faded flowerheads in place, and reach for the secateurs only in March, once the risk of frost has largely passed and the buds are clearly visible.
Monty Don’s hydrangea pruning trick: gentle deadheading, not hard cutting back
Many gardeners treat cutting back and removing spent blooms as the same task. With hydrangeas, knowing the difference can mean the contrast between abundant flowers and a ball of green foliage.
How to prune in March, step by step
For mophead hydrangeas, Monty Don advises only a light touch in March. It is not a drastic treatment, but precise work just above the correct pairs of buds:
- Wait for a frost-free spell in late February or March, ideally when the buds are visibly swelling.
- Examine each dried flowerhead individually and cut it away only immediately above the highest healthy pair of buds.
- Remove blackened, dead or dry stems completely at their base.
- Leave vigorous green stems untouched, as these will carry the season’s flowers.
This process, known as deadheading, removes only the dried flowerhead and often the frost-damaged tip of the stem. The two buds beneath remain intact and can reliably grow away in spring.
“When pruning hydrangeas in March, the secateurs should protect the buds rather than ‘shape’ the plant - Monty Don leaves shaping work until after flowering.”
When more substantial pruning is suitable
Not all hydrangeas respond in the same way. Some types, including many panicle and smooth hydrangeas (Hydrangea paniculata and Hydrangea arborescens), flower on “new”, meaning current-year, wood. They can cope better with harder pruning in late winter or very early spring.
| Hydrangea type | Flowers on | Recommended pruning | Timing |
|---|---|---|---|
| Mophead hydrangea (macrophylla, mophead) | Old wood | Remove only old blooms just above buds; thin out old stems after flowering | March (lightly); more heavily straight after flowering |
| Panicle hydrangea (paniculata) | Current-year wood | Cut back firmly while maintaining the framework | Late winter to very early spring |
| Smooth hydrangea (arborescens) | Current-year wood | Prune confidently, usually cutting back hard | Late winter to March |
The simple rule of thumb for amateur gardeners is this: if you do not know which hydrangea you have, take the cautious approach and treat it like a mophead hydrangea. Cut less in the first year and watch how it flowers.
The mulch that works quietly in the soil
Alongside pruning, Monty Don consistently uses mulch around hydrangeas, roses and other shrubs during winter. It may not look dramatic, but it has a major influence on how evenly the plant grows and how well its buds survive winter.
Monty Don’s advice on mulching
He uses well-rotted organic material, including:
- mature garden compost
- mushroom compost
- bark mulch or chipped bark, preferably slightly acidic material such as pine bark
The layer should be around 5–10 cm deep. Apply it on mild days in January or during very early spring, provided the soil is neither frozen nor completely waterlogged.
“Monty Don prefers a thick mulch layer every other year to a thin covering every year - the effect on soil life and the root environment is much greater.”
The important detail is that mulch should form a ring around the plant rather than sit directly against its stems. Leave the area around the root collar clear so that the base does not rot or develop mould problems.
Why mulch gives hydrangeas more flowers
A mulch layer shields the soil from rapid temperature fluctuations. This reduces frost damage around the roots, while the faded flowerheads provide some additional protection for the buds above ground. At the same time, mulch retains moisture in the soil for longer and supplies soil organisms with nutrients over several months.
Hydrangeas in particular react badly to uneven moisture levels. Extended dry periods or waterlogging cause stress, and the plant will then prioritise survival rather than producing plenty of flowers. Mulch acts as a buffer here.
Mistakes many amateur gardeners repeat every year
The same patterns that reduce hydrangea flowers can often be seen in typical German and Austrian terraced-house gardens:
- Hard pruning in December: In the urge to tidy up, all old flowerheads and stems are cut back deeply. The summer’s buds end up in the garden waste.
- Fresh bark mulch directly against the stem: Unrotted material temporarily draws nitrogen from the soil and can cause the plant’s base to rot.
- Waterlogging in containers: Attractive patio pots without drainage holes may look good, but they can cause hydrangea roots to rot one after another.
- Overdoing general fertiliser in spring: The plant may produce lush green growth, yet form fewer buds because it is too heavily focused on growing.
Correcting just one of these issues and trying Monty Don’s March pruning method often produces a noticeable difference in the number and size of flowerheads as early as the first summer.
Practical scenario: the 30-minute spring check
For many amateur gardeners, the calendar is busy enough already. A low-maintenance routine makes it easier to turn this into a habit. Here is an example of a brief hydrangea check on a mild March morning:
- Check the forecast: is a frost-free week expected? If so, get started.
- Remove weeds roughly around each hydrangea and lightly loosen the soil.
- Take each stem carrying a faded flowerhead, find a healthy pair of buds and cut just above it.
- Remove dead stems, stems growing inwards, and any that cross one another.
- If you have not already done so, spread a 5–10 cm layer of mulch around the shrub without covering the stem.
Nothing more is needed at this stage. Watering can wait for later, drier spells, while fertiliser can be added in April or May in the form of a slow-release organic feed.
What terms such as “old wood” and “bud protection” actually mean
Many guides use technical terms that sound rather textbook-like. There is nothing mysterious about “old wood”: it simply refers to stems that have already completed one growing season and become woody. On many hydrangeas, these are precisely the stems carrying the flower buds for the following year.
In this context, “bud protection” has two aspects. First, the faded flowerheads offer physical protection, hanging over the buds like small umbrellas. Secondly, careful pruning and stable soil conditions protect the buds from freezing, drying out or being weakened by a lack of nutrients.
Why patience pays off with hydrangeas
Anyone who has pruned hydrangeas heavily at the wrong time may face an almost flowerless summer. That is frustrating, but it can quickly prompt hasty remedies, such as applying even more fertiliser or cutting back again. A two- to three-year outlook is more sensible.
In the first year, it is worth using gentle March pruning with a focus on the buds, combined with a good layer of mulch. In the second year, you can be more selective: after flowering, remove one or two of the oldest, most tired stems close to ground level so that young, productive growth can emerge from below. This gradually rejuvenates the shrub without sacrificing an entire season.
Once you establish this combination of patience, a small March task and calm, protected soil for your hydrangeas, there is often an eye-opening moment: the shrub looks almost unremarkable in spring, then suddenly bursts into flowerheads in high summer, as though someone had secretly buried an XXL fertiliser dose. In reality, it is simply an easy, well-timed trick that surprisingly many gardeners overlook.
Comments
No comments yet. Be the first to comment!
Leave a Comment