
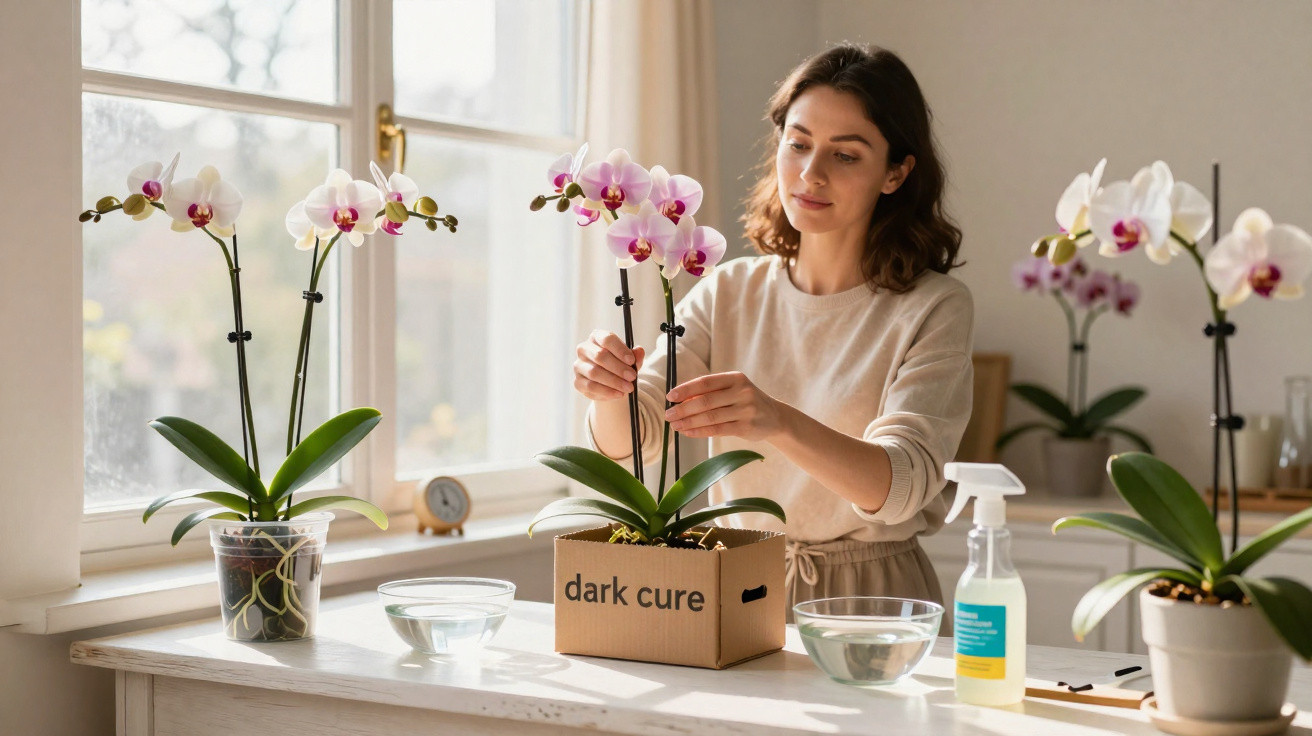
Receiving an orchid as a gift usually means enjoying its elegant flowers for weeks or even months. Eventually, though, the blooms drop, the pot remains green and nothing else happens: no fresh flower spike and no buds. This is the stage at which many people give up. Yet these plants often have far more potential than they first appear to. A few carefully chosen steps, together with a clever technique inspired by nature, can greatly improve the likelihood of a second, third or even continuing display of flowers.
Why so many orchids are discarded far too soon
At garden centres, orchids appear to flower endlessly. After a few weeks at home, however, they can suddenly look “bare”. Many amateur gardeners assume the plant is simply “finished”, much like a cut-flower bouquet.
In reality, an orchid works very differently. Green leaves and thick aerial roots indicate that it is still alive and continuing to store energy. It is merely entering a kind of resting period, building up strength for its next set of flowers.
An orchid with healthy leaves but no flowers is rarely dead – it is simply waiting for the right conditions to make a fresh start.
Those who become impatient at this point, water too heavily or even throw the plant away lose the opportunity for what can be an impressive second flowering.
Less fertiliser, more flowers: the biggest misconception
Abundant flowers are often associated with generous feeding. With orchids, this frequently has the opposite effect. In the wild, they usually grow as epiphytes on trees, often in areas with nutrient-poor conditions. They receive plenty of light, air and moisture, but very little “food”.
In a pot, they therefore need only very light fertilising. An excess of nutrients causes salts to build up in the growing medium, harms the delicate roots and encourages the plant to focus more on producing leaves than flowers.
How orchid enthusiasts fertilise especially gently
- Use a liquid fertiliser made specifically for orchids, preferably at around half the manufacturer’s recommended strength.
- Feed only during active growth, when new leaves or roots are appearing, roughly every two to three weeks.
- Flush through with plain water from time to time so that salt residues do not accumulate in the growing medium.
- Avoid strongly scented or highly concentrated household remedies.
Some plant enthusiasts add a tiny amount of mild home-made feed, such as a splash of heavily diluted milk, to provide a little calcium and protein. The crucial principle remains the same: it is better to use very small amounts regularly than too much on rare occasions.
The “soaking method”: watering properly instead of keeping roots wet
The most common care mistake is waterlogging. Orchids grow in an airy medium designed to leave plenty of air around their roots. If they stand in water continuously, this sensitive root system quickly starts to rot; flowering then stops, or the plant may die.
For this reason, many successful owners use a type of water bath:
- Take the inner pot out of the decorative outer pot.
- Fill a bowl with room-temperature water.
- Place the pot in it so the roots sit in water for 5–10 minutes.
- Allow the pot to drain thoroughly until no more water runs out.
- Only then put it back into the outer pot.
In a typical home environment, one such “bath” every 7–10 days is generally enough. Watering slightly late is preferable to keeping the plant constantly damp: orchids tolerate dryness better than wet roots.
A fine nutrient mist for more buds
Some enthusiasts supplement soaking with an extremely weakly diluted foliar fertiliser spray. Once a week, tiny droplets of nutrients are applied to the leaves, aerial roots and, where present, the base of the flower spike. This can encourage fresh buds to form, provided that the light and temperature are suitable.
The surprising method: a brief dark period for new orchid flowers
Things become particularly interesting with plants that refuse to produce any more flower spikes despite correct care. Experienced growers use a trick taken directly from nature: a deliberate period with much less light.
In many of their native habitats, orchids experience seasons with different light conditions. They respond with resting phases followed by renewed flowering. This approach can also be recreated in the living room.
How the dark treatment works step by step
- Choose an orchid that is healthy but not flowering.
- Move it for two to three weeks to a relatively dark room, such as a hallway or bedroom with little daylight.
- Alternatively, cover the pot with an opaque paper bag, without sealing it so that air can still circulate.
- During this time, water normally but sparingly, and do not fertilise.
- Keep the temperature as steady as possible, avoiding draughts and waterlogging.
After this period, return the orchid to a bright position, ideally at an east- or west-facing window away from intense midday sun. Many owners report that a new flower shoot then appears within a few weeks. There is never a guarantee, but the chances rise significantly.
The artificial “resting period” tells the orchid: A new season is beginning – time to put energy into flowers.
Light, temperature and air: the underestimated controls
Alongside water and nutrients, three further factors determine how readily an orchid flowers: brightness, temperature and humidity.
| Factor | Guideline for common indoor orchids |
|---|---|
| Light | Bright, but without direct midday sun; for example, an east- or west-facing window |
| Temperature | 20–24 °C during the day, slightly cooler at night (18–20 °C) |
| Humidity | Around 40–60%; do not place directly above a radiator |
A modest difference between daytime and night-time temperatures supports flower formation, as it imitates the natural fluctuations found in the orchid’s native environment.
Learning to read orchids: what roots and leaves reveal
Anyone who checks their orchid regularly will gradually notice small signs:
- Green, firm roots suggest that the plant is well supplied.
- Silvery-grey roots indicate dryness, meaning it is time for the next water bath.
- Yellow, mushy roots point to overwatering and possible rot.
- New leaves show an active growth phase and, therefore, an opportunity for new flowers.
- Tiny swellings on the stem may develop into buds or plantlets (offsets).
People who sit in the same place regularly, perhaps while working from home, can observe their orchid almost incidentally and react early when it shows signs of stress.
Risks and limits of the dark method
Although reducing light can be useful, it is not suitable in every situation. If the plant is already kept in conditions that are too dark, an additional shaded period offers little benefit. Weak orchids or those affected by pests should also be stabilised first before attention turns to flowering.
Darkening for too long, or watering too heavily during this period, risks fungal problems and leaf loss. The treatment should therefore always be time-limited and accompanied by good ventilation.
Practical additions for permanently healthy orchids
Small everyday routines can do a great deal to keep an orchid in good condition over the long term. Dust on leaves slows photosynthesis, so wipe them gently from time to time with a slightly damp cloth. When repotting every two to three years, use fresh, coarse orchid growing medium so that the roots have enough air again.
Location is another interesting consideration. Many owners move their orchid temporarily to a sheltered spot on a balcony in summer. There, it benefits from more fresh air and often better light. A shaded position, protected from direct midday sun and cold draughts, is essential.
Anyone who explores the subject more closely soon realises that orchids are not disposable items but long-lasting housemates. By paying close attention to roots, leaves, light and water, it is surprisingly easy to recreate their natural rhythm. The dark period fits well into this wider approach as a targeted prompt: a small trick that can make many plants shine for a second time instead of ending up prematurely in the bin.

Comments
No comments yet. Be the first to comment!
Leave a Comment