
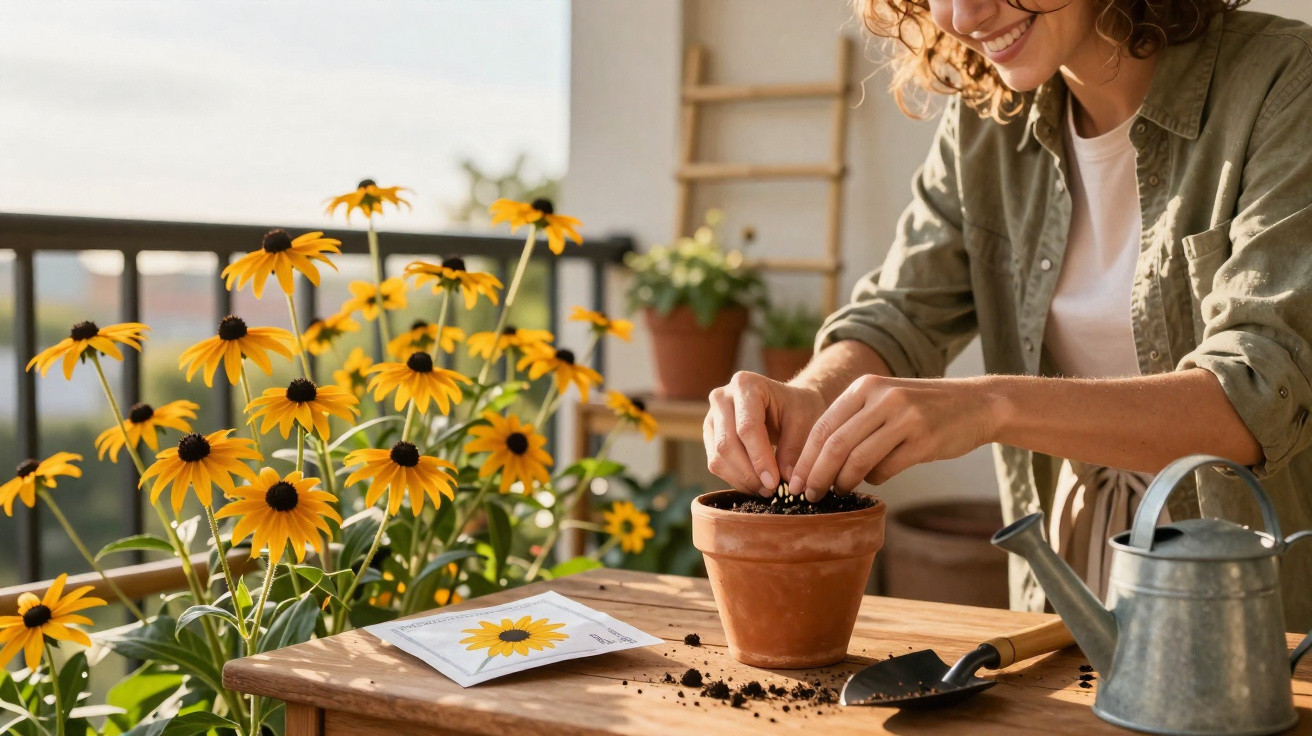
For anyone sowing seeds themselves for the first time, all the rules about compost, temperature and proper watering can feel rather daunting. The Black-eyed Susan takes that pressure away: it is one of the easiest climbing plants to grow, making it ideal when a rather dreary balcony or an empty corner of the garden needs to become a flowering focal point quickly.
Why this climbing plant is ideal for beginners
The Black-eyed Susan (Thunbergia alata) is one of those classic plants that brings quick success for beginners. It grows rapidly, climbs supports dependably and produces plenty of colourful flowers in its first summer, usually in shades of yellow, orange or cream with the characteristic dark centre.
“Anyone who sows in spring will have a lavishly flowering climbing wall in summer – without professional expertise.”
Its key benefits at a glance:
- Rapid growth: Strong shoots appear just a few weeks after sowing.
- Long flowering period: It keeps producing fresh blooms from summer into autumn.
- Versatile uses: Suitable for fences, balcony railings, obelisks, rose arches or large containers.
- Annual and straightforward: It does not need overwintering, allowing a fresh design every year.
This particular combination makes the plant appealing when you want to make visible changes in the garden with a manageable amount of effort.
The right time to sow
You can begin from March onwards. By then, days are already a little longer and windowsills generally provide pleasant temperatures for germination.
The best period is March to April. Starting earlier can mean that the plants become too large before they can go outdoors, while starting too late costs you some flowering time. Temperature is especially important: the seeds germinate reliably at around 16 to 18 degrees Celsius.
As the plant is sensitive to frost, it should initially remain somewhere warm after sowing. It should only move permanently to the balcony or garden once there is no longer any risk of frost outdoors.
Sowing Black-eyed Susan step by step
Choosing the right pot and compost
Small pots or trays, whether plastic or pressed cardboard, are sufficient for raising the plants. A drainage hole is important so that surplus water can escape. Seed compost is suitable, as is loose, fairly low-nutrient potting compost, ideally mixed with a little sand.
Easy sowing
- Fill the pots with seed compost and press it down lightly.
- Place one or two seeds in each pot.
- Cover the seeds with only a thin layer of compost – approximately as deep as the seed is thick.
- Carefully moisten the compost with a spray bottle until it is evenly damp.
- Put the pots in a warm, bright place, such as a windowsill.
The compost must not dry out, but it must not sit in water either. A useful guide is for the surface to look lightly moist at all times, without the shine of standing water.
Warmth and light: the key growth factors
The Black-eyed Susan originally comes from tropical areas of East Africa, where conditions are warm and sunny and soils tend to be loose. These are the conditions to aim for when raising it indoors:
- Bright position: Give it as much light as possible, but avoid intense burning midday sun through glass in spring.
- Steady warmth: A bright room above 18 degrees is more suitable than a cool hallway.
- No draughts: Cold draughts near windows slow growth or damage young plants.
“The brighter and warmer the spot, the more vigorously the seedlings will develop.”
Using a mini greenhouse lid creates a slightly more humid environment. In that case, air it regularly to prevent mould from developing.
After germination: prick out, support and continue caring
The first seed leaves appear after one to two weeks. If the young plants are growing too closely together, they compete for light and space. They should be moved into individual pots by the time the second pair of leaves is visible at the latest.
Pricking out without stress
Lightly moisten the compost before separating the seedlings. Carefully lift the plants out with a wooden stick or spoon and place them in new pots. Plant them only deeply enough that the leaves do not touch the compost.
It is worth adding an initial climbing support, such as a wooden stick, when repotting. The plant will later twine around it on its own. If you forget, you will soon have a tangled mass at the edge of the pot that is difficult to separate.
When Black-eyed Susan can go outdoors
Cold is the greatest risk for this climbing plant. Even a brief frost is enough to kill it. There is therefore one clear rule of thumb: only put it outside after the last late frosts.
In German-speaking regions, this is usually from mid-May.
Comments
No comments yet. Be the first to comment!
Leave a Comment