
Missing the right moment can put the plant under stress.
This fashionable houseplant, with its huge split leaves, may look hardy, but it reacts sensitively when its roots run out of room. Knowing when and how to repot a Monstera helps prevent waterlogging, yellow leaves and stalled growth – and allows the plant to perform at its best.
How to tell when a Monstera needs a new pot
A Monstera gives fairly clear signals when its pot has become too small. You simply need to watch closely.
Roots are emerging from the bottom
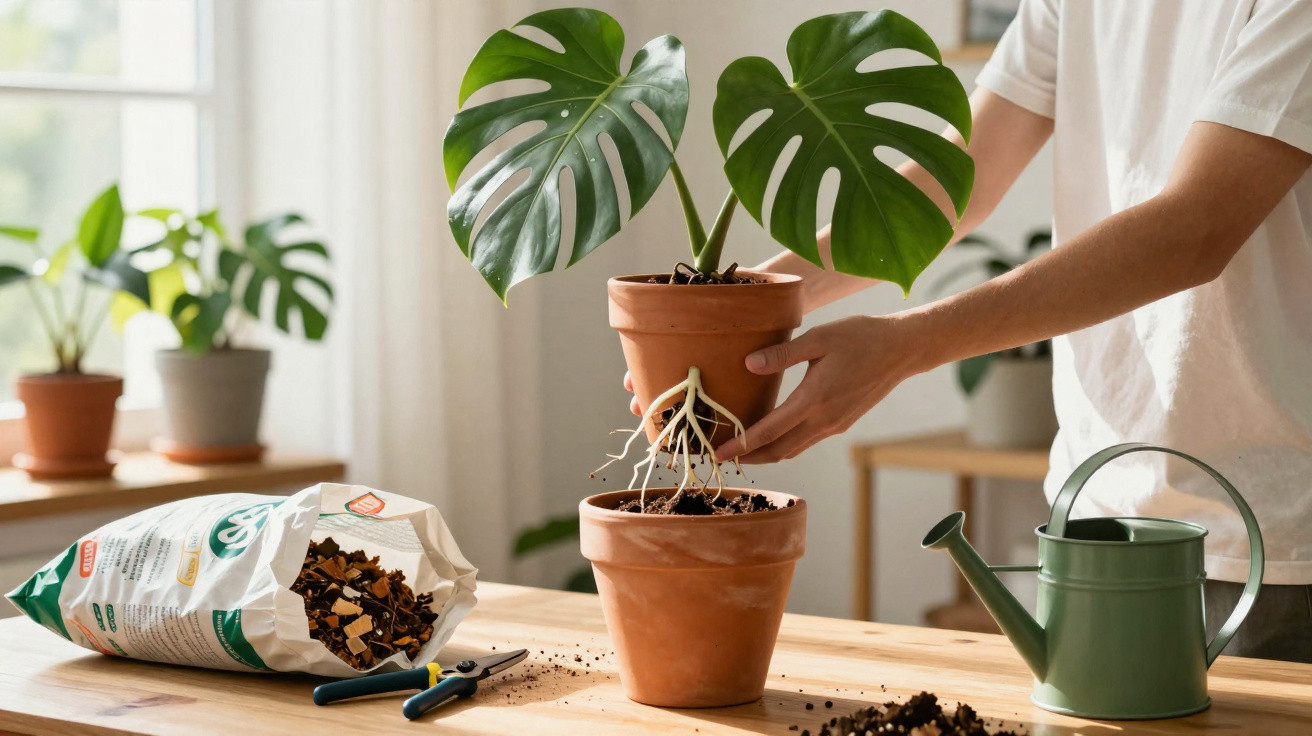
A classic warning sign is pale, firm roots protruding through the pot’s drainage holes. In some cases, they form actual rings around the base of the pot.
“When roots grow out of the holes or circle the pot, the Monstera has simply outgrown its home.”
Inside the pot, the roots often grow in tight circles too. The plant is desperately trying to find a little more space.
Water runs straight through
If watering water immediately drains from the bottom without soaking into the compost, the issue is usually not “poor” fertiliser, but too many roots and too little soil. The roots have displaced the compost, leaving it unable to retain much water.
Typical signs include:
- You need to water far more often than before.
- The surface of the compost dries out extremely quickly.
- The leaves look limp despite regular watering.
Leaves get smaller, turn yellow or growth stops
When a Monstera suddenly produces only small leaves in spring or summer, grows more slowly, or develops an increasing number of yellow leaves, restricted root space is often the cause. Nutrients are used up more rapidly and the plant can barely sustain itself.
Other indicators include:
- The root ball pushes the compost upwards, making the pot rim look “bulged”.
- The pot tips easily because the plant is becoming too top-heavy.
- Growth is noticeably weaker than in previous years despite adequate light and fertiliser.
The best time of year to repot a Monstera
Even when the pot has become too small, the time of year matters greatly. Some seasons are much more suitable than others.
Spring: the ideal window for Monstera owners
From March to around May, a Monstera enters growth mode. Longer daylight hours and rising temperatures mean it can cope better with root damage and settle rapidly into its new pot.
“Repotting in spring gives the Monstera the perfect start to the new season.”
Early summer: still suitable if it is urgent
Repotting is still straightforward until mid-June if the plant urgently needs more space. Days are long, temperatures are stable, and the Monstera can develop fresh roots.
During peak summer heat, however, stuffy air and strong sunlight place a double strain on the plant: repotting stress combined with heat stress is not a good combination.
Autumn and winter: emergencies only
From late summer onwards, the Monstera gradually slows its growth. In autumn and winter, it recovers much more slowly after repotting because there is less light and root activity.
- Autumn: repot only if roots are severely spilling from the pot or rot is likely.
- Winter: only in a genuine emergency, such as root rot or mould in the compost.
In well-heated homes with grow lights, the seasonal transition is somewhat less distinct. Even so, spring remains the safest time.
How often should you repot a Monstera?
How often repotting is needed depends largely on the plant’s age and size. Young Monstera plants grow at an impressive pace, whereas older specimens are more leisurely.
| Plant age | Recommended repotting interval | Pot size increase | Main aim |
|---|---|---|---|
| 0–2 years | About once a year | 5–7 cm wider in diameter | Room for rapid root growth |
| 3–5 years | Every 18–24 months | 5–10 cm wider | Maintain steady, healthy growth |
| Over 5 years | Every 2–3 years | Max. 5 cm or compost replacement only | Health and stability |
| Very old specimens (10+) | Every 3–4 years | Replace compost only | Refresh nutrients |
As a rule of thumb, the new pot should generally be only around two finger-widths wider than the old one. An oversized pot retains too much water, leaving the compost wet for too long and increasing the risk of root rot.
Step by step: how to repot a Monstera correctly
Preparation the day before
Water the Monstera thoroughly one day before repotting. This makes the roots more flexible and less likely to snap. Have the following ready:
- a new pot with drainage holes
- a loose, free-draining compost mix, such as houseplant compost mixed with perlite or pine bark
- clean scissors or a sharp knife
- gloves and a protective sheet to contain mess
Removing the plant from its old pot
Tip the pot slightly onto its side while supporting the root ball with one hand. Gently tap the sides of the pot until the root ball comes free. If it does not move at all, running a knife around the inside edge of the pot can help.
If the roots are extremely matted, carefully score the outer layer with several vertical cuts. This encourages new root growth outwards.
Check and clean the roots
This is the time for a close inspection: healthy roots are firm and pale. Remove anything that is soft, black or hollow with clean scissors. This prevents rot from spreading further.
Positioning it properly in the new pot
First, put a thin layer of fresh compost in the new pot. Place the Monstera inside so that it sits at the same height as before. The stem should not be buried more deeply, as this raises the risk of stem rot.
“The Monstera’s root crown must remain exposed – do not bury it.”
Fill the gaps with compost and press it down lightly with your fingers, without compacting it firmly. Roots need air; otherwise, they literally suffocate in the pot.
Care after repotting: helping your Monstera recover quickly
Water thoroughly once immediately after repotting, until water runs out from the base. This helps close air pockets in the compost. Afterwards, wait to water again until the top 2 to 3 cm of compost feels dry.
For the first few weeks, choose bright, indirect light rather than full sun. A spot near a window but out of direct midday sunshine is ideal. It is also best to avoid draughts and major temperature fluctuations.
During the first two to four weeks, it is normal for the Monstera to produce hardly any new leaves or to look slightly “sulky”. Its energy is being directed towards the roots. Begin fertilising moderately again only once new leaves appear – no earlier than around four to six weeks.
Common repotting mistakes and how to avoid them
- A pot that is far too large: Compost stays wet for too long, increasing the risk of root rot.
- Planting the stem too deeply: This raises the likelihood of rot around the base.
- Heavy, compacted compost: Too little air means the roots “suffocate”.
- Direct sunshine immediately after repotting: This adds stress and leaves are more likely to scorch.
- Too much water during the first few weeks: Damaged roots cannot cope with it.
Why good compost and the right pot matter so much
Monstera originates in tropical rainforests, where it climbs up trees. Its roots are never trapped in dense, wet soil, but grow in loose, airy material made up of bark pieces, leaves and moss.
A loose, well-draining potting mix replicates these conditions. Adding perlite, broken expanded clay or pieces of bark to the compost improves aeration. A decorative pot without drainage holes, on the other hand, is an invitation to rot – particularly just after repotting, when the roots are weakened.
Anyone familiar with these signs and guidelines can judge the right repotting time very accurately. The reward is strong aerial roots, large, sturdy leaves and a Monstera that is more than simply a fashionable living-room plant, growing reliably for many years.


Comments
No comments yet. Be the first to comment!
Leave a Comment