
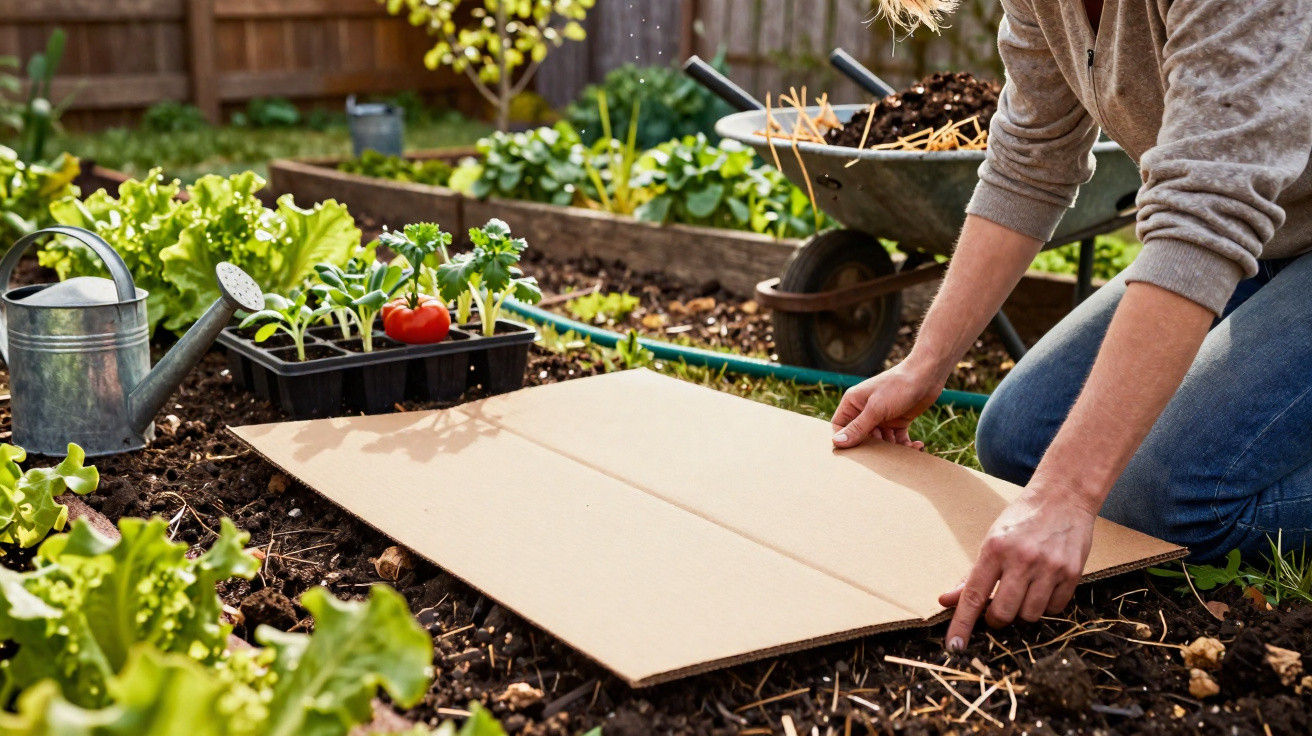
If you want to create a new vegetable bed, you probably picture a spade, plenty of sweat and an aching back. Yet an ordinary brown delivery box can turn the soil into a loose, fertile growing bed within a few weeks, without any digging at all. The idea comes from so-called “no-dig” gardening and is remarkably easy to use in a home garden.
Why an ordinary cardboard box replaces strenuous garden work
In spring, as the days become longer, many people enthusiastically begin the gardening season – only to end up on the sofa with sore muscles after the first weekend. Heavy soil, roots and clumps of grass usually mean one thing: digging everything over deeply. This is exactly where the cardboard method comes in. It saves effort by letting nature do the work.
“An untreated brown cardboard box works like a switch: lights out for weeds, green light for soil life.”
When large pieces of cardboard are placed directly over turf, this is what happens:
- The cardboard creates a light-blocking layer, causing the grass and weeds beneath it to die back gradually.
- The dead vegetation decomposes and releases nutrients.
- Earthworms and soil organisms are drawn to the damp cardboard and the organic layer above it.
- They loosen the soil naturally while blending dead roots, cardboard and humus.
After around three to six weeks, a compacted patch covered with grass becomes dark, crumbly soil in which vegetables can be planted with ease – without having to use a spade.
What to look for when choosing cardboard
For the method to work properly and remain suitable for the garden, choosing the right material matters. Not every type of cardboard is appropriate for a growing bed.
Suitable options include:
- plain brown delivery boxes without coloured printing
- cardboard with no glossy coating
- preferably thick corrugated cardboard that will not immediately become waterlogged
Avoid:
- boxes covered in colourful advertising or glossy print
- cardboard with plastic tape, labels or metal staples
- impregnated or heavily coated packaging, such as boxes used for frozen food
Tape, labels and staples should go in general waste, not into a vegetable bed. Taking five minutes to sort these materials prevents microplastics and metal from ending up in the soil.
Laying cardboard in spring: a step-by-step no-dig method
The best time to use this method is from late March onwards, once the ground is no longer frozen and can be worked easily by hand. By then, soil life is already active and responds quickly.
1. Prepare the area without digging
Do not dig over the chosen patch. Instead, simply cut back the existing growth:
- Mow grass or cut back wild growth as close to the ground as possible, using a mower or scythe.
- Remove loose debris roughly and chop up thick stems if necessary.
Leave the roots in place. Microorganisms and earthworms will later break them down, helping to build humus.
2. Lay the cardboard without gaps and water it
Next comes the cardboard. The key is to form a dense “carpet” with no gaps.
- Flatten the boxes and cut open any double bases.
- Place large sheets over the area so that they overlap by 10 to 15 centimetres.
- Cover every exposed section, including the edges, as holes that let in light are weak points.
- Water the entire cardboard layer thoroughly until it softens and settles closely against the soil.
“Without thorough watering, the method works considerably less well – the cardboard needs to be properly soaked.”
The moisture helps the cardboard to “merge” with the soil more quickly and makes it more appealing to earthworms.
3. Add compost and organic material
Cardboard is only the foundation. A productive bed also needs a generous layer of organic material on top. A mixture is ideal:
- 2–4 centimetres of mature compost directly on the wet cardboard
- followed by 3–6 centimetres of dry mulch, such as straw, leaves or thoroughly dried grass clippings
Together, these layers should be around 5 to 10 centimetres deep. They keep the cardboard moist, prevent it from blowing away and provide nutrients for future plants.
Grass clippings as free mulch: benefits and risks
Spring often produces plenty of grass clippings, making them an obvious mulching material. However, freshly applied clippings can cause problems. Fresh grass contains a high proportion of water and can quickly begin to ferment if the layer is too thick.
“Fresh grass clippings applied too thickly can act like a wet lid – suffocating the soil and roots beneath.”
Typical warning signs include:
- an unpleasant, sour smell coming from the mulch layer
- plants that look yellowed or wilted
- a slimy, compacted mat of grass with no air spaces
If you want to use grass clippings, spread them thinly over an area first and allow them to dry in the air until they no longer stick together and fall loosely through your fingers. Only then should they be used as the top mulch layer, at a depth of around 5 to 7 centimetres.
How long cardboard should remain in place before planting
Once the layers have been assembled, the next step is to wait and observe. Depending on soil temperature, moisture levels and the activity of soil organisms, the process takes around three to six weeks.
During this period:
- the grass beneath the cardboard layer gradually dies back,
- the cardboard starts to soften and rot down,
- earthworms and small soil organisms loosen the ground from within.
When it is time to plant, simply move the mulch aside using your hands or a small trowel. For tomatoes, courgettes, squash, peppers or chillies, make a planting hole through the softened cardboard layer and into the now-loose soil. Set the plant in place, then gently pull the mulch back towards the stem without packing it too tightly around it.
Which crops are particularly suited to the cardboard method
Heavy-feeding crops in particular benefit from the nutrient-rich, well-protected soil. Suitable choices include:
- tomatoes
- courgettes and squash
- cucumbers
- brassicas such as broccoli or white cabbage
For very fine direct sowing, including carrots or radishes, a conventional bed is more suitable because small seeds can struggle beneath a thick mulch layer. In these areas, adapt the method by using only a thinner compost layer.
Why digging can harm the soil
Many gardeners have been taught that a “clean”, thoroughly dug bed provides the best start for vegetables. Modern soil research paints a different picture. Deep soil disturbance damages delicate fungal networks, disrupts earthworms and mixes up soil layers that should ideally remain undisturbed.
Soil that is not cultivated, or only lightly worked, develops stable structures that retain water more effectively and hold nutrients over the long term. The cardboard method supports precisely this effect: it protects the surface, feeds soil life and leaves the task of “digging” to the organisms in the ground.
Practical tips and small pitfalls to avoid
Anyone trying this method can get started without fuss, but a few details make it easier:
- Cardboard laid too thinly allows light through, so it is better to use two layers rather than skimp on material.
- In windy locations, stones or boards can hold the cardboard down until the mulch and water secure it.
- Where slugs are a problem, keep the mulch slightly thinner around vulnerable young plants at first.
- Collect brown cardboard from parcel deliveries and store it flat, ensuring enough material is available in spring.
The approach is also useful for more than just new beds: it can rejuvenate overgrown areas as well. Even an old lawn can be turned gradually into a productive vegetable bed without a single stroke of a spade.
Anyone who has seen how loose and dark the soil beneath the cardboard layer becomes after a few weeks will usually have little desire to return to traditional digging. Your back will appreciate it – and so will the soil.

Comments
No comments yet. Be the first to comment!
Leave a Comment