
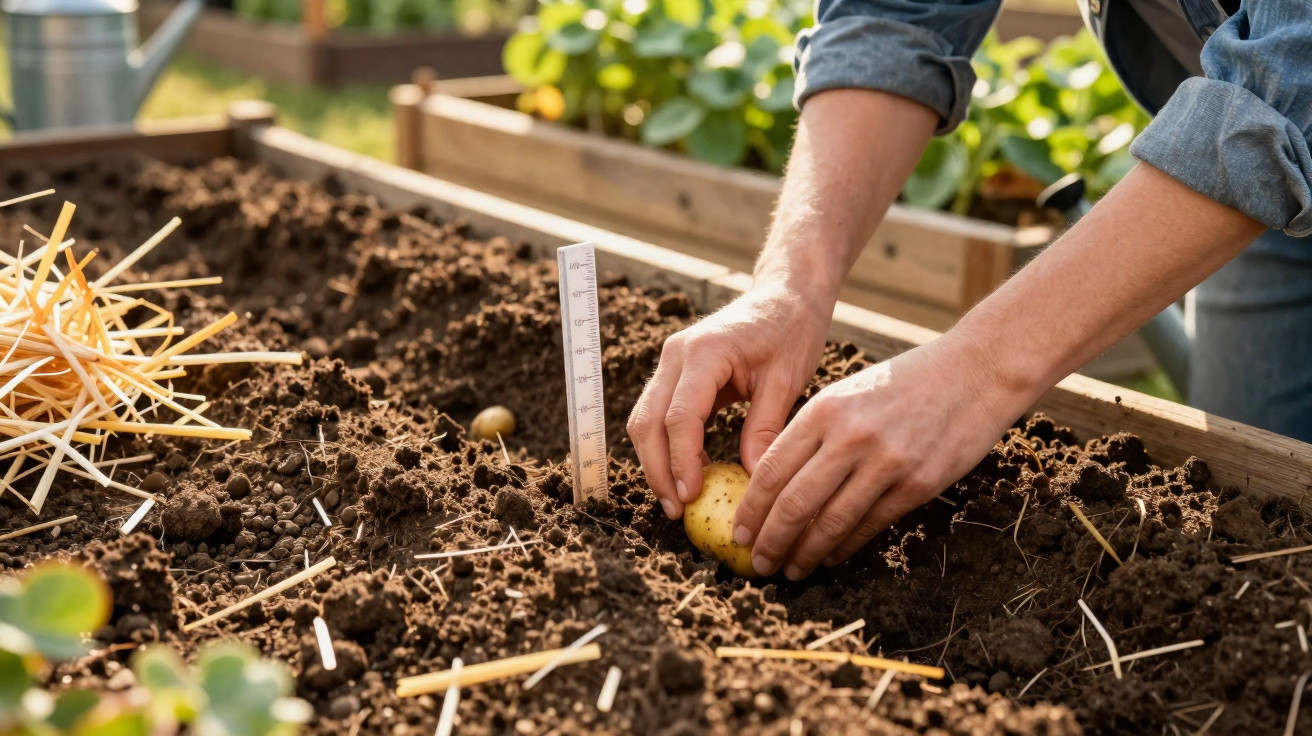
Many home gardeners fine-tune varieties, fertiliser and watering schedules, then wonder why their harvest is disappointing. Yet one crucial factor is literally beneath the surface: the correct planting depth. Just a few centimetres can separate weak foliage from a potato box packed with produce.
Why potato planting depth matters so much
Planting a potato effectively means placing an energy store in the soil. It must produce roots, shoots and new tubers. If this “store” has too little soil above it, it is exposed to cold, drought and light. If it is buried too deeply, the young shoots take too long to reach the surface and lose vigour.
Planting depth determines how quickly plants emerge, how healthy they remain and how plentiful the harvest will be.
Potatoes planted at the right depth emerge promptly, are less vulnerable to disease and produce even, well-formed tubers. Incorrectly planted potatoes are sensitive: they rot more readily, dry out faster or produce only a few small tubers.
The ideal potato planting depth in numbers
Most growing guides arrive at the same guideline: potatoes should be planted with around 10 to 15 centimetres of soil above them. This refers to the depth of soil covering the tuber, rather than the total depth of the hole.
- below 10 cm: risk of frost damage and green tubers
- 10–12 cm: a good compromise for most gardens
- 12–15 cm: useful in dry areas prone to frost
Before planting, thoroughly loosen the soil to a depth of roughly 15 to 20 centimetres. Next, place the tubers in the prepared furrows with the eyes – the small points from which shoots emerge – facing upwards. This gives the shoots the quickest route to the surface.
Planting noticeably deeper often results in delayed emergence. The plant uses more of its reserves to reach the light, leaving less energy later for developing new tubers. When a potato is planted too shallowly, only a few hours of sunshine can discolour exposed tubers and make them bitter.
How soil affects the correct planting depth
The ideal depth is not fixed. It depends greatly on the feel of the soil and the way it handles water.
Heavy, clay-rich soils
Water tends to collect in loamy or clay soils. If potatoes are buried too deeply in these conditions, they sit in a cool, wet layer – an ideal environment for rot.
- loosen the soil thoroughly and break up large clods
- improve drainage, for example with some coarse sand or mature compost
- keep planting depth towards the middle of the range: 10–12 cm of soil above the tuber
This provides sufficient protection from cold without trapping tubers permanently in overly wet layers.
Light, sandy soils
Sandy soil drains water quickly. It warms up sooner, but it also dries out more easily. In this case, potatoes can usually be planted slightly deeper.
- incorporate plenty of compost to retain water and nutrients
- aim for the upper end of the planting-depth range: 12–15 cm
- gaps between watering matter less because the tubers sit slightly deeper in a moister layer
The basic rule still applies: loosen the soil well first, then plant. In compacted, neglected sandy ground, roots may otherwise struggle to reach nutrients.
Climate, frost and water: adjusting planting depth
Taking the local climate into account can help you gain a few extra per cent of yield.
Areas with late frost
Where overnight frost remains a risk in spring, planting a little deeper and earthing up promptly can help. The tubers themselves are already protected, but young shoots cannot tolerate frost.
In frost-prone areas, plant slightly deeper, then earth up quickly and protect the shoots.
By planting closer to 15 centimetres deep and starting to earth up early, you create an insulating layer of soil around the young plants. This allows them to continue growing even during cool nights.
Dry summers and hot locations
During frequent dry spells, a second method helps: mulching. Rather than planting potatoes extremely deeply, cover the rows with organic material after the shoots emerge – such as straw, grass clippings or leaves.
- evaporation of soil moisture is reduced considerably
- the soil stays loose and crumbly for longer
- intense heat reaches the tubers less readily
This keeps planting depth within the normal range while still giving plants a consistently moist root zone.
Spacing, earthing up and care for full potato boxes
Perfect depth only works properly when the rest of the growing method supports it. Spacing and regular earthing up are particularly important.
Suitable spacing in the bed
Planting too closely creates competition for light, water and nutrients. Leaving gaps that are too large wastes space. These measurements have proved effective:
| Spacing | Recommendation |
|---|---|
| between plants | 30–40 cm |
| between rows | 60–75 cm |
This gives each plant enough room to develop dense foliage and form numerous usefully sized tubers.
Earthing up: the overlooked yield booster
Begin earthing up no later than when the shoots are 15 to 20 centimetres tall. Draw soil from between the rows towards the stems until small ridges form.
This step offers three advantages:
- new tubers are reliably kept in darkness and do not turn green
- it creates extra space in which more tubers can grow
- plants are more stable in wind and rain
Working over the ridges every two to three weeks until they are clearly defined will noticeably increase the return from every planted tuber.
Common potato planting-depth mistakes and how to avoid them
Many problems in a potato bed can be traced back to a handful of recurring mistakes.
- Planted too shallowly: tubers soon become exposed, turn green and are inedible.
- Planted in wet hollows: waterlogging, fungal infection and rot are almost inevitable.
- Too deep in hard soil: late, weak shoots and fewer tubers.
- No or infrequent earthing up: despite correct planting depth, many tubers remain underdeveloped.
Anyone who observes their bed before planting – noting where water collects and where the ground dries rapidly – and then adjusts depth and location accordingly has a clear advantage from the outset.
When it is worth departing from the standard depth
The 10 to 15 centimetre guideline is suitable in most situations. Even so, there are exceptions where a considered adjustment is worthwhile:
- Early potatoes in a sheltered garden: closer to 10 cm, so they emerge more quickly.
- Late varieties in an exposed, cold location: closer to 15 cm, plus thorough earthing up.
- Extremely sandy, drought-prone soils: slightly deeper, combined with plenty of compost and mulch.
If unsure, try a small test strip in your own garden: plant one row a little shallower and another a little deeper, then compare the results. After one season, you will know the best values for your plot.
What terms such as “ridging” and “mulching” mean
Many guides use terms that are not immediately clear to everyone. “Ridging” or “earthing up” simply means drawing soil up around the stems. This can be done with a hoe, a cultivator or even by hand if the soil is loose enough.
“Mulching” means covering the soil with organic material. In a potato bed, straw and slightly dried grass clippings have proved particularly effective. The layer should remain airy so that lasting damp does not build up directly around the stems.
By combining planting depth, soil structure, earthing up and mulch effectively, even a small bed can become a surprisingly productive patch. The real skill lies less in specialist fertiliser than in a few well-planned spadefuls at the right depth.


Comments
No comments yet. Be the first to comment!
Leave a Comment