
The autumn wind whistles across the balcony, and the summer flowers have long since faded. Among the dried-out stems, they stand out: those dull white crusts on your terracotta pots. A slight sheen that still looked “rustic” in spring now seems more like neglect. You pick up a pot, turn it over in your hands, and suddenly notice the fine cracks around the rim and the green coating on the inside. You can almost hear the clay softly crunching as you run a fingernail across it. The season is over, of course. But what if this is precisely the point at which the next one begins? Clean them once. Care for them once. Take a deliberate look before everything disappears into the cellar. Terracotta pots have a better memory than we tend to think.
Why terracotta pots “age” – and what their marks reveal
When buying new plants in spring, most people focus on flowers, leaves and variety names. Very few take a close look at the pots themselves. That changes when roughened rims, white streaks and green patches eventually become impossible to miss. Terracotta pots are like small archives of the previous gardening year: they retain limescale, fertiliser residue, waterlogging, sunshine and frost. They also show, without mercy, how we have treated them. A pot with fine white deposits points to hard tap water. One with a chipped rim tells of a winter spent partly in water and partly in ice. Take a moment to read these traces and a pattern suddenly emerges.
Picture an urban allotment: in October, Sabine stacks her terracotta pots behind the shed for the third time, “just for a moment”. Some still contain compost, some are packed with dead roots and others are half-full of rainwater. In March, she is amazed by how many have broken. Two have split along the side, while another holds a large clump of algae and moss, almost like a tiny marsh habitat. “Strange, they were still fine,” she says as she throws the shards away. Later, she does the sums: replacing them would easily cost her €50. A year afterwards, she photographs the same pots – this time after cleaning and storing them. Not one is broken. All because she spent one extra hour there in autumn.
This is not about perfectionism; it is about physics and time. Clay is porous: it breathes, absorbs water and releases it again. If its walls remain wet all the time, moisture penetrates deep into the material. When frost follows, the water inside expands and causes stress cracks. Limescale and fertiliser salts settle in the pores, alter the surface and make it more brittle. Then there are microorganisms, algae and fungal spores – a combination that new plants do not necessarily welcome. If you do not clean your pots, you plant into the past every year. And you may wonder why fresh compost feels as tough as old chewing gum.
How to get your terracotta pots into shape – step by step
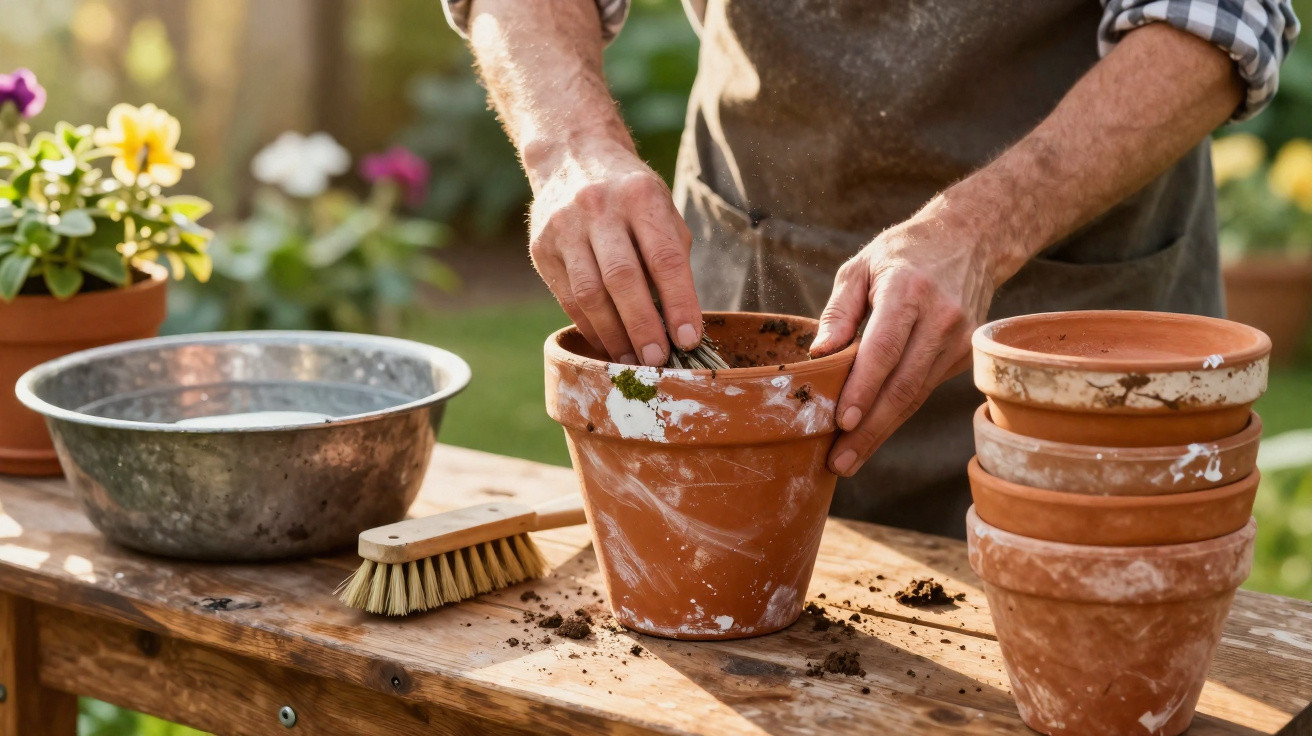
The ideal time to prepare terracotta pots for the next season is when the last plant has been removed. First, knock out all the compost and pull out every root remnant, including the fine ones. A wooden stick or old spoon is useful for reaching into grooves. Next, place the pots in a warm soapy bath: use a tub or large bucket of water with a few squirts of environmentally friendly washing-up liquid. Let them soak thoroughly for 30 minutes, or longer if needed. Then scrub both the inside and outside with a stiff brush until the coating has gone or at least looks noticeably thinner. For limescale marks, use a 1:1 mixture of water and vinegar, leave it briefly to work, then brush again. Finally, rinse with clean water.
Many people then miss the most important stage: drying the pots properly. They must dry completely before going into the cellar, garage or a storage box. Do not stack them in a dark, damp corner; stand them up first, ideally upside down on wooden slats or old newspapers. We all know that moment when we want to put everything away “just quickly”. Let us be honest: nobody really does that every day. Yet this in-between step determines whether mould and odours develop. Anyone who has smelled a musty pot knows how stubborn that smell can be.
At the same time, it is worth giving your terracotta pots a brief “health check”. Small cracks around the rim? A faintly hollow sound when tapped? These are warning signs. Cracks often widen during winter as the material shifts. Some gardeners tap every pot gently: if it sounds solid, it stays. If it sounds dull and brittle, it is removed.
“A good terracotta pot will stay with you for ten, fifteen years if you treat it as a tool rather than packaging,” says an older gardener at an allotment site, almost tenderly running his hand over an old, scarred pot.
- Remove all compost and roots, including from the drainage hole.
- Soak pots in warm soapy water and brush them thoroughly.
- Loosen limescale marks with a water-and-vinegar mixture, then rinse well.
- Allow them to dry completely before stacking or storing them.
- Sort out damaged pots or repurpose them as decoration, saucers or drainage crocks.
When terracotta pots tell stories – and why you should keep writing them
At some point, the way you look at your terracotta pots changes. They stop being merely “some containers” that happen to hold compost. Instead, they become constants among all the changing plants: familiar shapes that return year after year. Cleaning, sorting and stacking your pots with intention creates a small system of your own. The large ones go at the back, the narrow ones at the front; some are reserved for tomatoes, others for herbs. It is not only the garden that grows, but your routine as well. Suddenly, the beginning of a new season feels less chaotic. More like a reunion.
And yes, clay can sometimes reflect everything that received too little attention during a gardening year. Heavily encrusted rims suggest too much fertiliser, while mossy insides point to constant watering without checking the compost. There is no point feeling ashamed. The more interesting question is: what will change next spring? Perhaps collecting rainwater, using less fertiliser or feeling the compost with your fingers before tipping the watering can. Gardening is rarely glamorous; mostly, it is quiet readjustment. Terracotta pots are remarkably honest partners in that process.
Perhaps there is a stack of half-forgotten terracotta pots somewhere near you right now. Dusty, battered and slightly neglected. You could ignore them, buy new ones and add more plastic to the cycle. Or you could spend an hour brushing, rinsing and sorting them – and recognise, in the damp clay, the whole story of recent years. There is something soothing, almost meditative, about it. It also creates a strangely clear starting point. The next season does not begin when the first tomato plants appear at the DIY shop. It starts at the very moment your terracotta pots are clean, dry and waiting to be used.
| Key point | Detail | Benefit for the reader |
|---|---|---|
| Cleaning systematically | Remove compost, use a soapy bath, brush, and dissolve limescale with a vinegar solution | Extends the life of the pots and creates healthier conditions for new plants |
| Drying thoroughly | Stand pots upside down and allow them to dry completely before storage | Prevents mould, odours and frost damage in winter storage |
| Maintaining them consciously | Check for cracks, sort out damaged pots or repurpose them | Saves money, reduces waste and helps build a dependable basic collection |
FAQ:
- How often should I clean terracotta pots? Once a year is usually enough – ideally at the end of the season, when the pots are emptied. If plants have been diseased, an additional clean immediately after removal is worthwhile.
- Is hot water enough, or do I need cleaning products? Hot water and a brush achieve a great deal, but mild soap removes grease and fertiliser residue more effectively. For stubborn limescale marks, use a water-and-vinegar mixture, leave it briefly to work, then rinse thoroughly.
- Do I need to disinfect terracotta pots? Only if plant diseases or pests were involved. After cleaning, you can briefly immerse them in very hot water or wipe them with a mild vinegar solution, then allow them to dry thoroughly.
- What is the best way to store terracotta pots in winter? Keep them dry, frost-protected and well ventilated. Ideally, stack them upside down; do not leave them standing in water, and avoid sealed plastic bags so any remaining moisture can escape.
- What should I do with badly damaged pots? Cracked or broken pots can still be used as drainage crocks in the base of larger containers or as decorative fragments in a flower bed. For new planting, severely damaged pots are more of a risk.

Comments
No comments yet. Be the first to comment!
Leave a Comment