
Many home gardeners wait until the weather turns properly warm before thinking about sowing. Yet late winter offers a valuable opportunity to give your soil a major head start. It does not require bagged fertiliser, but a plant that nobody harvests, few people notice – and which is effective for precisely that reason.
The unassuming helper: how one plant works your soil for you
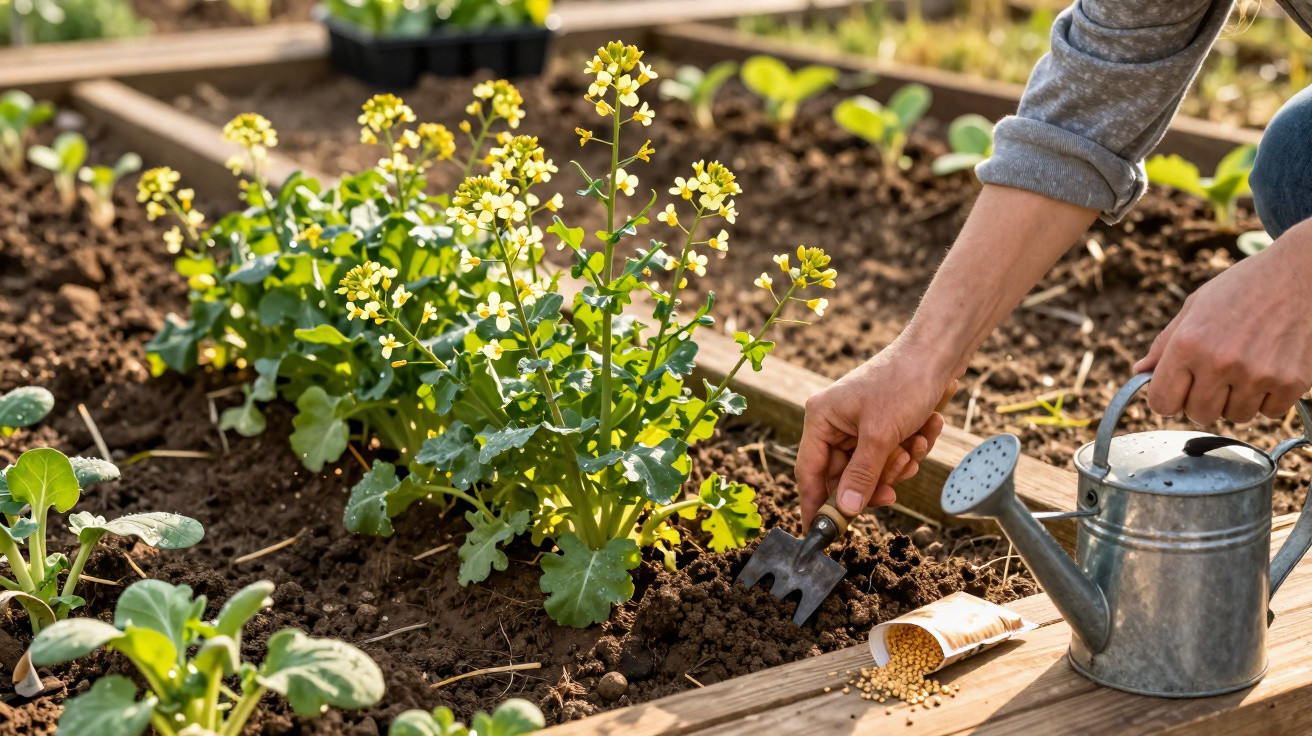
This is a classic green manure crop: white mustard, also known as yellow mustard (Sinapis alba), usually sold simply as “mustard mix” or “mustard green manure”. It is sown solely for the benefit of the soil, rather than for harvest. That is exactly what makes it so useful.
As soon as soil temperatures reach roughly 5°C, this plant gets to work. While vegetables are still slow to start, mustard uses the cooler period to quickly produce a dense layer of greenery. Rather than being left bare, the soil gains a living cover.
“A living carpet of plants protects the surface, captures nutrients and releases them again at exactly the right time.”
This reduces your workload on several fronts:
- Fewer weeds, as the soil is shaded
- Less erosion caused by rain and wind
- Roots loosen compacted patches without any machinery
- More nutrients in organic form for the following crop
Why late winter is the right time
Late winter, broadly from mid-February onwards, can make the garden appear dormant. For this specialist crop, however, it is the starting signal. In many areas, soil temperatures are already sufficient, even when nights remain cold.
While other gardeners are still making plans, one simple task can prepare the ground for your next vegetable-growing season. The plants make use of the remaining winter moisture, germinate rapidly and cover the bed before weeds can properly establish themselves.
How much seed you actually need
For home gardeners, the appeal is clear: a small quantity of seed can deliver a substantial result. Surprisingly little seed is needed to create a noticeable benefit.
| Area | Recommended seed quantity |
|---|---|
| 1 m² bed | approx. 1–2 g |
| 5 m² bed | 5–10 g |
| 10 m² bed | 10–20 g |
Broadcast the seed by scattering it evenly over a lightly roughened surface. It should be covered only very shallowly, to a maximum depth of 1–2 cm. Good contact with the soil is the aim, rather than burying the seed deeply.
Preparing the soil: less is more
There is no need to dig the entire bed over. In fact, gentle cultivation is usually more than enough:
- Lightly scratch up the top layer with a rake or cultivator
- Loosen crusted areas without turning them over
- Break up large clods so the seed can rest against the soil
If the ground is heavily compacted, push a digging fork into it and gently rock it back and forth without fully turning the soil. This creates air channels, and the roots will find their own way through them.
How to sow white mustard correctly: step by step
Sowing is straightforward and rarely takes more than half an hour in a small garden.
- On a frost-free day, loosen the soil surface lightly.
- Mix the measured seed quantity in a bucket with a little dry sand to achieve a more even spread.
- Scatter it across the bed, working both lengthways and crossways.
- Firm it gently using the back of a rake, or walk briefly over the area.
- If conditions are dry, water once carefully.
In damp weather, the first lines of seedlings often appear after around ten days. During mild spells, they may emerge even sooner. Before long, the young plants form a continuous green cover over the bed.
Care, cutting and incorporation: timing matters
At its heart, this method works best only when you manage the plant’s life cycle. The key point comes around six weeks after sowing.
By then, the crop has produced plenty of leafy growth and contains a high level of nutrients, but has not yet come fully into flower. This is the stage at which it offers the greatest benefit to the soil.
“Green manure works best when it returns to the soil while still young and succulent – not once it has become a tough stem.”
When and how to cut it
- Cut it just before flowering, or as flowering begins.
- Use a hand scythe, a sharp knife or grass shears.
- Allow the plants to wilt for a few hours before incorporation, as this makes them easier to work into the soil.
Leave the crop too long and the stems become fibrous and woody. They then decompose slowly and can get in the way when planting later on. More importantly, if seeds are allowed to ripen, the plant itself can become a nuisance.
Working the plant material into the soil
The cut material should not be buried deeply. A shallow depth is sufficient to speed up decomposition while feeding soil organisms at the same time.
The recommended depth is 3–5 cm. This can be achieved easily with a rake or cultivator. Alternatively, leave the material on the surface as a mulch layer and incorporate it only shallowly later – around two weeks before planting or sowing vegetables.
What green manure gives your soil – and your harvest
Agricultural trials from recent years show quite clearly that plots grown with green manure before the main crop produce noticeably higher yields on average. Several assessments found an increase of around 18 percent.
There are several reasons for this:
- Deep roots loosen the ground and create channels for water and air.
- The plants retain nutrients that would otherwise be washed away, releasing them later.
- The dense cover suppresses weeds, reducing competition for your vegetables.
- Soil organisms have plenty to feed on and become more active.
Anyone who uses this consistently often notices after just one season that beds become more crumbly, rainwater drains away more effectively and young plants establish faster. Tomatoes, cabbage, lettuce and beans respond particularly well to thoroughly prepared soil.
Important points for home gardeners
Keep a few points in mind so that this approach does not backfire:
- Sow only into soil that is not waterlogged, as standing water slows germination.
- Do not allow the plants to reach full seed maturity, to prevent uncontrolled spreading.
- Where there are known issues with certain pests, incorporate the material promptly after cutting or add it to the compost heap.
- If you intend to grow brassicas, take care with closely related green-manure crops in the same bed so as not to increase disease pressure.
Practical examples from everyday gardening
Consider a small example: a 10 m² bed is empty after the autumn harvest. Rather than leaving it bare until May, sow green manure in February.
At the end of March, cut down the full green growth, incorporate it shallowly and wait for two to three weeks. In April, plant lettuce and early kohlrabi. The plants then meet loose, nutrient-rich soil full of life. Weed pressure remains low, and less watering is needed because the humus layer holds water more effectively.
The same approach works equally well before warmth-loving crops such as tomatoes or peppers. The difference is that you can leave the green manure in place a little longer because these seedlings are planted later. The essential rule remains the same: allow at least two weeks between incorporation and planting, so decomposition can begin.
What green manure actually does in the soil
Many gardeners talk about “recharging” the soil without knowing exactly what happens. As the plant material breaks down, microorganisms move in. They turn leaves and stems into humus while releasing nutrients in forms plants can use.
Organic nitrogen from the material is gradually converted into ammonium and nitrate – nutrients to which vegetables respond especially strongly. At the same time, stable humus compounds are formed, improving soil structure and its ability to store water. All of this happens in the background; you simply need to sow at the right time and cut at the appropriate stage.
Once you understand this principle, you can plan the garden year differently. Rather than leaving beds empty for months, you “store” nutrients in a layer of greenery which is later returned to the vegetables. This cycle reduces reliance on expensive fertiliser and improves the chances of vigorous plants and full baskets at harvest time.

Comments
No comments yet. Be the first to comment!
Leave a Comment