
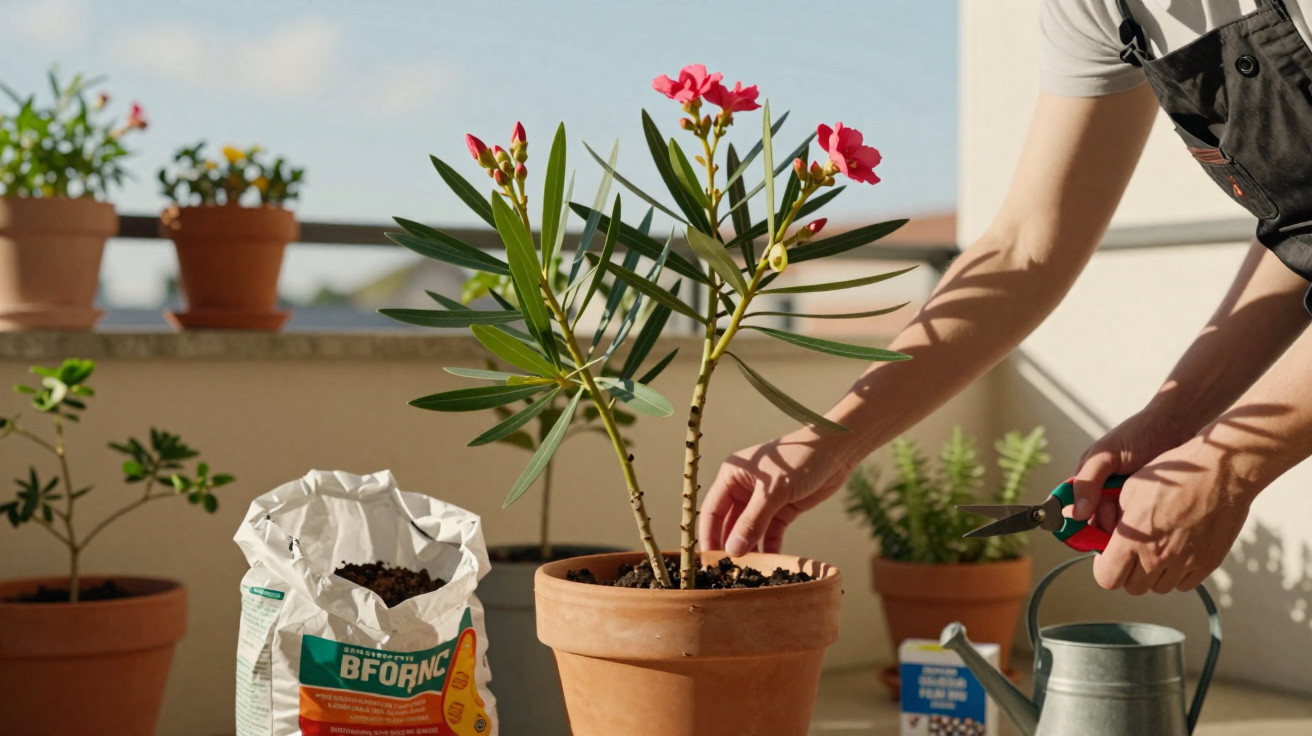
With the right measures, this can often be turned around completely.
Anyone who finds a half-dried-out oleander on their balcony or patio in spring may be quick to write it off. Yet this apparently dead shrub often still contains a surprising amount of life. What matters is a systematic approach in spring, along with clear rules for pruning, positioning, watering and feeding.
First check whether the oleander is still alive
Before reaching for secateurs, fertiliser or a new pot, assess the plant's condition. From the outside, the shrub can often look far worse than it really is.
A fingernail test and a look at the base
A simple check can reveal whether a shoot is still viable:
- Scratch away a small patch of bark using a fingernail or knife.
- If the tissue beneath is green and moist, the shoot is alive.
- If it is entirely brown and dry, that branch has died.
It is equally important to inspect the base of the shrub closely. This is where the most protected buds are located. Small, plump swellings on the wood indicate that the oleander is preparing to produce new growth.
"If there is still green visible beneath the bark anywhere, attempting to save it is almost always worthwhile."
The right time after winter
Oleander originates from warm climates and reacts badly to frost, particularly when grown in a pot. It should therefore only go outside once these conditions are met:
- Night-time temperatures remain consistently above around 10°C.
- No severe ground frost is forecast.
- Depending on the region, this is usually between late March and mid-April.
If you want to be on the safe side, wait a few extra days. A late cold spell can set back an already weakened shrub considerably.
Gradual sun acclimatisation instead of heat shock
Oleander loves sunshine, but after months in winter storage it cannot cope with an abrupt change from darkness to intense light.
Moving it outdoors step by step
This is how to make the move without causing stress:
- Place the pot in partial shade for a few hours at a time over the first few days.
- Ensure it is sheltered from wind, for example beside a house wall.
- Watch for signs of sun scorch, such as pale patches on leaves or burnt edges.
- Only move it permanently to its sunniest position after a week.
Oleander planted in the ground should also have its protective cover removed gradually. Do not take covers off on a very cold or extremely sunny day; choose mild, lightly overcast weather instead.
Spring pruning: bold action pays off
A targeted prune is the most important step towards a vigorous recovery. It directs the plant's energy into young shoots that are more likely to flower.
How to prune it properly
Once the risk of frost has passed, it is time for the secateurs:
- Cut back every branch that has turned black or dried out completely, taking it down to healthy green wood.
- Remove shoots that cross over one another or grow towards the centre.
- Shorten overly long, thin tips by one third to two thirds.
If the shrub is extremely damaged, a hard prune to around 40 centimetres high may be the only solution. Although this sounds drastic, it often triggers strong new growth from the base. Flowering will usually be more limited that year, but the oleander should be noticeably more vigorous in the following year.
"Flowers form mainly on young shoots. Pruning deliberately therefore also determines how impressive the display will be in high summer."
New pot, new life: roots and growing medium
Container plants in particular often suffer around the roots while kept in winter storage. Looking inside the pot will show whether it needs to be moved.
When repotting is worthwhile
Signs that the pot has become too small include:
- Roots are growing out through the drainage holes.
- When lifted out, the plant has a dense root ball with no loose compost visible.
- The plant dries out extremely quickly despite regular watering.
In this case, move the oleander into a slightly larger container with fresh, free-draining growing medium. An ideal mix contains:
- Flowering-plant compost.
- Coarse sand or fine gravel.
- A proportion of well-rotted compost.
If the container is already huge and heavy, a partial refresh is often enough: remove the top roughly five centimetres of compost and replace it with nutrient-rich, loose compost.
Fertiliser: why potassium gives flowers a boost
Following winter, the oleander needs nutrients to develop new shoots and, later, flowers. Nitrogen alone may produce plenty of foliage, but it does not encourage a lavish display of blooms.
The right feeding strategy
From March to September, feed the shrub every one to two weeks with a fertiliser high in potassium, such as a specialist flowering-plant feed. Keep the following points in mind:
- Only fertilise compost that is slightly moist, never soil that is bone dry.
- Follow the manufacturer's dosage instructions.
- Stop feeding in autumn so the shoots can mature.
"Potassium strengthens plant tissue and flower formation – a clear advantage for plants that must withstand frost and summer heat every year."
Watering correctly: neither drowning nor drying out
Many oleanders fail not because of frost, but because of how water is managed afterwards. Both overwatering and underwatering cause damage.
Watering rules for a fresh start
After winter, allow the top layer of compost in the pot to dry briefly before watering again. A few basic rules are helpful:
- Water slowly and directly around the root area, avoiding wetting the leaves where possible.
- Pour away excess water from the saucer after a few minutes.
- During hot summer weather, plan for around two thorough waterings per week for plants in the ground, rather than giving a little every day.
A layer of bark mulch or gravel around the root area of plants in the ground reduces evaporation and retains moisture in the soil for longer. At the same time, it improves aeration, helping to prevent rot.
The best microclimate for maximum flowers
Oleander needs light and warmth. Ultimately, both factors determine how spectacular its flowering will be.
The ideal location on a balcony and in the garden
Particularly suitable positions include those:
- With several hours of direct sun each day.
- Against a south- or south-west-facing house wall that stores warmth.
- Sheltered from cold draughts.
Anyone living in a cooler area benefits from using a movable container: it can stand in full sun during summer, then be taken into a frost-free place in good time in autumn.
Common mistakes that hold back flowering
Many post-winter problems can be traced back to a few recurring errors. The good news is that they are easy to avoid.
| Mistake | Consequences |
|---|---|
| Putting it outside too early while frost remains a risk | New shoots freeze and the plant becomes even weaker |
| Sudden move from winter storage into full sun | Leaf scorch, stress and halted growth |
| Permanently waterlogged compost | Root rot, yellow leaves and leaf drop |
| Heavy feeding on dry compost | Root damage caused by salt concentration |
| Water constantly standing in the saucer | Lack of oxygen around the roots and rot |
"Small adjustments to timing and care are often enough to turn a weak shrub back into a dense ball of flowers."
How long does recovery take – and how can you recognise success?
Those who take the right action in spring often see the first results after only a few weeks. Fresh, light-green shoots appear first, followed by branching. From late spring, the typical clusters of buds form at the young shoot tips. A badly damaged oleander may need a full season to regain its shape, but it will make noticeably stronger progress in the following year.
Additional notes: toxicity, pruning waste and companion planting
Oleander may look harmless, but botanically it is one of the poisonous species. Its sap can cause skin irritation, while swallowed plant parts are dangerous, especially for children and pets. Wear gardening gloves when pruning, and dispose of cuttings in general waste or green waste rather than putting them on a bonfire.
If you keep your oleander in a container, it can be visually combined with Mediterranean companions such as lavender, sage or thyme. These plants prefer similar conditions: plenty of sun, free-draining soil and relatively moderate watering. This creates a small piece of the south on a balcony or patio, providing colour from late spring into autumn – even if winter has been harsh in between.
Comments
No comments yet. Be the first to comment!
Leave a Comment