
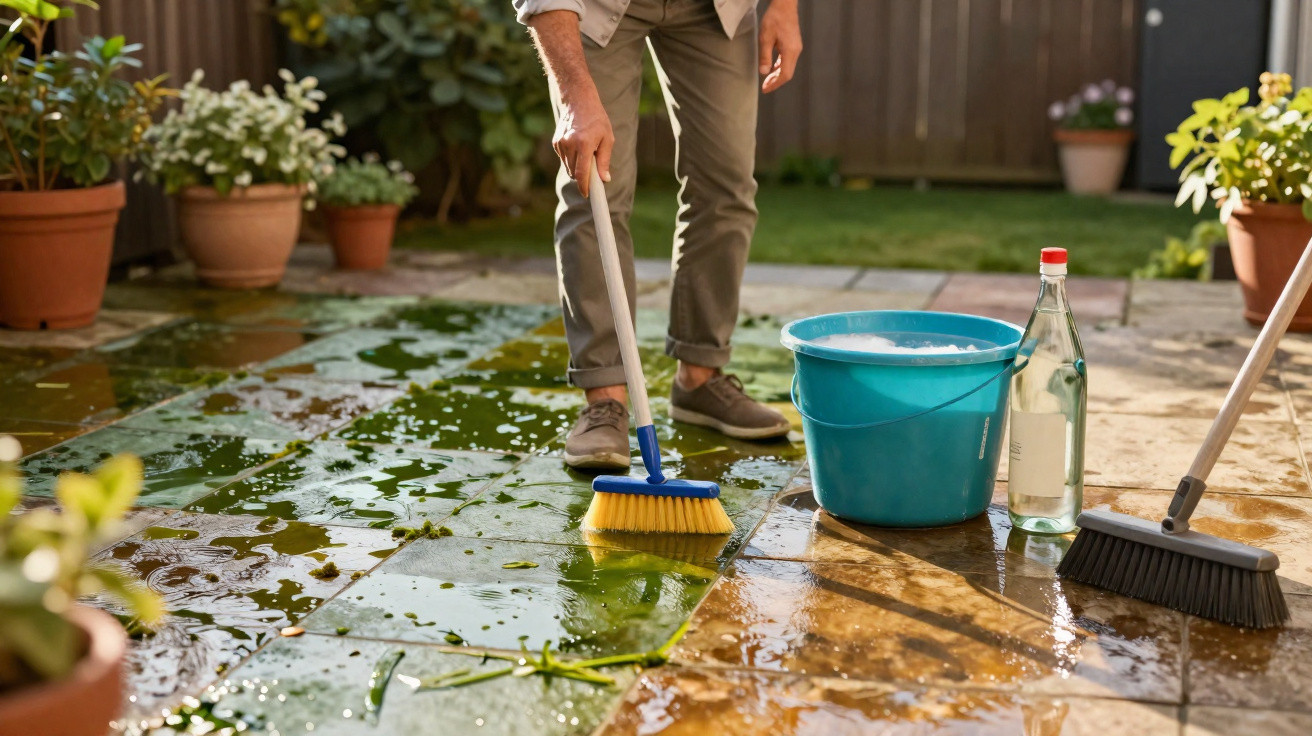
Almost everyone with a garden or balcony knows the situation: weeks of rain, very little sunshine, plus fallen leaves and dirt. By spring, the outdoor surface can resemble a slippery ice rink rather than a welcoming seating area. My own patio looked exactly like that, until I tried a straightforward method that needs no pressure washer, costly specialist products or hours of scrubbing.
From green slip hazard to usable patio
After the cold, damp months, every concrete slab was covered: moss filled the joints, green growth spread across the surface, and dark marks made it impossible to tell what colour the patio had originally been. It was difficult even to place a chair securely, let alone walk across it barefoot.
At the DIY store, shelves were stacked with containers labelled “anti-green deposit”, “moss remover” and similar specialist treatments. Their prices were far higher than I wanted to pay. The instructions also recommended applying them in dry conditions, while wearing gloves and, in some cases, respiratory protection. I also looked at hiring equipment: renting a pressure washer for a day was not exactly cheap either, and I wanted to avoid the effort of transporting it as well as the noise.
So I looked for something quick, inexpensive and not dependent on what felt like half a chemistry lab. The answer was surprisingly ordinary: a bottle of household vinegar – specifically clear table vinegar, available in supermarkets for just a few pence.
The vinegar method: cleaning a patio without a pressure washer
The principle is uncomplicated. Vinegar contains acid, which weakens organic growth such as algae and moss. When diluted with water, the mixture can be spread over a large area without over-treating the surface. A British journalist had described using this exact approach to make her own patio usable again, and I followed those instructions.
Preparation: sweep before mixing
The first stage is one many people overlook: sweep thoroughly. Using a stiff-bristled broom, I cleared away loose leaves, soil, sand and fragments of moss. The cleaner the area is at the start, the better the vinegar can reach the deposits themselves.
I then used an ordinary bucket and mixed the ingredients at a 1:1 ratio:
- 1 part clear household vinegar
- 1 part water (not boiling; lukewarm to cold is best)
The amount of water required depends on the size of the patio. For roughly 15 to 20 square metres, half a bottle of vinegar – around 0.5 litres – together with the same quantity of water was sufficient for me. The benefit is that the total cost is well below £1.
“An inexpensive 1:1 vinegar-and-water mix was enough to make a heavily green-covered patio usable again in around an hour.”
Apply it and leave it to work
I poured the prepared mixture directly from the bucket across the patio, with no particular fuss. A watering can or pressure sprayer can be used if preferred, but neither is essential. The important thing is to wet the surface thoroughly, especially the dark green and almost black areas.
The next step is simply to leave it alone. Around 45 to 60 minutes of contact time was enough in my case. The patio changes very little visually during this period; the real result only becomes apparent in the next stage.
Gentle brushing instead of strenuous scrubbing
After the waiting time, I used the broom again and brushed the surface with light pressure. To my surprise, the green deposits lifted with very little effort. The slabs looked brighter as I brushed them, while the joints became cleaner too.
Rather than spending hours kneeling down and battling with a small brush, it took only a few minutes to cover the whole area. Finally, I gave the patio a quick rinse with water; an ordinary garden hose is enough.
Where vinegar works well – and where it should not be used
Useful though this trick is, it is not automatically suitable for every patio. The surface material is the deciding factor. Vinegar is acidic, and some materials are sensitive to it.
Suitable surfaces
- Concrete slabs: The mixture generally works very well here, particularly on green deposits and light discolouration.
- Frost-resistant outdoor porcelain tiles: Many modern patio tiles tolerate diluted acid, provided their surface does not have a special coating.
- Joints with weeds: Vinegar also weakens small weeds and patches of moss between slabs.
Materials that vinegar can damage
- Natural stone, including marble, limestone or some granite types: Acid can roughen the finish, cause stains or leave the surface looking dull.
- Metal components: Metal railing bases and decorative strips should not remain in contact with vinegar, as corrosion may result.
- Sensitive timber decking: On oiled or stained timber, vinegar may attack the protective coating.
If in doubt, test the mixture first in an inconspicuous spot, such as a corner or a single slab behind a planter. Only treat the whole area once that test section still looks good.
Vinegar compared with anti-moss chemicals and pressure washers
There are three main groups of solutions sold for green deposits on patios: biocidal products, pressure washers, and simple household options such as vinegar or soda. Each has advantages and disadvantages.
| Method | Cost | Effort | Risks |
|---|---|---|---|
| Vinegar-water mix | A few pence per application | Sweep, pour, briefly scrub | Unsuitable for sensitive stone; use sparingly near plants |
| Anti-green-deposit container | Several pounds per application | Protective equipment, precise dosage, dry weather required | Biocides affect the environment; keep pets away |
| Pressure washer | Hire or purchase, plus water | Carry and connect equipment, noise, spray | Can wash out joints and roughen soft stone |
The vinegar mix stands out mainly for its low cost and simplicity. There is no need for an outdoor electricity connection, specialist protective clothing or airborne spray containing aggressive active ingredients. However, professional treatments or a pressure washer may still make sense for heavily soiled large areas, such as decades-old surfaces or driveways with extensive moss growth.
Practical advice for trying the vinegar patio method
How to improve the first attempt
- Choose dry weather: The ground should be as dry as possible during application, so the mixture is not immediately diluted again.
- Avoid working in blazing sunshine: If the solution dries too rapidly, it becomes less effective. Light shade is ideal.
- Keep pets indoors briefly: Dogs and cats should not walk over the area while it remains wet.
- Allow for more than one treatment: A second application may be needed where deposits are particularly severe.
If delicate flower beds sit directly beside the patio, do not allow the mix to run towards the plants. Kerbs or small channels can help direct the water away.
How often can vinegar be used on a patio?
For most surfaces, once or twice a year is enough. More frequent applications are usually not an issue on concrete, but they are not advisable on more sensitive stone. For routine cleaning between treatments, plain water – potentially with a little neutral cleaner – is the better option.
What really causes moss and green deposits
Moss and algae develop where moisture lingers and sunlight is limited. North- or east-facing areas are affected far more than sunny south-facing patios. Covered spaces, large trees and dense hedges also encourage the green layer to form.
Anyone wanting less work over the long term should therefore do more than clean the surface and should also assess the surrounding conditions: keep drainage channels clear, improve airflow and, if necessary, trim shade-casting shrubs. Every additional hour of sunshine on the slabs helps them dry more quickly and removes the conditions moss needs to thrive.
Vinegar is not a miracle cure that replaces those measures; it is more of a practical spring-cleaning aid. For many ordinary patios, though, that is enough to turn a slippery green surface back into an attractive place for the first coffee outdoors – without pressure-washer noise or a large DIY-store bill.



Comments
No comments yet. Be the first to comment!
Leave a Comment