
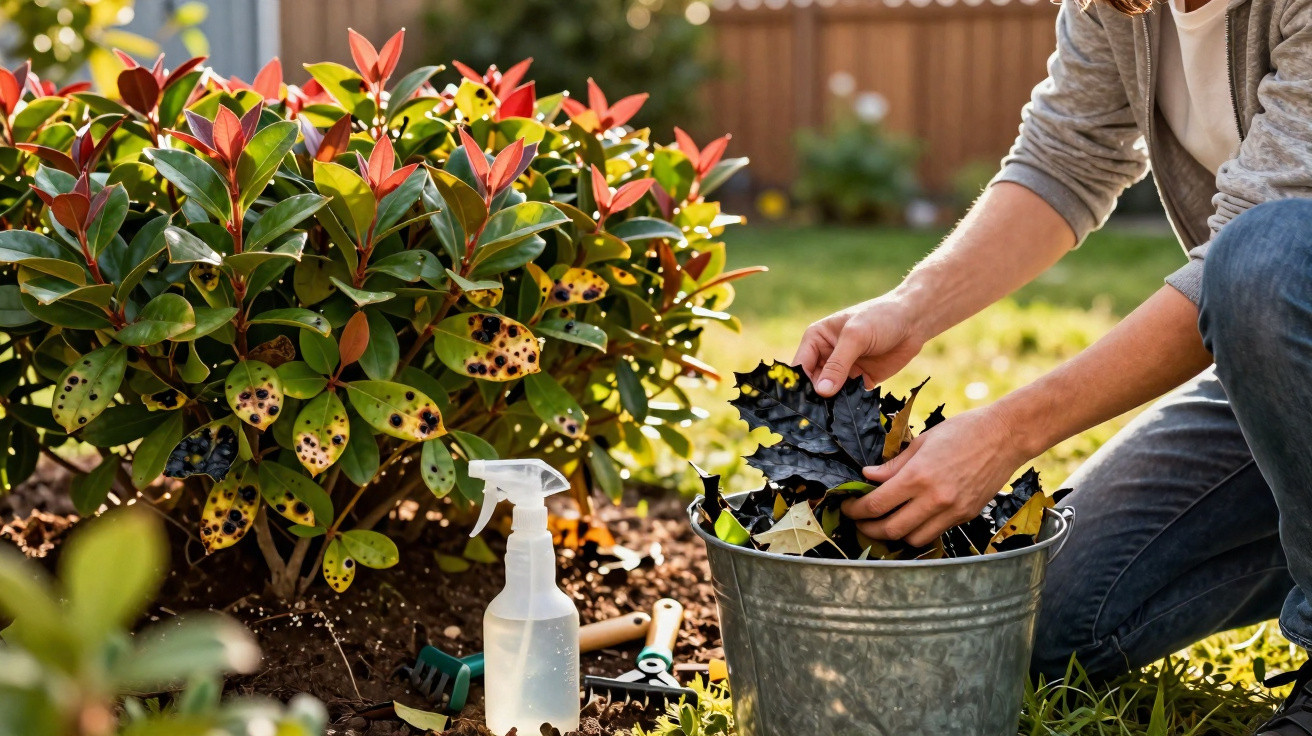
During winter in particular, the red new growth of Photinia brings colour to otherwise bleak gardens. It is therefore all the more worrying when its leaves become covered in dark spots and fall in large numbers. Rather than resorting to expensive sprays, one surprisingly simple, entirely natural measure is often enough - provided it is carried out in good time before spring.
What really causes black spots on Photinia
In most cases, the mysterious marks are caused by a fungal disease known to specialists as Entomosporium leaf spot. The fungus thrives in damp springs and wet soil. Following winters with heavy rainfall, researchers consider the risk of severe infection to be significantly higher.
The pattern is typical on the popular variety Photinia × fraseri ‘Red Robin’: small brownish to blackish spots first emerge at the very bottom of the hedge, often with a fine reddish edge. They spread over time, the centres eventually become greyish, and the leaf turns yellow before dropping.
“A clear warning sign is a ring of discoloured leaves around the lower part of the hedge - by then, the fungus is already working its way upwards bit by bit.”
This should not be confused with normal leaf replacement, which produces evenly yellowing leaves without sharply defined round spots. Thick, crusty, almost scab-like coatings are more likely to indicate other fungal problems, such as scab or sooty mould.
So, if you notice clearly outlined circular marks together with heavy leaf loss in the bottom third of the plants, it is highly likely to be the typical Photinia disease caused by Entomosporium leaf spot.
Why fallen leaves are making your hedge ill
The real culprit is not in the hedge itself but beneath it. A dense layer of fallen, already infected leaves acts as a vast store of spores. Specialists believe that the majority of fungal spores overwinter there.
In spring, a single heavy shower is enough: raindrops hit the wet old leaves, dislodge the minute spores and throw them upwards onto the fresh, tender growth at the base of the hedge. Without intervention, this infection cycle repeats itself year after year.
“The disease does not come from the roots; quite literally, it jumps from the bottom upwards - with every splash of rainwater.”
Dense hedges growing in heavy, poorly drained soil are especially vulnerable. Their leaves barely dry out, while the leaf layer remains wet for a long time. Anyone who leaves fallen foliage unattended during autumn or winter is unknowingly creating a comfortable home for their own fungal problem.
A natural rescue plan before spring
The good news is that tackling this source of infection requires an exceptionally simple measure. It takes only a little time and physical effort, works purely mechanically and needs no harsh chemicals.
The best time to act
Choose a dry day between late February and early March, before the buds visibly begin to open. The ground should not be completely waterlogged, so that working around the hedge does not compact the soil.
- Pick dry weather with as little rain as possible.
- Wait until temperatures are above freezing.
- Schedule the work before the new leaves begin stronger growth.
Step-by-step removal of infected foliage
Put on sturdy gloves and gather a rake, bucket or garden waste bag:
- Begin close to the hedge and gently rake the leaves outwards, working from the inside out.
- Pull out by hand any leaves caught between the lower branches, as this is often where most spores are found.
- Collect everything thoroughly and seal it in sturdy bags.
- Take the bags to the local green waste collection site or dispose of them with general household waste.
“Crucially, diseased leaves must never go on the compost heap. Fungal spores survive there undisturbed and can later return to the garden in compost.”
Use this opportunity to thin the lower part of the hedge slightly. A few carefully placed cuts with secateurs are sufficient. More air and light inside the shrub allow the leaves to dry faster after rain, creating far less favourable conditions for the fungus.
Natural support: spraying and care tips
Immediately after this major clear-up, gardeners can protect the hedge with established products used in fruit growing. A copper-based spray is often used, with the dosage following the manufacturer’s instructions. Apply it as a fine spray to the lower part of the shrubs, where young shoots are emerging.
Many home gardeners later supplement this with gentle plant-strengthening treatments, such as horsetail tea or nettle liquid feed. These preparations make leaf tissue more resilient, but they are not a substitute for removing fallen leaves thoroughly.
- Remove fallen leaves generously - this must always be the first step.
- Consider a preventative spray using established products in late winter.
- Apply plant-strengthening treatments regularly, but sparingly.
It is equally important to water Photinia as directly as possible around the root area. Overhead watering that sprays the foliage encourages splashing and prolonged dampness - ideal conditions for the fungus. Drip irrigation or watering with a hose at ground level is much gentler.
Helping severely affected Photinia hedges recover
If the hedge is already in serious trouble, much of its lower section may be bare. In this situation, a consistent care programme over several years is needed.
In late winter, heavily damaged shoots can be cut back. The plant will generally produce new growth readily. After pruning, return to leaf management: remove all diseased material, apply a preventative spray, then monitor the new shoots.
| Situation | Recommended action |
|---|---|
| Mild infection, few spots | Remove leaves, adjust watering, improve airflow |
| Severe infection, extensive bare areas | Prune in late winter, manage fallen leaves consistently, provide care over several years |
| Problems returning every year | Check the site, improve the soil, thin the hedge, consider changing variety |
Prevention: keeping Photinia healthy in the long term
Anyone planting a Photinia hedge can avoid a great deal of trouble from the outset. Free-draining soil, sufficient spacing between plants and adequate light provide the foundation. In heavy soil, it is worthwhile adding a drainage layer of gravel or coarse sand to the planting trench.
Heavy nitrogen feeding may produce soft red shoots extremely quickly, but it also leaves plants more susceptible to fungal infection. Moderate applications of an organic slow-release fertiliser in spring are better. This encourages sturdy growth that is not excessively lush.
- Prune the hedge regularly, but avoid cutting it back too severely.
- Loosen compacted soil and prevent waterlogging.
- Do not allow autumn leaves to build up in deep layers.
In many gardens, a mixed hedge proves considerably more resilient than a monoculture. Combining Photinia with robust woody plants such as privet, cherry laurel or native shrubs reduces the risk that a single fungal pest will ruin the entire boundary.
One further point is often underestimated: in recent years, gardeners have increasingly faced extremely wet winters combined with very mild temperatures. These conditions favour fungal diseases. This makes an apparently simple measure, such as thoroughly collecting old leaves, even more worthwhile. Spending an hour on the task in late winter often gives a Photinia hedge the crucial advantage for the new season.


Comments
No comments yet. Be the first to comment!
Leave a Comment