
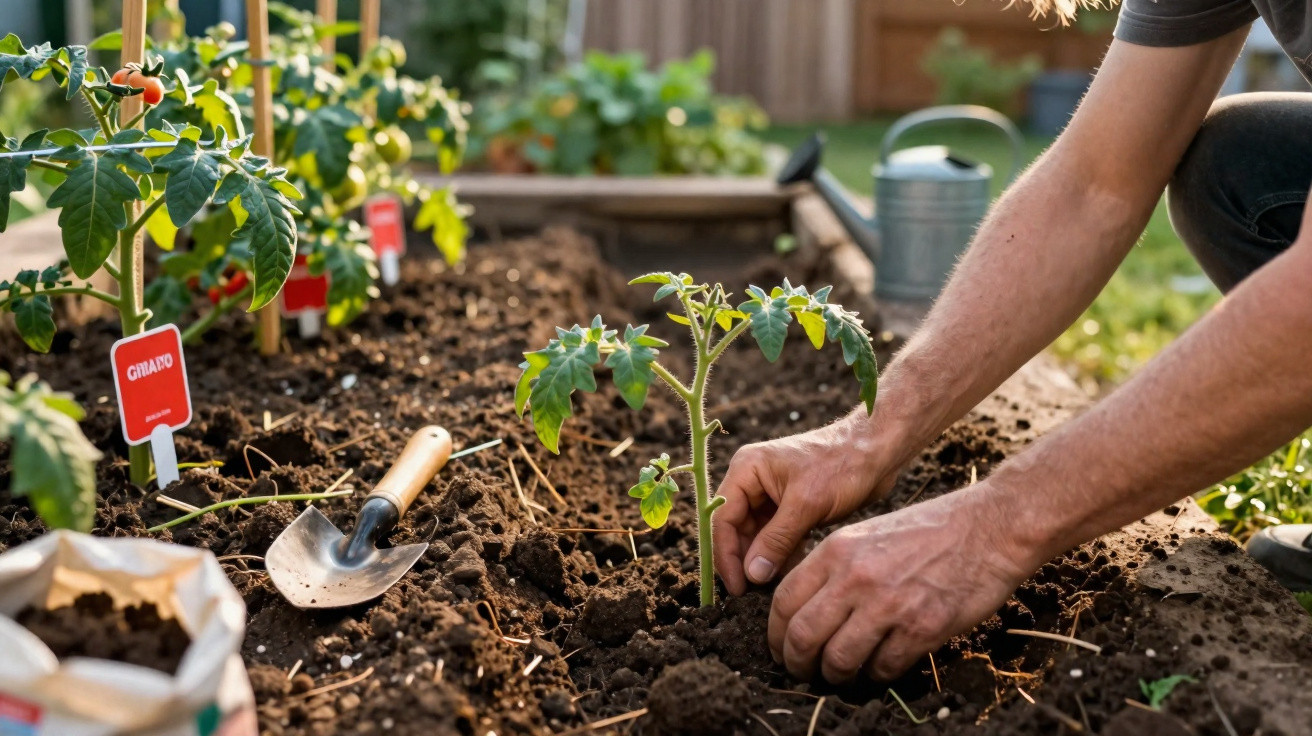
Many amateur gardeners simply plant their tomatoes upright in the soil – and in doing so give away enormous growth potential.
Professional vegetable growers take a different approach: they lay tomato plants flat in a shallow trench, leaving only the tip exposed. It may sound unusual at first, but experienced market gardeners say it produces noticeably stronger, more drought-tolerant plants – and often a higher yield.
Why horizontally planted tomatoes grow so strongly
Tomatoes have an ability that many other vegetable plants lack: every section of stem that touches soil can form extra roots. Specialists refer to these as “adventitious roots”.
“Laying a tomato plant down turns much of its stem into an additional root system – like an underground safety net.”
One example illustrates the effect clearly: rather than planting a tomato plant around 25 centimetres long upright as usual, it is placed sideways in a shallow trench. Around 20 centimetres of the stem then lie directly beneath the soil. Before long, countless roots develop along this extended contact area.
This broad, horizontal root network offers several benefits:
- More root space: The plant can access water and nutrients across a wider area of soil.
- More stable growth: The dense mat of roots anchors the tomato much more securely.
- Improved drought tolerance: The plant copes better with hot spells and irregular watering.
- Healthier foliage: Greater air circulation around the leaves reduces the risk of fungal diseases such as blight.
There is another advantage: the part of the plant buried in the ground is shielded from extreme temperature changes. While the surface of a bed heats up considerably during the day and cools again at night, conditions a few centimetres below remain far more even. The root system benefits directly from this stability.
Which tomatoes are best suited to this method
Horizontal planting is especially suitable when young tomato plants are already 20 to 30 centimetres tall. In many areas, April or early May is the right time, depending on when hard frosts are no longer expected.
It is important to distinguish between varieties:
- Indeterminate varieties (which continue growing taller throughout the season) benefit particularly strongly. They produce long shoots and many flower trusses, and make good use of every bit of additional root strength.
- Bush or patio tomatoes can also be laid down, provided their stems have not yet become too woody.
- Potted tomatoes on a balcony can be planted according to the same principle in long, deep planters or large containers – sufficient depth and effective drainage are essential.
There is, however, one clear exception.
When you should not lay tomatoes down
The horizontal method is unsuitable for grafted tomato plants. The graft union – usually visible as a small swelling on the stem – must remain above ground. If it is buried, the scion variety will grow its own roots, eliminating the benefit of the robust rootstock.
A deep trench is also only conditionally appropriate in very heavy, wet soils. If water cannot drain away, the buried stem could rot. In this situation, a slightly raised bed or a large container filled with loose, free-draining soil is a better option.
Tools and materials for the tomato trench
Basic equipment for planting
- Spade or hand cultivator for making the trench
- One sturdy cane or spiral support per plant
- Mature compost
- Dry mulching material, such as straw or shredded leaves
Reliable soil improvers and quantities
- Trench depth: around 10 to 15 centimetres.
- Compost: 2 to 3 handfuls in the lower part of the trench for each plant.
- Finely chopped fresh nettles: one handful as a natural nitrogen boost, if available.
- Wood ash (sieved): around one tablespoon per plant as a potassium source – use sparingly to avoid raising the pH too much.
Compost and nettles supply nutrients slowly and evenly. Wood ash later supports fruit formation, as tomatoes require plenty of potassium for flavour and fruit quality.
Step by step: how to lay tomatoes down correctly
- Make the trench: Use a spade or cultivator to create a straight trench 10 to 15 centimetres deep.
- Remove the lower leaves: Pinch off leaves from the lower stem over roughly two-thirds of its total length. This prevents leaves from touching the soil and allows the stem section to form roots undisturbed.
- Lay down the plant carefully: Position the tomato sideways in the trench without bending sharply or crushing the stem.
- Leave only the tip exposed: Just the uppermost 5 to 10 centimetres, with the youngest leaves, should remain above the soil.
- Cover with soil: Loosely refill the trench and gently firm the soil around the stem so that no large air pockets remain.
- Install the support immediately: Push a cane into the ground directly beside the plant. The tomato will soon turn towards the light; a support prevents weak points and breakages.
- Mulch generously: Cover the root area with straw or dry leaves. This retains moisture in the soil and protects the newly forming roots.
“After only a few days, the shoot tip will clearly point upwards – an early sign that the plant has adapted to its new position.”
Common mistakes when planting horizontally and how to avoid them
Most difficulties are caused not by the method itself, but by small oversights. The most frequent pitfalls are:
- Soil that is too wet: In clay-heavy soils prone to waterlogging, the buried stem will rot quickly. Drainage or a raised bed is the only solution.
- No spacing between plants: When tomatoes are planted too closely, foliage dries more slowly and fungal spores spread easily.
- Watering over the leaves: Damp foliage on cool evenings encourages blight. Water the soil directly instead.
- Forgetting the support: The stem can snap easily as the plant turns upwards without support.
Giving plants enough space, watering preferably in the morning and avoiding splashing water onto foliage all significantly reduce the risk of fungal disease.
How the method affects plants throughout the season
Stronger growth often becomes apparent after only a short time. Many gardeners report that horizontally planted tomatoes suffer less transplant shock, meaning they resume growing more quickly and produce new shoots sooner.
Once summer begins, the larger root area delivers its greatest advantage: plants tolerate dry periods better, leaves wilt less often, and watering mistakes have less impact. Flowering is often more consistent, while the harvest remains steadier across the season.
Whether there are ultimately more kilograms of tomatoes on the plant naturally also depends on the variety, weather and care. In many gardens, however, the plants noticeably appear more robust and cope far more calmly with stresses such as wind, heat or brief gaps in watering.
Practical additions for even sturdier tomatoes
Anyone using the horizontal method at planting time can achieve even more with a few additional measures:
- Regularly removing side shoots: Break or cut out shoots growing in the leaf axils while they are still small. This directs more energy into the main stems and fruit.
- Purposeful watering: Water less often but thoroughly. This encourages roots to grow deeper into the soil.
- Topping up mulch: Mulch compacts quickly in summer. If the layer becomes too thin, the soil dries out faster.
If you like using nettle feed, apply it only once the plants are well rooted. Fertilising too early or too heavily otherwise encourages tomatoes to produce lots of leaf growth but fewer fruits.
Why trying it in your own garden is worthwhile
Planting tomatoes horizontally takes only a few extra minutes, yet makes use of a tomato characteristic that is often overlooked. Particularly in years with hot, dry summers, this technique can make the difference between struggling and vigorous plants.
If you have always planted tomatoes conventionally upright, try a comparison: plant some tomatoes normally and lay the others down. Observing their growth, stability and yield at the end of the season will provide the best answer as to how convincing this method really is in your own garden.

Comments
No comments yet. Be the first to comment!
Leave a Comment