
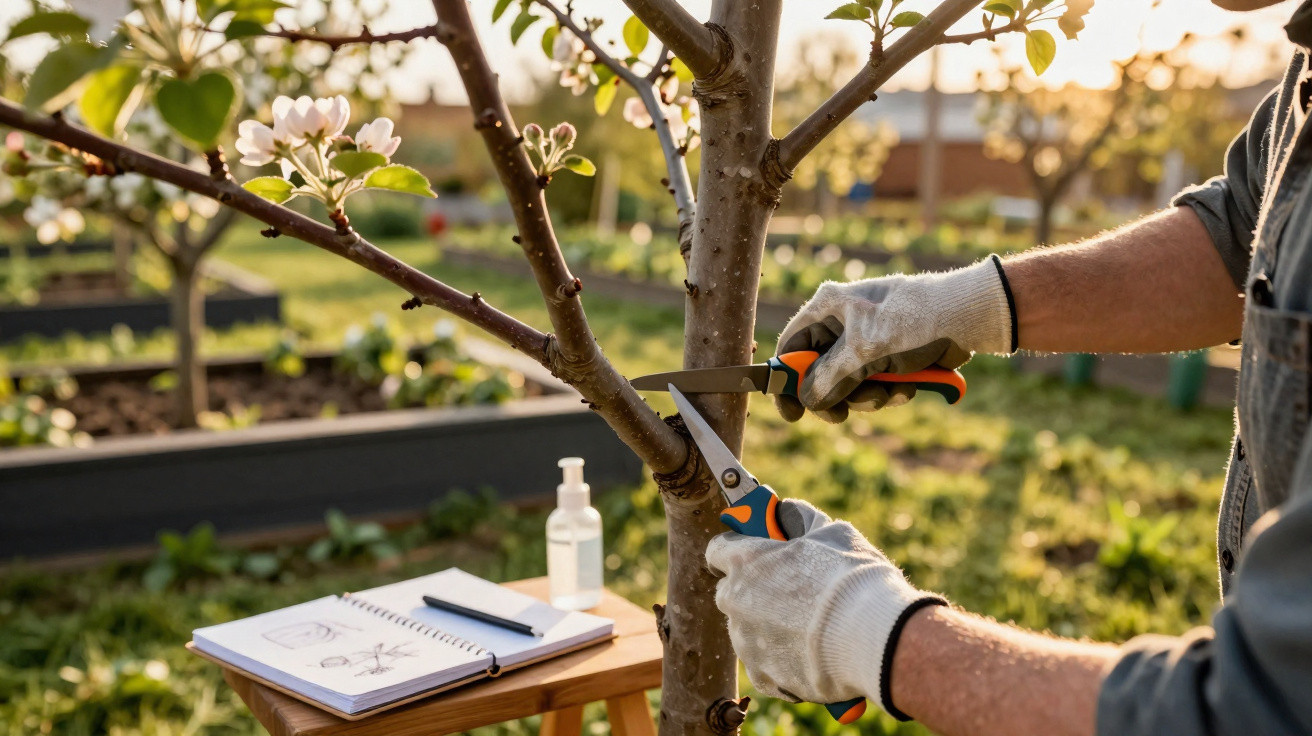
Home gardeners often blame the weather, fertiliser or a poorly timed pruning job when apples, pears or plums produce very little fruit. In professional orchards, however, growers rely on an almost invisible intervention in the bark that directs growth towards flowers rather than leaves. It may look insignificant, yet this method can determine whether the season brings overflowing baskets or disappointment.
Why your fruit tree produces leaves rather than fruit
A tree that is too comfortable in the garden can behave like an excitable teenager: it shoots upwards, produces long stems and dense foliage, while almost forgetting to set fruit. This is particularly common with young or exceptionally vigorous trees that receive plenty of water and fertiliser.
The underlying issue is the movement of sap inside the tree. Two types of sap are especially important:
- Raw sap: water and minerals carried upwards through the wood.
- Processed sap: a sugary solution made in the leaves that travels downwards immediately beneath the bark.
This sugar-rich layer below the bark influences whether a branch develops mainly foliage or flower buds. Careful intervention there can shift the balance in favour of fruit.
“When a fruit tree puts too much energy into wood growth, it lacks the ‘pressure’ to flower – a small cut in the right place can tip the balance.”
The nursery growers’ secret: a fine cut in the bark
Professional growers use a deliberate, small injury to the bark to slow the movement of sugary sap for a short time. Sugar then accumulates above the cut, encouraging that area of the branch to form more flower buds rather than long shoots.
Tree nurseries use this technique especially often on:
- apple trees
- pear trees
- plum and damson trees
- trained fruit trees growing against walls or fences
When to make the bark cut
The most suitable period is from late spring to early summer. Sap is flowing strongly, leaves are growing fully and the tree responds clearly to intervention at this time.
Choose a day that is:
- dry, with no rain
- mild rather than hot
- free from strong winds
“A dry, mild day lowers the risk of fungal infection and helps the bark wound heal quickly.”
How to make a bark cut step by step
Although the method may initially sound like something for professionals, it can be carried out in a home garden with patience and care.
Tools and preparation
Suitable tools include:
- a sharp garden knife or folding knife
- a fine grafting knife
- a clean, disinfected scalpel-like cutting tool from a garden supplier
The brand is unimportant; sharpness and cleanliness are what matter. Blunt blades tear bark, whereas sharp ones leave a clean cut. Before starting, disinfect the tool with alcohol or boiling water so that pathogens cannot enter the wound.
Where to make the cut
The position of the small bark notch determines its effect:
- Just above a bud: stimulates that specific bud area to develop flowers the following year.
- Near the point where the branch joins the trunk: slightly restrains branches that are growing too vigorously or stubbornly.
In both cases, the objective is the same: greater fruit set and less uncontrolled extension growth.
How deep and how long the cut should be
Clear limits apply if the bark injury is to work without causing unnecessary harm:
- Length: around 3 centimetres
- Depth: around 1 to a maximum of 2 millimetres
- Direction: across the direction in which the branch is growing
The blade should cut only through the thin layer immediately beneath the bark, never into the wood. The branch is meant to be checked, not mutilated.
“The ideal cut is barely visible but clearly effective: the bark is opened while the wood remains intact.”
Warning signs: what you must never do
Overdoing it with the blade can cause serious damage to the tree. Some limits are non-negotiable:
- Never cut a complete ring around a branch.
- Do not cut deeply enough to expose the pale wood across the whole area.
- Do not treat the whole tree: make only a few cuts per tree each year.
A complete ring cut stops sap flow altogether. The section above it may then die because it is no longer supplied. This would be a particularly serious loss on an older tree.
How the fruit tree responds after treatment
After a few weeks, the area above the cut usually begins to thicken slightly. The tree stores more nutrients there, which are later used for flower formation. In most cases, the wound closes again without any wound sealant.
If you inspect the area carefully in the following year, you will often see:
- tightly clustered flower buds
- fewer long, soft shoots
- generally more compact growth
“With a few targeted notches, a ‘foliage monster’ can gradually become a fruit tree that carries regular crops.”
Which fruit trees are suitable – and which are not
Fruit varieties with pips generally respond best to this technique, including:
- apple
- pear
- quince
Many stone-fruit species, such as plum, can benefit too. Some cherry and apricot varieties are much more sensitive, however. They are more prone to gumming and more vulnerable to wound infections when the bark is damaged. Great restraint is needed with these trees; when in doubt, it is better not to use the technique.
How to prevent stress and disease in the tree
When planning the cuts, assess the tree’s overall condition first. Weakened, diseased or heavily fungus-affected fruit trees cope poorly with further intervention. Improve their care, establish a healthier canopy and ensure sufficient water before working on the bark.
Useful basic rules include:
- Cut only vigorous trees with healthy leaf cover.
- Remove dead branches and severely affected areas beforehand.
- Select different positions each season to prevent a build-up of scars.
How this method differs from radical pruning
Many gardeners respond to a poor harvest with secateurs: hard pruning, heavy thinning and sometimes cutting back almost into old wood. The result is often even more vigorous water shoots the next year, with fruit pushed further out of reach.
A bark notch works in the opposite direction. Rather than removing large amounts of wood, it regulates nutrient flow. The tree retains its basic structure, while the genetic programme in the affected branch is subtly shifted – away from “growth at any cost” and towards “more flowers, more fruit”.
Extra tips for better yields in your garden
A small bark cut works best when the other factors are right too. These practical measures can help:
- Ensure pollination: Plant other varieties nearby that flower at the same time, and encourage insect-friendly conditions.
- Avoid over-fertilising: Too much nitrogen promotes shoots instead of flowers. Use compost and apply nutrients moderately instead.
- Keep the canopy open: Prune regularly but lightly so that light can reach the centre of the canopy.
- Adjust watering: Severe drought in early summer reduces fruit formation, but waterlogging does the same.
Combining these measures with a targeted bark cut helps you develop a reliable, productive home garden step by step. The technique requires a little finesse but no costly equipment. A sharp knife, a steady hand and a dry day are often all that is needed to turn the difference between a decorative leafy tree and a productive supplier of fruit.


Comments
No comments yet. Be the first to comment!
Leave a Comment