
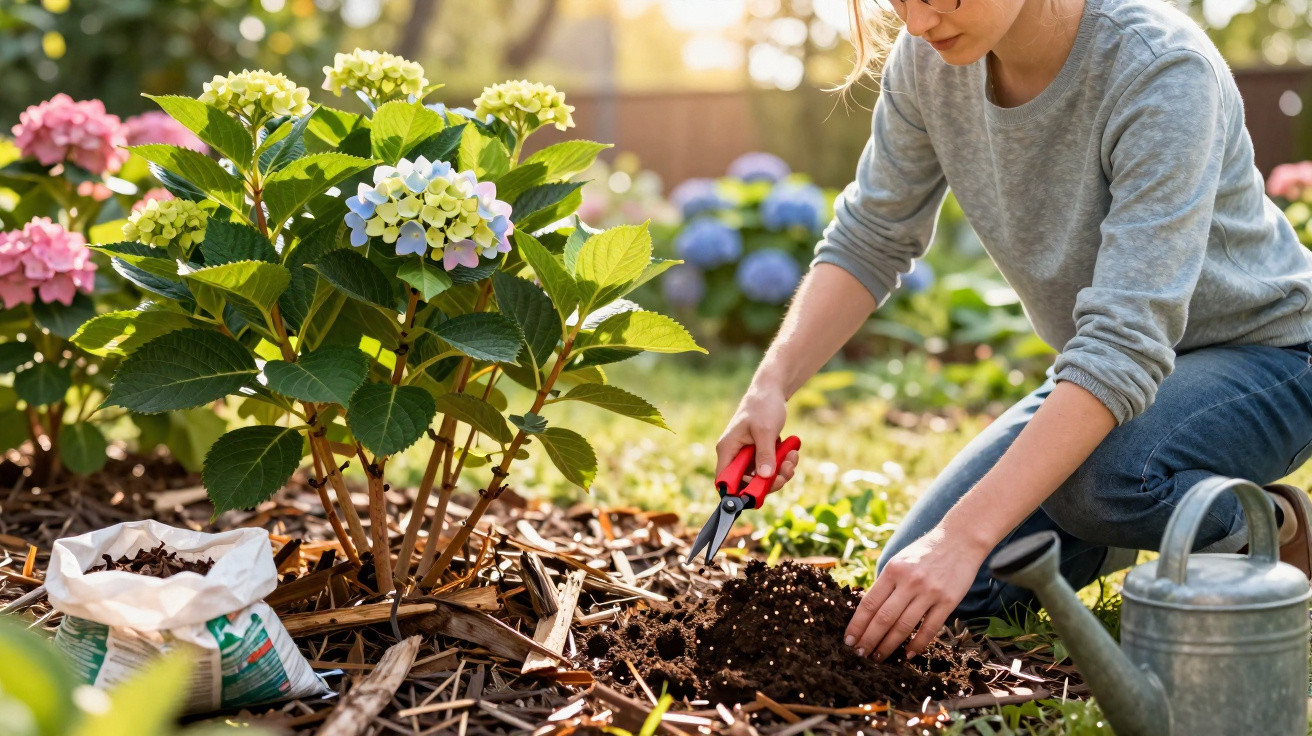
Traditional mophead hydrangeas, with their heavy balls of flowers, were long considered easy-going, reliable garden performers. Now, however, they struggle in many locations with dry summers, heatwaves and fungal diseases. That is precisely why April determines whether these shrubs burst into magnificent bloom in summer or quietly languish.
Why April has become a decisive month for hydrangeas
In April, hydrangeas properly begin to stir: buds start to swell, fresh green growth appears, and it finally becomes clear which stems have survived the winter. This period is especially important for mophead hydrangeas (Hydrangea macrophylla).
Those who reach for the secateurs too early can easily remove flower buds that have already formed. At the same time, late frosts can still occur until mid-April and may damage young shoots that emerge prematurely. Specialists therefore recommend waiting until the second half of April before working on these varieties, when it is clear which parts of the plant are genuinely still alive.
In April, it is decided whether a hydrangea invests its energy in dead stems – or in abundant summer flowers.
Climate stress is an additional issue. Hydrangeas originally come from comparatively moist regions. In many gardens today, they receive too little water at the wrong time, or are even drowned while under stress. Typical warning signs include:
- Leaves turning brown at the edges or curling up
- Flower heads remaining small or drying out early
- Soil that is constantly soaking wet and smells musty
Supporting shrubs specifically just before the growing season begins takes pressure off them throughout the summer. Essentially, three measures are enough – provided they are completed by the end of April.
The three most important April jobs for healthy hydrangeas
The practical plan can be reduced to three steps: correct pruning, suitable nutrients and a cool, protected root zone.
1. Remove dead wood thoroughly
Start by inspecting the stems: alive or dead? Dead branches only drain the plant’s energy. Proceed as follows:
- Check every stem individually, working from the top downwards.
- If there are no green emerging buds or signs of fresh wood, it is dead material.
- Using sharp, clean secateurs, cut back to just below the last ring of living buds.
You can identify living stems by:
- Green, slightly plump buds
- Wood that is greenish inside when lightly scratched
- A certain springiness when gently bent
After this sorting-out process, the shrub may initially look rather sparse. Afterwards, though, it can focus its energy on healthy stems – the foundation for large flower balls.
2. Work in a slow-release fertiliser
Immediately after pruning, it is worthwhile giving the root area a basic feed. Hydrangeas need plenty of nutrients, but react sensitively to excessive amounts of fast-acting mineral fertiliser.
Those who use an organic slow-release fertiliser are laying the foundations now for months of flowering.
Suitable options include:
- Granular organic hydrangea or rhododendron fertiliser
- Horn shavings or horn meal
- Ready-sieved, well-rotted compost in moderate quantities
Lightly work the fertiliser into the top layer of soil around the root zone, then water it in thoroughly. The nutrients will then release gradually, feeding the plants for weeks without scorching their roots.
3. Add a mulch layer to protect against heat and drought
The third component is a dependable moisture reserve: a mulch layer around five to eight centimetres deep. It prevents the soil from drying out too quickly and keeps sensitive roots noticeably cooler in summer.
Good materials include:
- Leaf mould or partially decomposed leaves
- Fine to medium-grade bark mulch
- Straw or flax straw
- Mixed garden compost that is neither too coarse nor too fresh
Do not press the mulch directly against the stems, as this can cause rot. A small two- to three-centimetre ‘air circle’ around the base of the shoots is sufficient.
Water, position and soil: helping hydrangeas through the summer
Getting the amount of water right is something of an art with hydrangeas. They prefer consistently moist conditions, but not boggy ground.
How often should you water – and how much?
It is best to water less often but more deeply:
- Water until the soil around the roots is thoroughly moistened.
- Then wait until the upper soil layer has dried slightly and become loose again.
- Only then water once more.
Permanently wet soil can make roots ‘suffocate’. Fungal diseases such as powdery mildew or grey mould are common consequences. If you are unsure, press a finger into the soil: if it feels cool and lightly moist, it will usually not need watering yet.
The best place in the garden
Many hydrangeas simply suffer because they are planted in the wrong position. Directly in front of a pale south-facing wall, heat builds up and can effectively roast plants on hot days. Better locations are:
- Bright spots that are not in full sun
- Morning sun followed by afternoon shade
- Airy corners that are not exposed to draughts
| Type of location | Suitability for hydrangeas |
|---|---|
| Full sun in front of a pale house wall | Critical, poorly suited |
| East-facing aspect with morning sun | Very well suited |
| Bright, airy north-facing aspect | Well suited |
| Dark shade that stays constantly wet | Unsuitable, high risk of disease |
If you realise that your hydrangea has been growing in the wrong place for years, you can carefully move it at the end of April or in autumn. Keep as many roots intact as possible, water the root ball well and mulch immediately in its new position.
Soil, pH and flower colour – what causes the difference
Many gardeners wonder why a hydrangea that once bloomed blue suddenly produces pink flowers. The reason lies in the soil: blue blooms require a fairly acidic, humus-rich growing medium with available aluminium. In neutral to slightly alkaline soils, flowers tend to turn pink.
A few points can help you assess the situation:
- Plenty of conifers nearby suggests that the soil is likely to be acidic.
- A high lime content in irrigation water or visible limescale marks on pots indicates a higher pH.
- Special hydrangea or rhododendron composts can lower the pH locally.
If your priority is healthy plants with plenty of flowers, do not become too preoccupied with colour. Stable conditions are what matter: even moisture, sufficient nutrients and a reasonably sheltered position.
Hydrangeas and climate change: risks and smart additions
Heat and prolonged dry spells are particularly hard on classic mophead hydrangeas. Anyone planning a new garden or redesigning borders can deliberately choose varieties that cope better with sun and drought, such as certain panicle hydrangeas or oakleaf hydrangeas. Compared with mophead hydrangeas, these are often less sensitive to full sun and brief periods of drought.
A well-planned combination of plants in a border can also stabilise the microclimate. Ground-covering plants such as lady’s mantle, cranesbill or low-growing asters shade the soil and reduce evaporation. They also attract beneficial insects and make the overall planting look less uniform.
By observing shrubs regularly, you can spot signs of stress early: limp leaves in the afternoon, persistently brown leaf edges or small, weak flowers. Rather than automatically leaving the hose running for hours, check the soil moisture, mulch layer, fertiliser and position carefully. This can prevent many problems before they take hold.
With the combination of targeted pruning, organic slow-release fertiliser and a thick layer of mulch by the end of April, the likelihood rises dramatically that hydrangeas will not merely survive the coming summer, but once again fill the garden with large, dense balls of flowers.
Comments
No comments yet. Be the first to comment!
Leave a Comment