
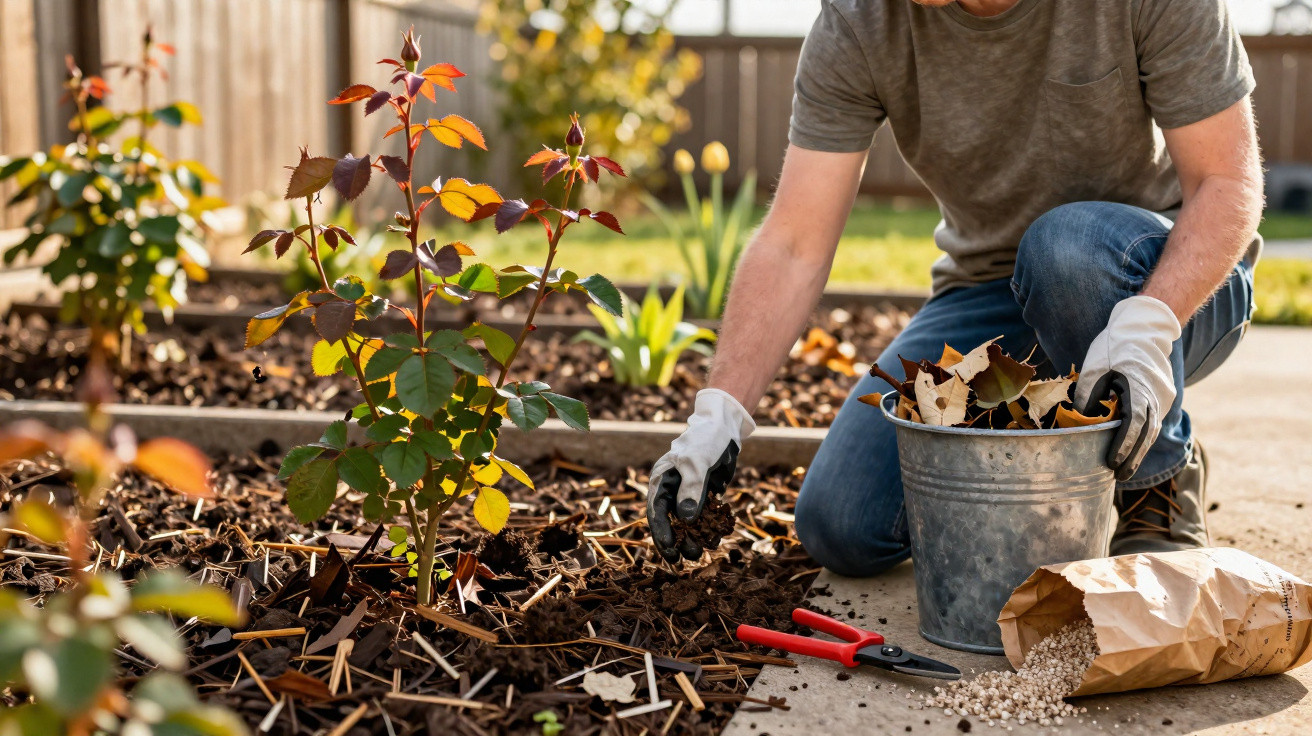
Anyone who takes the right action in March can stop this problem in its tracks.
Black spots on rose leaves are among the most irritating recurring problems in the garden. It seems to return every year, usually just as roses ought to be flowering generously. What is often overlooked is that the foundations for healthy, resilient roses are laid as early as March. Three straightforward measures are enough to curb black spot disease significantly.
What really causes black spots on roses
The dark, ragged-edged marks are caused by a fungus. Its forms are known by technical names including Diplocarpon and Marssonina rosae. The fungus may be microscopic, but its effects certainly are not.
Typical symptoms include:
- dark, irregular marks on the leaves
- yellow areas of leaf tissue surrounding the spots
- leaves dropping prematurely, often as early as June or July
- sparse, weak flowering with few buds
The rose rarely dies straight away. Instead, it becomes weaker from one year to the next. It sheds its foliage early, its shoots do not ripen properly, and pests such as aphids and spider mites can take hold more easily.
“The fungus is not a brief summer visitor: it overwinters in the rose bed itself, particularly on old fallen leaves.”
It becomes active with the first mild, damp days of spring. Temperatures of roughly 13 to 30 degrees, together with leaves that remain wet for extended periods, are enough for spores to spread explosively. Raindrops splash them upwards from the soil onto young foliage, while wind carries them between shrubs. March is the time to intervene if you want to prevent this.
First March step: clear thoroughly around each rose bush
The key task is to remove the fungus’s winter shelter, which is situated right at the base of the rose.
Remove old foliage without compromise
Over winter, debris accumulates among the shoots and around the root area: dried leaves, small pieces of twig and dead flower stems. Fungal spores survive precisely in this material.
In March, you should therefore:
- collect every old rose leaf within a radius of at least 30–40 centimetres
- carefully pull out any concealed leaves from the centre of the shrub
- remove snapped twigs and those that have become dry
Do not put these plant remains on the compost heap. Spores can survive there and later find their way back into the garden. Dispose of them in the household waste bin or take them to a local recycling centre instead.
“By removing the fungus’s overwintering sources from the bed in March, you quite literally take the ground from beneath its feet in summer.”
Second step: apply a protective layer around the rose
Once the soil surface is clean, the next element is a layer of mulch. It performs several useful functions at once.
Mulch suitable for roses
Proven options include:
- mature, well-rotted compost
- bark mulch or chipped bark
- garden soil mixed with some well-rotted manure, such as horse or cattle manure
For a noticeable result, the layer can be reasonably substantial. Gardening professionals recommend spreading it to a depth of approximately 3–5 centimetres around the base of each rose bush. Leave a narrow ring clear immediately around the stem so that a permanently damp collar does not form.
It offers three main benefits:
- Fewer splashed spores: Raindrops hit the mulch instead of splashing spores up from the soil.
- Improved nutrient supply: Compost acts as a natural slow-release feed.
- Less water loss: Moisture stays in the ground for longer, helping the rose through dry periods.
“The mulch layer acts like a protective shield: it softens raindrops, blocks fungal spores and at the same time supplies energy for the next flowering season.”
Third step: strengthen roses specifically in late March
After clearing and mulching comes the third task: feeding. Only vigorous roses are better equipped to cope with infection.
Choose the right fertiliser
Special rose fertilisers are a good choice, as they contain the correct balance of nitrogen, phosphorus and potassium. Organic alternatives are also available, including:
- organic rose fertiliser in pellet form
- horn shavings combined with compost
- ready-mixed organic-mineral rose feed
Depending on the region and weather conditions, the first application is best made between mid and late March. The ground must no longer be frozen.
Many home gardeners also use liquid plant tonics made from herbal extracts, algae or rock dust. Small quantities are added to watering water and applied around the root zone. This allows the nutrients to reach the roots quickly.
“The more vital the rose is at the start of the season, the harder it is for fungi to cause lasting damage to its leaves and shoots.”
Why March matters so much for roses
Several processes begin at the same time in March: the fungus emerges from winter dormancy, the rose starts to produce new growth, and the soil gradually becomes warmer and more biologically active. Acting now disrupts the disease cycle before it can properly gather pace.
Those who turn the three measures - thorough cleaning, proper mulching and targeted feeding - into a regular March routine will usually notice a clear difference after just one year. Roses put on stronger growth, retain their leaves for longer and cope much more calmly with spells of damp weather.
Practical extra tips for even healthier roses
Do not underestimate variety choice and location
Alongside the March measures, two further factors are important: the variety and its position in the garden. Many modern rose varieties are now specifically sold as fungus-tolerant or robust. This is worth considering when planting a new rose bush.
Choose an airy site so that rainwater can dry quickly. Tight planting distances and a completely still corner encourage lasting dampness on the foliage, creating ideal conditions for fungi.
Water and care for roses properly throughout the season
Ideally, water directly onto the soil rather than over the leaves. Morning is the best time, as any remaining moisture can dry during the day. Rainy periods cannot be controlled, but your own watering habits can.
If the first affected leaves appear in summer, remove and dispose of them promptly. This lowers the spore load during the season. In exceptionally wet years, additional plant-strengthening products may be useful for giving the rose’s natural defences an extra boost.
Common misconceptions about black spots
At the first signs, many gardeners immediately reach for chemical sprays. They may help in the short term, but they do not address the cause. If old leaves and sources of fungus remain in the bed, the same issue will usually return the following year.
Another misconception is that only old, weak roses develop black spot disease. In fact, freshly planted young roses can also be affected when conditions are right: foliage that stays damp for a long time and a high spore load in the bed.
By working cleanly, caring for the soil and feeding the plants, you can enjoy each rose bush far more over the long term - often without resorting to harsh chemicals.


Comments
No comments yet. Be the first to comment!
Leave a Comment