
Most people know the feeling: an orchid looks magnificent in the living room for weeks, then its flowers fall away – and nothing else happens. The plant stays green and appears healthy, yet simply refuses to produce another bloom. This is the point at which many people give up. However, anyone who follows a few basic principles and uses one surprisingly simple trick can keep their orchid flowering for almost the entire year.
Why so many orchids are thrown away far too soon
Orchids may look delicate, but they are often hardier than they seem. Usually, the issue is not the plant itself but our expectations. Many people assume an orchid is “finished” as soon as its flower stem is bare.
In reality, the orchid is simply doing what it would do in nature: taking a rest period, rebuilding its reserves and preparing for its next flowering cycle. Reaching for the scissors or the bin at this stage deprives the plant of that opportunity.
An orchid without flowers is rarely dead – in most cases, it is simply taking a break before its next flush of blooms.
Rather than throwing it away, inspect the leaves and roots closely. If the leaves are firm and deep green, while the roots are silver to green rather than soft and mushy, the plant is alive and can usually be encouraged to flower again without too much difficulty.
Less fertiliser, more blooms: the most common mistake
Many owners are overly generous and apply too much fertiliser. Yet the most popular indoor orchids come from regions where they grow as epiphytes on trees. Their roots hang freely in the air, nutrients are scarce, and water arrives in intermittent bursts.
In this setting, survival matters more than abundance. The plant has adapted to lean conditions. If it is constantly “overfed” at home, this can slow down flower production. Instead of putting energy into buds, it directs more of its strength towards leaves and roots.
Useful rules of thumb for fertiliser:
- Fertilise regularly only during the growing season, from spring to late summer.
- Choose a heavily diluted orchid fertiliser, using around half the dose stated on the packet.
- Apply fertiliser roughly every two to three weeks, rather than every time you water.
- Occasionally flush the pot through with clean water to remove salt deposits.
Some plant enthusiasts swear by gentle household remedies, such as adding a dash of strongly diluted milk to the watering water to provide a little calcium. These methods should only be used sparingly. The underlying principle is to give small, steady amounts of nutrients instead of overwhelming the plant with fertiliser.
An orchid “bath day”: watering correctly
The second key factor is watering. Treating an orchid like a conventional houseplant and watering it from above risks leaving stagnant water in the pot. This can quickly cause root rot – and flowering will then fail altogether.
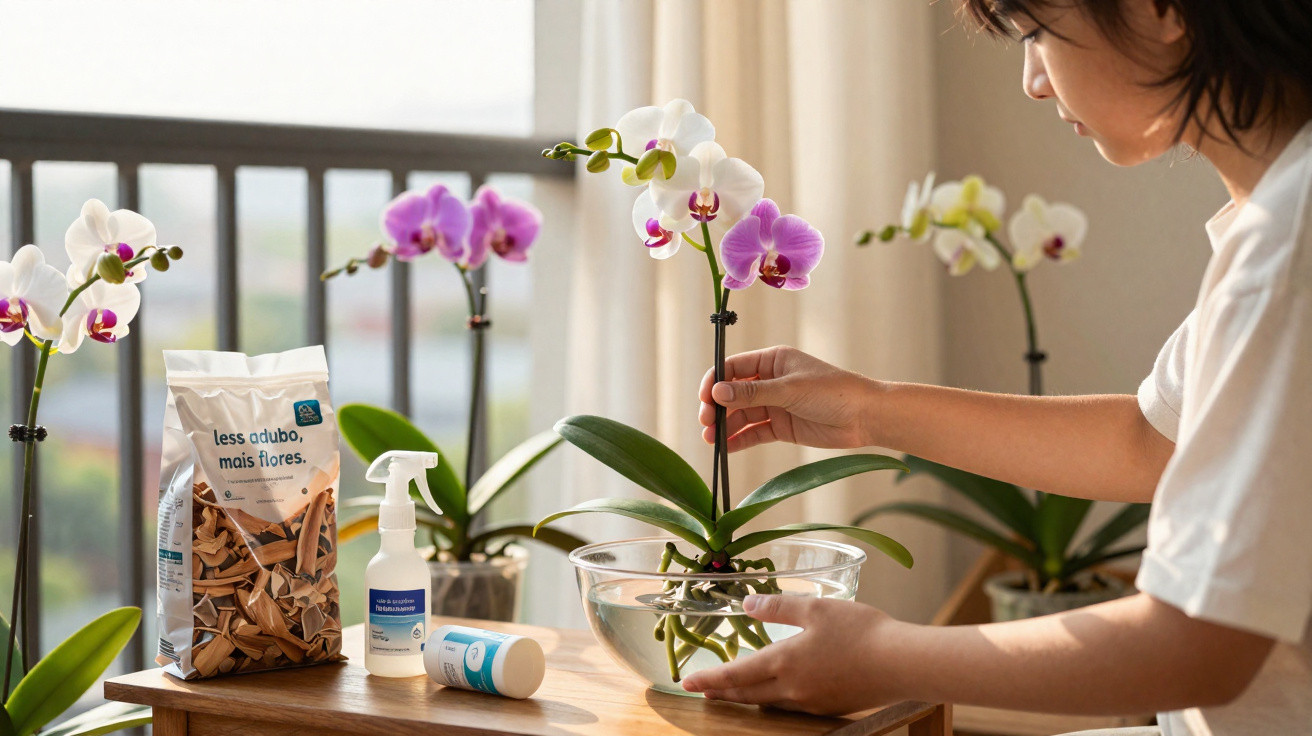
The tried-and-tested approach is known as the immersion method, or the “bath method”:
- Remove the clear inner pot from its decorative outer pot.
- Fill a bowl or the kitchen sink with lukewarm water.
- Place the pot in the water so that the roots are fully submerged.
- Leave it for around five minutes, until air bubbles stop rising.
- Take the pot out and let it drain extremely well – there must be absolutely no water left standing in the outer pot.
This method allows the roots to absorb only the amount of water they need. One such “bath day” per week is generally sufficient; in winter, every ten to fourteen days is often enough.
It is better to water an orchid once too little than to make it struggle with permanently wet roots.
In addition, some owners use a fine mist containing very weakly diluted fertiliser about once a week on the leaves and aerial roots. This mimics the humid air of the tropical rainforest where these plants originally grow.
The dark period: the surprising natural trick for new orchid flowers
The most interesting tip comes directly from the orchid’s natural way of life: many species experience a type of rest or dry season, during which they receive less light and water. This period can later trigger a fresh flower shoot.
The same principle can be recreated indoors with an “artificial dark period”.
How the dark period works
- Move the orchid to a much darker place, such as a hallway without a direct window.
- Alternatively, cover the pot with an opaque paper bag so that very little light can get through.
- Maintain these conditions for approximately two to three weeks.
- Water only sparingly during this time; avoid waterlogging as well as extremely dry air.
Temperatures should still remain reasonably steady, with 18 to 22 degrees being ideal. Draughts and damp, cold cellars are unsuitable. The important thing is for the plant to rest, not to become chilled or develop mould.
After this short “break”, return the orchid to a bright location, preferably with indirect sunlight, such as a windowsill behind a curtain. With a little patience, a new flower spike will often appear – sometimes much faster than expected.
Many owners report that, after precisely two to three weeks of dark treatment, a new flower stem suddenly grows from the centre of the plant.
Location, light and observation: what orchids really need
Anyone hoping to keep an orchid for years mainly needs patience and a watchful eye. The plant gives clear signs of whether it is comfortable:
| Condition of the plant | Possible cause |
|---|---|
| Leaves soft and yellowish | Too much water or too little light |
| Roots brown and mushy | Waterlogging, possibly rot |
| Roots silvery-grey and wrinkled | Likely too dry; shorten the interval between watering |
| Lots of new leaves, no flowers | Too nutrient-rich, too warm or too consistent |
Bright windows are suitable positions, provided they do not receive relentless direct midday sun. East- or west-facing windows are ideal. South-facing windows can work with light shading, while north-facing windows are often too dark.
Common practical questions
When should I cut off the old flower stem?
If the stem is completely brown and dry, it can be removed directly above its base. If it remains green, it is worth leaving it in place. It may sometimes produce new flower spikes from the side.
How often should I repot?
Roughly every two to three years, once the growing medium starts breaking down or the roots are growing extensively beyond the pot. Special orchid compost ensures that the roots receive enough air.
Why the natural orchid trick works so well
The dark period, combined with restrained fertilising and considered watering, closely reflects what orchids encounter in their native habitats: phases of abundant light and moisture alternate with leaner periods. This contrast encourages the plant to reproduce – and form flowers.
By adjusting their habits slightly, owners can get more from a single plant instead of continually buying new ones. Plant lovers who are especially budget-conscious and environmentally aware use this effect deliberately.
It also has practical benefits for other houseplants: learning to read subtle orchid signals – such as root colour, leaf firmness and bud formation – soon helps you develop a feel for watering schedules, light requirements and appropriate fertiliser quantities for many other species.
No trick guarantees flowers “at the push of a button”. But those who do not discard their orchid too quickly, give it a short stay in partial darkness, use water and nutrients in measured amounts, and provide a bright, draught-free spot will often be rewarded with a surprise: the supposedly “spent” plant begins a new season and decorates the home with fresh blooms long after its first purchase.


Comments
No comments yet. Be the first to comment!
Leave a Comment