
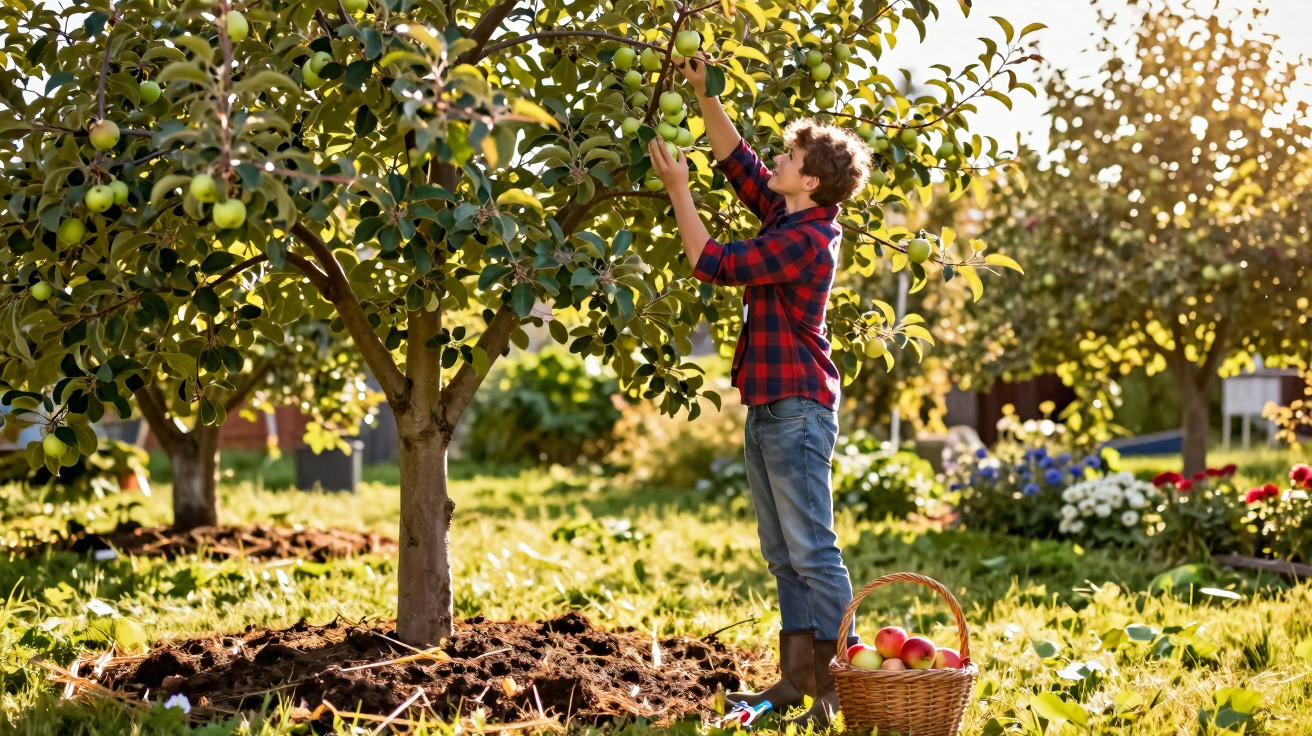
No expensive fertiliser, no horticultural degree and no magic required: with three simple actions, you can get even a tired apple tree producing properly again.
Many amateur gardeners reach for costly specialist fertilisers in frustration when their apple tree yields only a few undersized fruits. Yet the issue is often not the “wrong fertiliser” at all, but three basic care mistakes. Understand and correct them, and the very same tree can produce noticeably more-and better-apples, without a chemical fanfare or branded promises.
Why your apple tree does not respond to “miracle fertiliser”
An apple tree does not work like a houseplant on a windowsill. It is built for the long term, has deep-reaching roots and chiefly needs three things: air and light in its canopy, living soil, and a sensible balance in the amount of fruit it carries.
The real boost for an apple tree comes from pruning shears, a wheelbarrow of compost and your hands-not from a bottle of fertiliser.
If the tree has become too dense, is growing in compacted, nutrient-poor soil and has to carry every tiny apple through to ripeness, no fertiliser in the world can make up for it. Three clear steps will adjust the factors that truly matter.
Step 1: Prune properly so the apple tree can breathe
Many people are nervous about using a saw. Worried about “taking too much off”, they leave everything in place-then wonder why the fruit is small and unhealthy. A thick mass of growth in the canopy acts like a heavy coat for an apple tree: too little light, insufficient air and excessive moisture.
How to approach the tree canopy
Always begin by standing back and looking carefully. Ask yourself: where is hardly any light getting through? Which branches are rubbing against each other? Where can you already see dry or dead sections?
- Remove dead wood: Cut out dead, brittle, grey branches without hesitation.
- Deal with rubbing and crossing branches: Remove one of the two so that rubbing cannot create wounds.
- Cut back watershoots (gourmands): These upright shoots race upwards, produce very little fruit and consume a great deal of energy.
- Open up the centre of the canopy: The aim is a loose, “bowl-shaped” canopy that you can almost see through.
The tree should not look bare afterwards. Think of pulling a curtain slightly aside so sunlight can reach the window again. That is precisely the effect that benefits the apples: more sun reaches the leaves, the tree dries faster after rain, fungal problems are reduced and the fruit develops much better colour.
The right time for pruning
As a rule, the main prune is carried out from late winter to very early spring, before the buds begin growing in earnest. At this stage, the tree is ready to start the season, can seal wounds effectively and responds with strong but manageable growth.
Those who regulate growth a little every year avoid the “drastic prune” that merely encourages the tree to produce even more watershoots.
Step 2: Feed the soil instead of buying colourful fertiliser packs
Apple trees depend on a network of roots, fungi and soil organisms. Where that soil has been depleted, a quick burst of nutrients helps only briefly. Productive, loose ground provides a lasting solution.
Organic material-the best food for an apple tree
Most of the active fine roots sit directly beneath the canopy, in the area where rain drips from the branches. This is exactly where nutrients belong:
- Mature compost: Apply a layer 3–5 cm deep, but do not place it directly against the trunk.
- Well-rotted farmyard manure: Use a thin layer, and only on trees that have been established for several years.
- Dry grass cuttings: Spread them in fine layers so that they do not rot or mat together.
Leave a small circular gap around the trunk. Bark does not tolerate permanent dampness or direct contact with highly nutrient-rich material.
Mulch as a “living cover”
Place mulch over the compost. It retains moisture in the soil, protects fine roots from heat and frost, and gradually supplies fresh food for earthworms and other soil life.
Suitable options include:
- Straw or seed-free hay
- Leaves from native trees
- Woodchips from untreated branches (BRF)
A well-kept mulched area beneath an apple tree works like a slow-release continuous fertiliser: quiet, inexpensive and dependable.
If your soil is heavily compacted or very sandy, you can also work in a thin layer of compost in autumn or sow a green manure crop in the tree strip. This helps keep the root environment active and stable over the long term.
Step 3: Thin the fruit-less really is more
Now comes the part that many people find hardest: removing young fruit. At first, it can feel wasteful, but it often produces the greatest visible improvement.
Why too many apples weaken the tree
When an apple tree sets an exceptionally heavy crop, it has to spread its resources across too many fruits. The result can be:
- Small, bland or sour apples
- Branches bending to the ground or even snapping
- Strong “on-off” behaviour: a bumper crop one year, followed by almost nothing the next
This is exactly where fruit thinning comes in. It controls how many apples the tree actually has to bring through to maturity.
How fruit thinning works in practice
Wait until the small apples are roughly walnut-sized. Then work through the tree branch by branch:
- Examine each fruit cluster-several small apples will usually be growing close together.
- Select the strongest, best-positioned apple, generally the one in the middle.
- Carefully twist off all other fruits in the cluster with your fingers, or remove them using clean scissors.
As a rough guide, leave no more than one or two fruits for every 15 to 20 cm of branch length. It may look severe, but it will ultimately give you much larger, juicier apples while taking pressure off the branches.
The heart wants to keep every fruit; the head knows that a few fewer on the branch mean far more in the basket.
When to do each job so it pays off
The three steps work together best when the timing is right. This short overview makes planning easier:
| Task | Best time |
|---|---|
| Canopy pruning | Late winter to very early spring |
| Applying compost and mulch | Spring, after pruning or slightly later |
| Thinning fruit | Late spring to early summer, when walnut-sized |
Marking these short time windows in your calendar prevents rushed jobs just before harvest and makes the most of the tree’s natural cycle.
Common mistakes that hold back your apple harvest
Many problems in an apple garden are self-inflicted. Three familiar mistakes appear time and again:
- Pruning far too hard in one year: The tree responds with a flood of watershoots and looks like a broom again the following year.
- Piling fertiliser and compost directly against the trunk: The bark stays wet, creating ideal conditions for rot and bark diseases.
- Not thinning fruit: “Every blossom becomes an apple” may sound appealing, but it results in masses of tiny fruit and gaps in cropping the next year.
Knowing these pitfalls and avoiding them takes you halfway towards a heavily fruiting apple tree.
Additional tips: site, variety choice and companion plants
Even the best care has its limits if the location is fundamentally unsuitable. Apple trees prefer a position in full sun with good air movement. A permanently damp, cold corner behind the garage encourages fungal diseases and slows ripening.
Variety choice also plays a part. Highly susceptible varieties are more likely to develop scab or powdery mildew, while robust heritage varieties generally get through the season with less care. If you are planting a new tree, seek advice from local fruit growers or nurseries about varieties proven in your particular area.
Companion plants beneath an apple tree can also be worthwhile. Shallow-rooted herbs such as chives, calendula or borage attract pollinators, can partly suppress weeds and add colour to the tree strip. The important thing is not to create excessive competition in the soil: plants with high nutrient demands or densely spreading shrubs close to the trunk are not a good choice.
Healthy apples, healthy garden
Caring for an apple tree with pruning shears, compost and the confidence to leave gaps between the fruit brings more than full baskets: lower pest and disease pressure, more life in the soil and a garden that remains resilient without chemical inputs.
The three steps-opening the canopy, feeding the soil and thinning fruit-can be refined a little more each year. Over time, you develop a feel for your own tree: how vigorously it grows, how it responds to pruning and how much fruit it can genuinely carry. That is the point at which an “adequately maintained” apple tree becomes a reliable provider for the whole family.

Comments
No comments yet. Be the first to comment!
Leave a Comment