
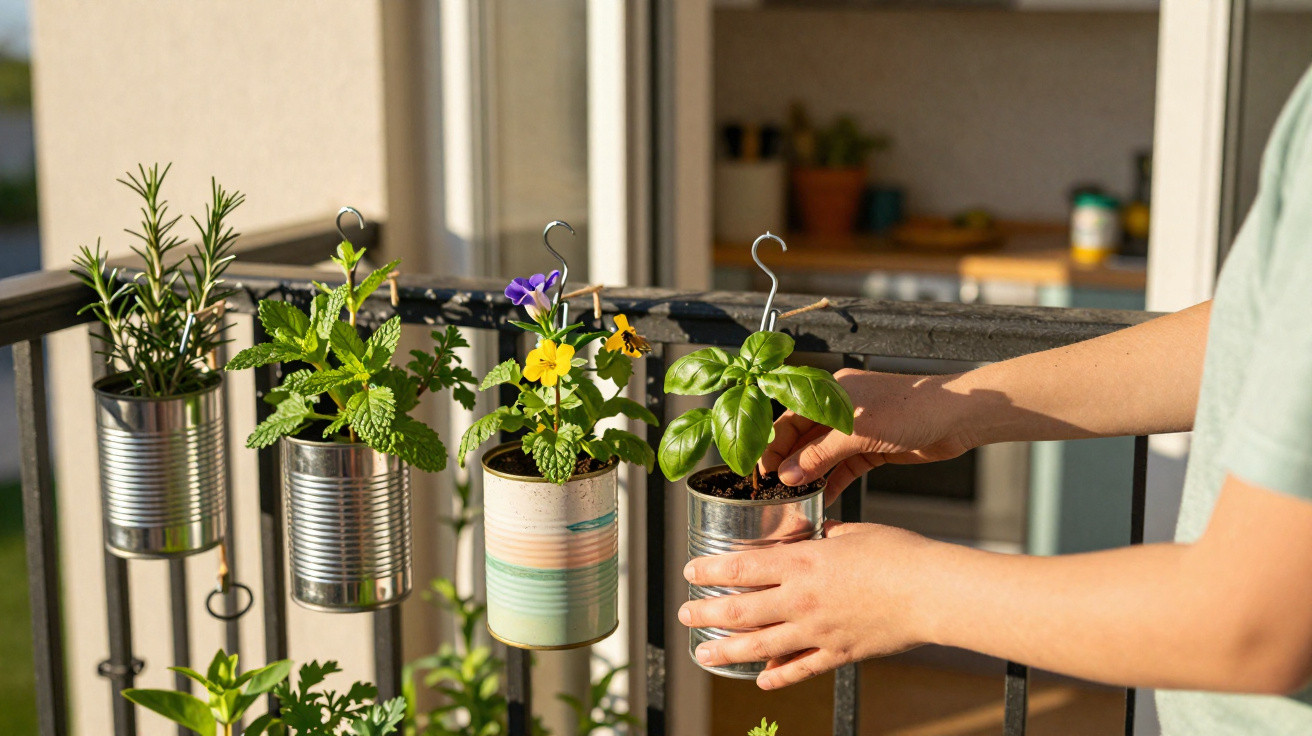
More and more amateur gardeners are suggesting a rethink of a familiar kitchen habit: rather than throwing away or recycling a common piece of packaging straight away, it can be transformed with just a few simple steps into an attractive herb pot or even a whole miniature garden – ideal for a balcony, patio or windowsill.
From kitchen to garden: why cans deserve a second life
Empty food cans appear in the kitchen almost every day: tomatoes, beans, sweetcorn and soup. After cooking, they usually end up without a second thought in the bin or with metal recycling. Gardeners are increasingly viewing them differently: as free, sturdy plant containers.
“Reusing cans saves money, cuts waste and creates room for fresh herbs, even on the smallest balcony.”
Cans may seem unremarkable in day-to-day life, but they offer several benefits:
- Durability: Metal is considerably tougher than many thin plastic pots.
- Compact size: They fit neatly on windowsills, steps and narrow balcony railings.
- Cost: They are already available at home, so there is no need to buy new pots.
- Sustainability: Upcycling conserves resources by turning waste into something useful.
This idea is particularly helpful for anyone short on space. Arranging several cans side by side on a fence or railing quickly creates a type of “vertical garden” without sacrificing valuable floor space.
Step by step: turning a can into an herb pot
No specialist equipment or professional experience is needed to turn an old can into a practical planter. Most of what is required can already be found around the home.
Preparation: cleaning and removing labels
Start by washing the can thoroughly. Food remnants can quickly go mouldy and may harm plants. Remove the label too if you want a clean, understated overall appearance.
- Remove the lid completely, smoothing any sharp edges with a file if necessary.
- Wash the inside and outside in warm washing-up water.
- Peel off the label and, if needed, use a little oil or rubbing alcohol to remove adhesive residue.
This leaves a clean, neutral base that is easy to adapt further.
Drainage: holes to prevent waterlogging
Every can needs drainage holes so that plants are not left sitting in water. Without drainage, roots can rot very quickly.
Suitable tools include:
- a small cordless drill with a metal drill bit
- a large nail and hammer
Several small holes in the base are entirely sufficient. If the can will later be hung up, make an additional hole at the top of the back; this is where the hanger will be attached.
Hanging cans with a coat hanger or string
An old wire coat hanger is enough to secure the cans to a wall, fence or trellis. It can easily be shaped into hooks and supports.
- Use pliers to open up the wire hanger and cut it into suitable lengths.
- Form one end into a hook that fits through the hole at the back of the can.
- Bend the other end into a larger hook that can hang over a nail, screw or trellis.
Strong string or garden wire can also be used instead. The important thing is that the can is securely suspended and does not shift with every gust of wind.
What goes into the can: compost and the best herbs
Loose potting compost is suitable for filling the cans, ideally a peat-free variety. It is often lighter while still retaining water well, and it protects peatlands because no peat has to be extracted.
“Herbs that grow compactly and recover quickly after regular cutting are well suited to cans.”
Popular choices for everyday cooking include:
- Parsley: Works with almost every savoury dish and enjoys partial shade to sunshine.
- Chives: Ideal for salads, scrambled eggs and spreads, and very reliable in pots.
- Thyme: Loves sunshine, needs little water and is perfect for Mediterranean dishes.
- Mint: Needs rather more water and regrows quickly – excellent for tea and drinks.
Anyone who enjoys experimenting can also try coriander, basil or oregano. Fill each can generously with compost and water well after planting, so the roots make contact with the compost.
Styling ideas: from rustic to pastel
Cans offer a surprising range of visual possibilities. Some people deliberately leave them metallic and slightly weathered, creating a rustic, almost industrial look. Others choose paint.
For painting, weather-resistant paint or metal spray paint is best. Pale pastel shades such as mint, pink and light blue are popular, while classic white or olive green also complement herbs well.
- Use one colour per can for a calm appearance.
- Choose tonal variations for a soft, contemporary effect.
- Label them with a marker or chalk paint, for example “Basil” or “Mint”.
For an extra touch, attach small wooden sticks or labels, tie raffia or jute ribbon around the rim, or combine a few cans with traditional terracotta pots.
Flowering cans for bees and butterflies
Flowering plants are another good option alongside herbs. Trailing varieties such as lobelia, nasturtiums or sweet alyssum can soon make a can resemble a miniature cascade of flowers.
Wildflower mixes that provide food for bees and other insects are also appealing. Even a few cans planted with these blooms can brighten up a dull corner considerably while supporting biodiversity at the same time.
Tips for care, safety and everyday practicality
To keep this improvised herb garden enjoyable for a long time, it is worth paying attention to a few easily overlooked details.
- Position: Herbs generally like plenty of light, although young plants do not always cope well with intense midday sun. A bright spot with some protection is ideal.
- Watering: Cans dry out more quickly than large containers. It is better to give smaller amounts of water more often than large quantities infrequently.
- Frost: Metal conducts cold. On chilly spring nights, bring the cans indoors temporarily if necessary, or hang them against a sheltered wall.
- Sharp edges: Check the rims and, where necessary, bend them over with pliers or cover them with tape – especially if children are helping.
Over time, tinplate can rust. Some people like this very vintage effect. Anyone wishing to avoid it can seal the outside beforehand with clear varnish.
Why a can garden is worthwhile for families and renters
For children, a can garden is an easy-to-understand project: rinse the can, make holes, paint it, add compost, add seeds – then watch everything grow. Along the way, they learn that packaging does not necessarily have to be rubbish and can still have a useful purpose.
For renters, the solution is practical because the cans can be hung up flexibly and removed again easily. There is no heavy planter and no permanent installation – a few nails or hooks are enough. When moving home, simply take the herb garden along.
There is another advantage: as prices rise, every bunch of fresh herbs grown at home can prevent an extra impulse purchase at the supermarket. Even a small can garden can provide a surprising number of leaves for pasta, salads, soups or drinks in everyday life.
Ultimately, this simple idea has a whole range of benefits: less waste, more greenery, more flavour in the kitchen, and a project that can be completed over a weekend using materials already at hand.
Comments
No comments yet. Be the first to comment!
Leave a Comment