
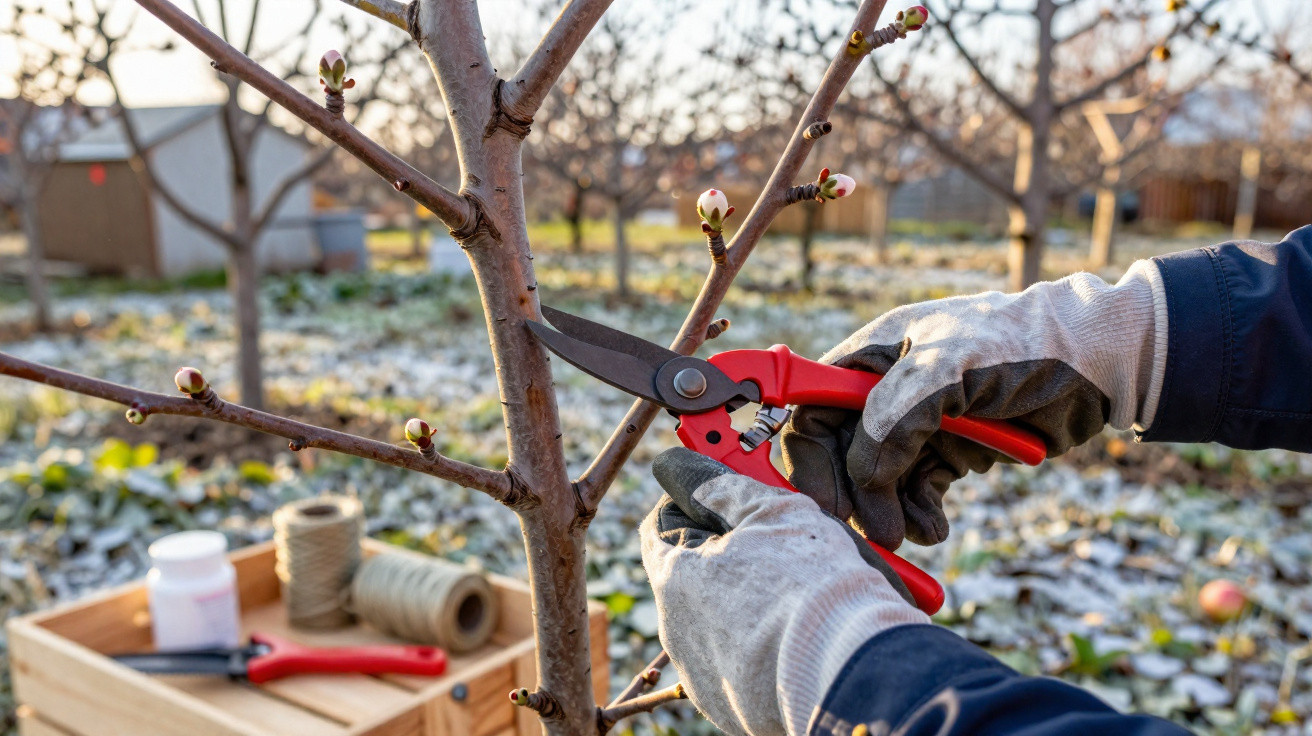
Many amateur gardeners sit back in late winter, convinced there is nothing to do in the orchard during February. That assumption can seriously reduce the harvest. Anyone hoping for juicy eating apples, fragrant apple pie or a store of homemade apple sauce in the months ahead should act before spring begins - by making one particular cut to the apple tree.
Why February shapes your apple harvest
Apple trees look almost lifeless in February: there are no leaves or blossoms, only bare branches. Yet an important process is taking place inside. The trees are dormant, with most of their sap drawn back into the roots. This is precisely the time when they cope well with pruning, and when it can be used to improve the crop.
February is ideal for the so-called fruit-pruning waist. Its purpose is straightforward: less unnecessary wood, more flower buds. Waiting until March or April, when the sap is already rising, places considerably more strain on the tree and may put some blossoms at risk.
“Pruning apple trees purposefully in February directs the tree’s energy away from producing wood and straight into flowers and fruit.”
When carried out properly, winter pruning allows the tree to enter spring with a balanced branch structure and plenty of productive buds. The benefits become apparent months later: more apples, larger fruit and fewer diseased areas.
Tools and a careful eye: preparation is essential for good pruning
Preparation comes before any branch is removed. Blunt or dirty tools cause needless injury to the tree and create an easy entry point for fungi and bacteria.
Essential equipment for pruning an apple tree
- Bypass secateurs for thinner shoots and accurate cuts.
- Loppers for thicker branches that need extra leverage.
- A pruning saw for large, old branches that cannot be cut with secateurs.
- Alcohol or disinfectant to clean blades between different trees.
Clean blades reduce the chance of carrying fungal spores or bacteria from one tree to another. A quick wipe with alcohol before moving on is enough.
Reading the tree: inspect first, prune afterwards
It is worth walking around the tree once before starting. Viewing it from a short distance makes its overall shape much easier to judge. The aim is an open, light-filled crown that allows sunlight to reach the inner branches in summer.
Pay particular attention to:
- branches that cross over and rub against one another;
- shoots growing steeply upwards, known as water shoots or “gourmand shoots”;
- branches growing inwards and crowding the centre of the crown;
- crooked, dead or visibly diseased sections.
Anything that causes rubbing, shade or pockets of damp weakens the tree and encourages disease. These branches should be at the top of the pruning list.
The key technique: directing the tree’s energy towards fruit
Fruit pruning is not about thinning the tree as heavily as possible; it is about making informed selections. The tree should retain a strong framework, while putting less energy into unproductive long growth.
The “three-bud rule” step by step
Even beginners can work methodically by following this simple approach:
- Find a side shoot growing from a stronger branch.
- Starting at the base of that shoot, count 3 buds, known in horticulture as “eyes”.
- Make the cut just above the third bud.
- Ensure that this third bud points outwards, away from the middle of the crown.
This leaves 3 well-supplied buds that can develop into productive short shoots. An outward-facing bud helps the crown grow wider and more open rather than becoming overly crowded.
“Fewer buds in the right positions are more valuable to the harvest than numerous weak shoots growing in shade.”
How much can be removed - and when should you stop?
One common mistake is excessive caution. Those who prune almost nothing out of fear may end up with a bushy tree that produces only a few small apples. The opposite extreme is equally problematic: cutting everything back severely. The tree then responds with masses of water shoots, invests once again in wood rather than fruit, and yields very little.
As a broad guide, a neglected tree can initially lose a good third of its shoots, but this should be spread across several years. Each winter, it is better to improve one section in a planned way than to strip the whole tree in a single operation.
Making the right cuts: small details, major results
Whether a cut heals cleanly or becomes a site for disease depends largely on the pruning technique.
- Always cut at an angle: the cut should slope slightly away from the bud that remains.
- Do not leave a stub: cut immediately above the bud, without leaving several millimetres of wood above it.
- Avoid crushing the wood: if the secateurs squash the branch, they are too blunt or the branch is too thick.
An angled cut lets rainwater run away instead of sitting on the bud. Dampness directly around a bud provides ideal conditions for fungal infection.
Wound protection, hygiene and patience after pruning
Once the pruning itself is finished, protection and aftercare matter. Larger cut surfaces measuring around 2 to 3 centimetres in diameter can provide an entry route for decay organisms. In these cases, a wound sealant, such as one based on tree resin or clay, can help.
Apply the sealant in a thin layer over the fresh cut. This slows drying, reduces cracking in the wood and makes it harder for fungal spores to take hold.
The final step is often underestimated: clear away the prunings. Diseased material should not be left near the tree; dispose of it separately. Healthy branches can be chipped and either composted or used as mulch.
“Clearing up after pruning prevents old sources of disease from surviving in the soil and infecting the tree again the following year.”
How to recognise an apple tree that is ready to flower
After 1 or 2 weeks, the tree will still look bare, but the groundwork has been laid. As spring progresses, clearly recognisable flower buds develop on the remaining shoots. They are usually thicker and rounder than the narrow leaf buds.
A properly pruned tree will have:
- a clear basic framework with a small number of strong main branches;
- plenty of short side shoots bearing thick buds;
- an open crown through which light and air can move freely.
With older trees, it can take 2 or 3 years of regular winter pruning before the full effect becomes visible. Those who keep at it will notice a clear difference: the trees crop more consistently and are less likely to fall into typical “alternate-bearing years” with widely fluctuating yields.
Tips for different garden situations
Small garden, large tree: keeping an apple tree under control
In many home gardens, an apple tree quickly becomes too tall. Reaching both the fruit and the branches then becomes difficult. Over several years, the highest shoots can gradually be brought down. Rather than harshly cutting off a thick upper trunk, each year redirect some of the top branches to lower, outward-growing side shoots.
This keeps the tree vigorous while giving it a more compact shape that is easier to harvest and maintain.
Giving young trees the right start
For newly planted young apple trees, pruning serves a different purpose: it creates the future framework. Usually, 3 to 4 well-spaced main branches are retained around the trunk. All other shoots should either be cut back considerably or removed completely.
Working systematically in the first few years saves many later corrections to a poorly formed tree.
Risks, mistakes and how to avoid them
The greatest risk is being overly decisive. Removing nearly all the major branches from an ageing tree in one winter triggers a kind of emergency response: during summer, the tree produces an extreme number of upright water shoots but scarcely any flowers. It is better to rejuvenate the tree in stages, replacing only some of the old branches each year.
Another difficulty is uncertainty when identifying buds. Fruit buds look thicker and more rounded, whereas leaf buds are pointed and flat. Comparing them directly on the tree is extremely helpful. Once the difference is understood, it becomes possible to encourage the shoots that will actually bear apples.
As a rule of thumb, well-planned and targeted cuts in February are better than rushed pruning just before flowering. The tree responds more calmly, pruning wounds heal more effectively and the autumn basket will be fuller.


Comments
No comments yet. Be the first to comment!
Leave a Comment