
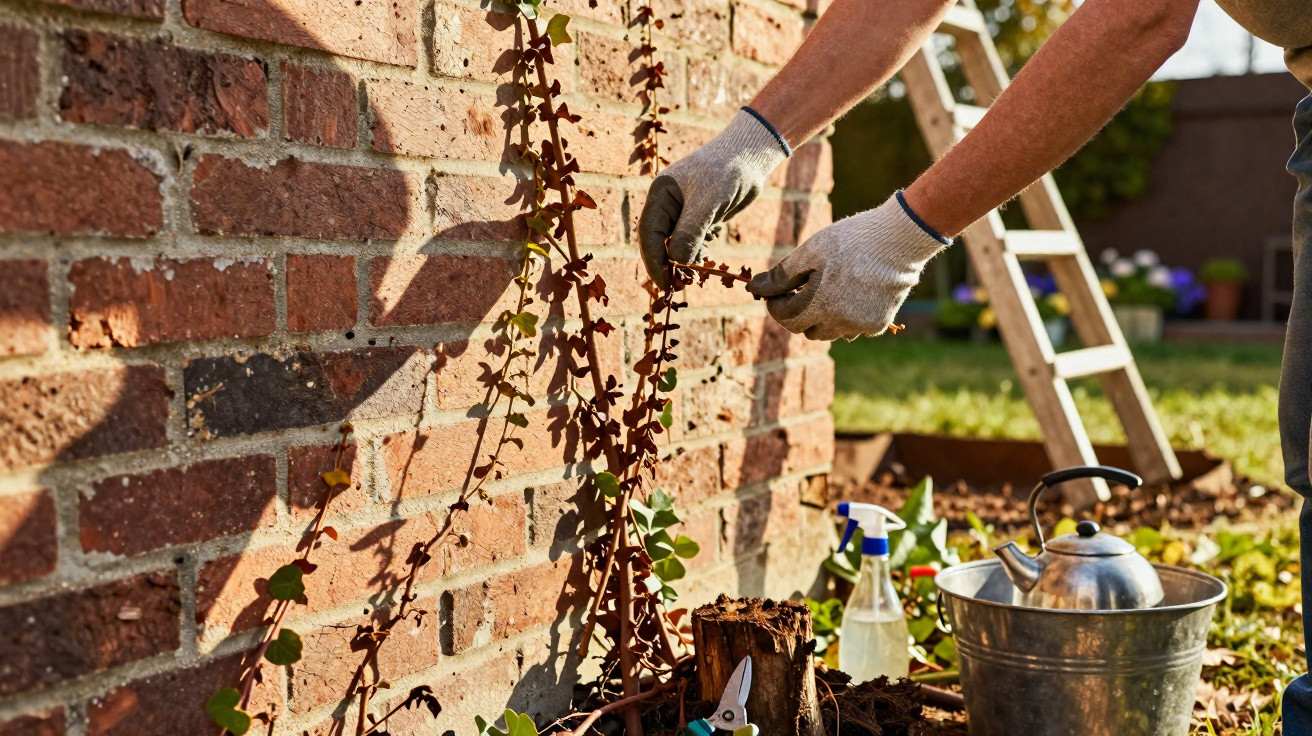
When faced with a plant that has been established for years, many gardeners have the same instinct: pull on the long stems to clear the wall as quickly as possible. That is often when the trouble starts. The holdfasts resist, render comes away in patches, and the plant may even return the following spring. A more measured approach, starting at the base, delivers far better results.
Why long stems cling so firmly to walls
This climbing plant does not merely wind around its support. It also produces small holdfasts, sometimes known as aerial roots, which adhere to timber, stone, brick or render. These allow it to climb to considerable heights without needing a trellis.
On a sound, sturdy wall, these attachments do not invariably cause immediate damage. The situation is different where the masonry already has cracks, crumbling mortar joints or an ageing finish. Stems can then work their way into imperfections in the wall. On a roof, they trap moisture, block downpipes and may lift poorly secured components.
Yanking hard on the green growth does not tackle the issue at its roots. The base remains alive underground. It continues to feed the cut stems or prepares fresh shoots. An old stump can become extremely thick, almost woody, and may survive for several decades.
“The right approach is to cut off the stems’ supply before trying to remove them from the wall.”
The pruning cut that changes the rest of the job
First, locate where each large stem begins at ground level. Foliage can conceal several separate plants, particularly alongside an old wall or behind a hedge. Carefully part the leaves and identify the main stems, which are usually brown, thick and stiff.
Using sharp secateurs, cut every stem as close to the soil as you can. Loppers are suitable for medium diameters. If a stem resembles a small branch, use a pruning saw. The aim is straightforward: separate the climbing growth from the stump that supplies it.
Rather than making one cut, it may be helpful to remove a short section several centimetres long. This prevents a stem from remaining connected and healing over. With especially vigorous plants, check that no secondary stem has been missed behind fencing, a downpipe or a flower bed.
- Put on thick gloves to prevent scratches and skin reactions.
- Use disinfected secateurs, especially after working on diseased plants.
- Wear eye protection when cutting taut stems or working at height.
- Do not work alone on a ladder close to guttering or a roof.
Wait rather than pulling everything off on the same day
Once cut, the leaves do not vanish at once. They generally turn yellow within one to two weeks, before becoming brown and dry. Depending on the time of year, the wall’s aspect and the thickness of the stems, complete drying may take longer.
This waiting period significantly reduces the risk of damage. As a stem dies, it gradually loses flexibility and its attachments release more easily. You can then remove it in small sections without forcing it. On a fragile façade, it is best to work slowly by hand, using a soft brush.
A wire brush may be useful on hard stone or robust brick, but it can scratch painted finishes and pull away crumbly sections of render. Always test your chosen method on an inconspicuous area before tackling the whole surface.
Removing the stump to reduce returning shoots
Cutting the hanging stems halts further spread, but it is not always enough to remove the problem altogether. Once the dried foliage has been taken down, deal with the base. Loosen the soil around the stump to a depth of roughly 20 to 30 centimetres using a narrow spade or digging fork.
Large roots often spread out like spokes. Follow them as far as possible and cut them cleanly. If the plant is growing against a wall, do not drive a heavy tool into the foundations. Work in small areas to avoid weakening masonry that is already damaged.
“An old stump will not always come out in one session: it is better to work several times over three to six months than damage the wall or your back.”
After extraction, collect the stem fragments and thick roots. Leave them to dry on a tarpaulin in the sun before disposing of them. Avoid putting them straight into a home compost heap. Some pieces can regrow in damp conditions, especially if they remain in contact with soil.
Monitor for three months: the detail that prevents another invasion
Regrowth is often inconspicuous at first. A small glossy leaf emerging close to the wall may signal that a missed root is starting again. Check the area every ten to fifteen days for around three months. Pull out young shoots as soon as they appear, while they can be removed easily.
This monitoring takes only a few minutes, yet it prevents the plant from colonising the façade again the following year. If the soil remains bare after the work, a thick mulch can also hinder new shoots from emerging. Bark, dead leaves or shredded branches offer a simple option around existing plants.
Should you use boiling water or vinegar?
Very hot water can scorch visible young shoots, but it will not necessarily deal with a deep stump. Pour it carefully, well away from plants you want to keep, and without creating a burn risk for people or animals.
Vinegar, often promoted as a garden remedy, acidifies the soil and can harm neighbouring plants. Repeated use also disrupts beneficial soil organisms. For a plant growing against a façade, cutting the stems, gradually extracting the roots and checking regularly remain more manageable options.
If stems have already reached a roof, come into contact with cables or cover a large area of façade, calling in a professional can prevent a fall or costly damage. In other cases, secateurs, a little patience and regular checks are often enough to regain lasting control of the garden.


Comments
No comments yet. Be the first to comment!
Leave a Comment