
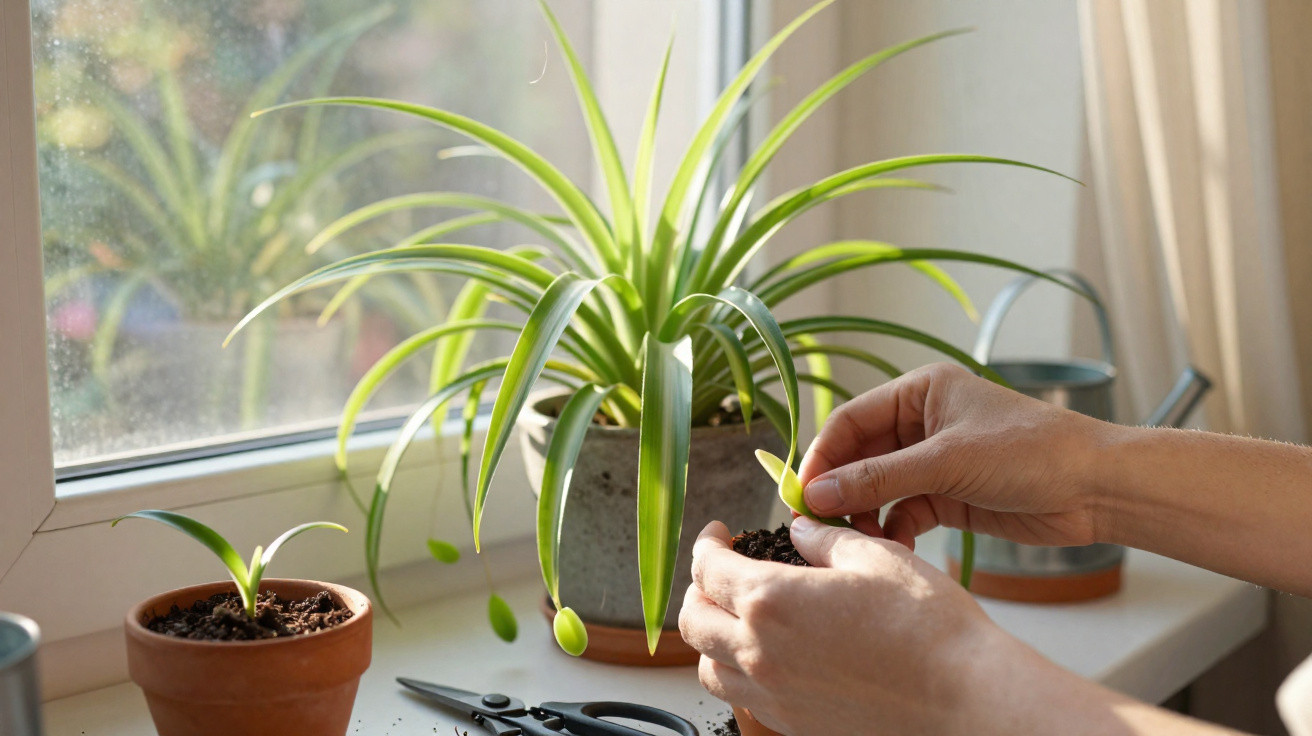
Many plant enthusiasts will recognise the problem: a spider plant (Chlorophytum comosum) looks excellent in its pot, yet the characteristic long stems with tiny “plantlets” never appear. Rather than a trailing houseplant with a cascade of new plants, it produces only a dense tuft of leaves. There is usually no mystery behind this; the balance of light, pot size, fertiliser and watering simply is not quite right yet.
How a spider plant decides when it is ready to produce offspring
Spider plants are among the houseplants that are exceptionally easy to propagate – provided the conditions suit them. In nature, they grow long, hanging shoots known as runners or stolons. Small leaf rosettes form at their ends, gradually develop their own roots and mature into complete plants.
The process is much the same indoors. However, the plant needs a certain amount of “starting capital” first:
- Age: A spider plant will generally begin producing plantlets after around one to two years.
- Stored energy: Its fleshy roots act as storage organs. It only puts energy into offspring once sufficient reserves have built up.
- Mild stress: Being slightly pot-bound and receiving moderate amounts of nutrients shifts its focus away from root growth and towards developing plantlets.
“A spider plant without plantlets is often not ill – it simply feels too comfortable or is receiving the wrong light.”
Once the balance feels right to the plant, it switches into propagation mode. Small, inconspicuous flowers appear on the runners first; later, the flower buds thicken into miniature plants with their own whorls of leaves.
The role of light and day length: no plantlets without the right day–night rhythm
Light affects more than leaf colour: it also determines whether a spider plant enters propagation mode at all. Two factors matter especially: brightness and duration.
A bright position, but not blazing sun
A spot close to an east- or west-facing window is ideal. Here, the plant receives plenty of light without exposure to intense midday sun.
- Too dark: The leaves become limp and the plant conserves energy, so plantlets fail to form.
- Too sunny: Brown leaf tips and stress result, causing the plant to use its resources to repair leaves and roots rather than produce offspring.
A bright but lightly sheltered position offers the right compromise: enough light for energy production, without scorching.
Day length as a hidden trigger
What is less widely known is that spider plants respond to the length of the day. In homes, lights are often left on late into the evening. This artificially extends daylight and can prevent the formation of plantlets.
“Limiting the lighting period to fewer than twelve hours a day signals to the spider plant: now is the time for flowers and plantlets.”
A practical approach at home:
- Place the plant by a window, but avoid directing room lighting onto it in the evening.
- In rooms where lights remain on late, such as the kitchen or home office, move the spider plant to a less frequently used room.
- Deliberately create “shorter days” for three to four weeks – for example, turn lights off by 8 pm if the plant would otherwise be lit by lamps.
Pot size, fertiliser and watering: mistakes that prevent spider plant plantlets
Alongside light, the pot and care routine are the main reasons many plants do not reproduce. Most spider plants are simply too comfortable.
Why a snug pot is beneficial
This plant likes its roots to fill the pot well. A slightly overcrowded pot puts it under gentle pressure. It then slows root development and is more likely to send out runners and plantlets instead.
- Repot only every two years, ideally in spring.
- Choose a pot that is only one size larger each time; do not move it straight into a huge pot.
- Roots emerging from the drainage holes are a positive sign: this indicates the mild stress the plant uses for plantlet production.
In a pot that is too large, a spider plant channels considerable energy into roots and fresh leaves. Plantlets are left behind.
Too much fertiliser makes it “lazy”
Many people mean well with liquid fertiliser and add some with every watering. For propagation, this is more likely to be counterproductive.
“Heavily fertilised spider plants mainly build leaf mass instead of investing in new plants.”
A proven routine is:
- Fertilise once a month from spring until late summer.
- Fertilise very sparingly, or not at all, in autumn and winter.
- It is better to under-fertilise slightly than to over-fertilise.
Watering routine: allow slight drying out
Because its fleshy roots store water, a spider plant copes well with short dry spells. These periods provide a gentle growth stimulus.
- Allow the top layer of compost to dry out clearly between waterings.
- Avoid waterlogging at all costs, as it causes the roots to rot.
- In dry centrally heated air, misting the leaves occasionally can help without keeping the compost constantly wet.
This combination of a snug pot, restrained fertilising and moderate watering puts the plant into a productive “propagation mode” rather than encouraging leaf growth alone.
Removing and rooting spider plant plantlets correctly
Once small leaf rosettes have formed on the runners and tiny root beginnings are visible, the young plants can be moved into their own pots.
The right time
Separation is easiest during the warmer part of the year, roughly from May to August. Young plants establish quickly then and recover more easily from setbacks.
The ideal time is when:
- The miniature rosette has several leaves.
- The first fine root tips can be seen.
- The runner feels firm rather than very fresh and soft.
Two reliable methods for rooting
There are essentially two straightforward ways to raise the small plants.
| Method | Procedure | Advantage |
|---|---|---|
| In water | Put the base of the leaf rosette in a glass of water until the roots are around 3 cm long, then pot it up. | Root growth is easy to monitor, making this ideal for beginners. |
| Directly in compost | Place the plantlet straight into loose, free-draining compost and keep it lightly moist. | The plant only has to be moved once and is usually established more quickly. |
Many hobby gardeners use a third option as well: place the leaf rosette in a small pot of compost while it remains attached to the mother plant via its runner. Cut the runner only after it has rooted well. This significantly reduces the risk of failure.
Caring for young spider plants: what new growth needs
Freshly rooted spider plants are more sensitive than their hardy parent. A few simple measures will help them become strong houseplants quickly.
- Light: Bright but out of direct sun – around half a metre from the window.
- Temperature: 18 to 22°C is ideal.
- Moisture: Keep the compost evenly lightly moist, with no waterlogging.
- Humidity: Slightly higher humidity, for example from a bowl of water nearby, encourages root development.
- Fertiliser: Do not apply any until at least four to six weeks have passed, and then use a very weak dose.
“The more slowly and steadily young roots develop, the longer-lasting the eventual houseplant will be.”
Frequently asked questions: when is my spider plant “ready” for plantlets?
Many owners underestimate how strongly the plant’s location and care influence its behaviour. Two points are often overlooked: light duration in winter and the temptation to repot too early.
In flats with numerous lamps, screens and smart lights in particular, a spider plant is effectively exposed to constant light. Those who consistently rely on natural daylight and switch off unused light sources in the evening often notice the first flower and plantlet buds after only a few weeks.
It pays to be restrained when repotting. As long as the plant appears healthy, produces new leaves regularly and the pot is not bursting, it can safely remain in its snug space. This slight lack of room is often precisely what prompts it to put energy into new plants instead of new roots.
Anyone who deliberately uses these adjustments – day length, position, pot size, moderate fertiliser and a considered watering routine – can turn a single spider plant into a whole collection within a few months. This is ideal for adding greenery to your home, giving plantlets as gifts or creating a small green “plantlet exchange” with friends and neighbours.



Comments
No comments yet. Be the first to comment!
Leave a Comment