
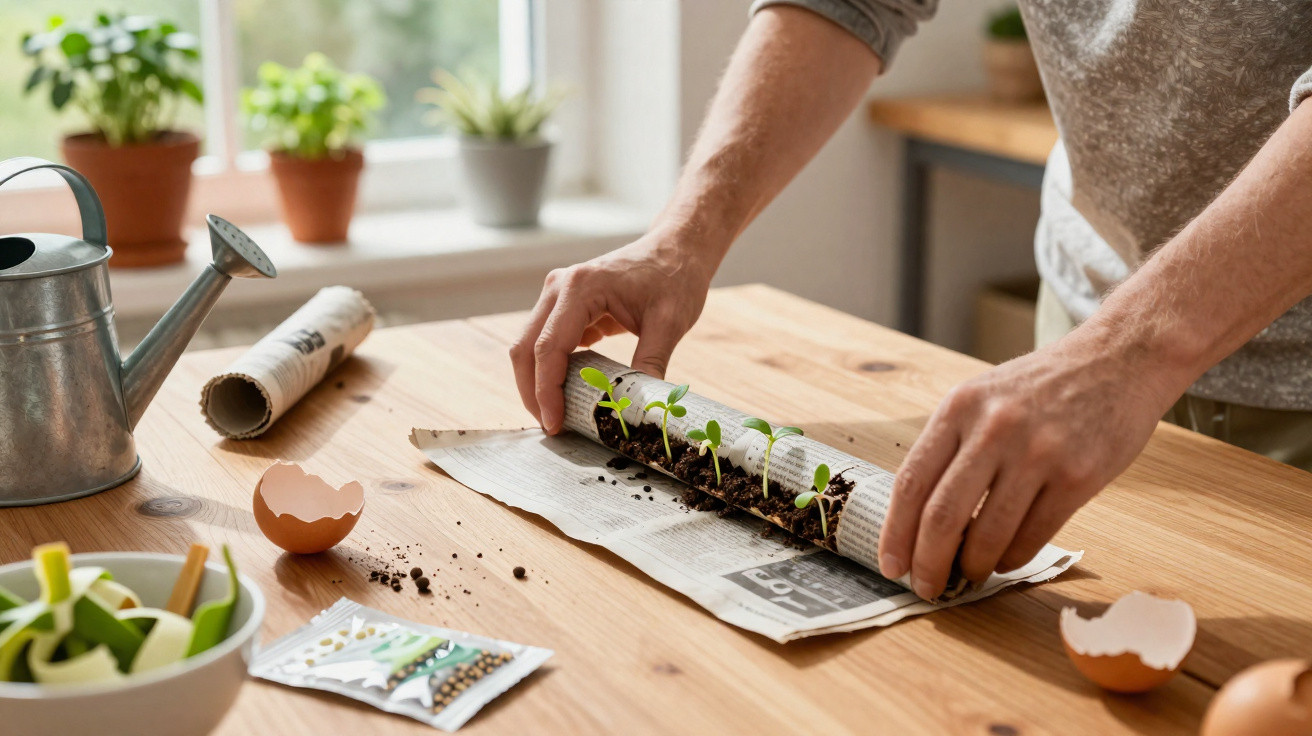
In spring, anyone keen to start sowing will know the problem: the seed packets are plentiful, but the shelf of pots and trays is empty. Rather than making a frustrated trip to the garden centre, many people now use a remarkably simple technique that turns a piece of plastic or paper into a mini greenhouse.
The seed roll: the idea behind the snail method
Gardeners often call it “snail sowing” or a seed roll. It is a rolled strip of flexible material containing a thin layer of growing medium and the seeds within it. The result is a compact roll that takes up very little room while holding several plants.
“Several rows of seedlings in a single little roll – all in the space of a coffee cup.”
The principle is as straightforward as it is clever: rather than filling lots of individual containers, everything goes into one roll. This technique is particularly useful when windowsills, shelves and propagation trays are already overflowing.
Why more and more home gardeners are going without pots
A seed roll has several practical advantages that quickly make it appealing:
- Space-saving: Dozens of seeds can sit closely together in one container rather than in numerous individual pots.
- Low-cost: It uses items that are already found in almost every household.
- Recycling-friendly: Plastic bags, leftover film and old newspaper are given a second use.
- Roots stay intact: Seedlings can later be removed individually by slowly unrolling the roll.
- Easy to monitor: All seedlings are kept in one place, making watering and observation simpler.
This method is especially well suited to rented flats with limited space. The roll fits on a saucer, in a shallow dish or even inside an empty yoghurt pot. Anyone wanting to grow several varieties can simply place a few rolls next to one another.
Materials: what you actually need for a seed roll
A modest basic kit is enough to get started, and much of it is likely to be in the kitchen already:
- a clean plastic bag, a piece of film or newspaper
- kitchen paper or a thin cloth as a moisture-retaining layer
- finely sieved seed compost
- the seeds you want to sow
- a flat plate, saucer or small dish
- optional: an elastic band or piece of string to secure it
This can easily replace an entire collection of propagation pots. It is particularly handy that different materials can be combined, such as film for the outer layer and kitchen paper on the inside.
Step by step: turning waste into a seed roll
1. Prepare the base
Lay the film or paper flat on a table and cut it into a long strip. A width of around 10 to 15 centimetres works well. The longer the strip, the more seeds it can hold.
Place a layer of kitchen paper or thin cloth on the strip. This layer helps distribute moisture evenly and prevents the compost from sitting directly against the plastic.
2. Add the growing medium
Spread a thin layer of lightly moistened seed compost over the kitchen paper. The compost should be crumbly and damp rather than wet. One centimetre is entirely sufficient. Too much growing medium makes the roll harder to form later.
“The compost should feel like a wrung-out sponge – damp, but without puddles of water.”
3. Position the seeds with space between them
Now add the seeds. Arrange them in a row along the length of the compost. Leave a few centimetres between each seed. This gives the roots more room to develop and stops the young plants from immediately becoming tangled together.
For very fine seed, such as basil or strawberries, a light scattering is enough. Larger seeds, including peas or beans, are better placed individually; otherwise, the roll becomes too crowded.
4. Roll it up until the snail stands upright
Starting at one end, carefully roll up the strip. Press it gently as you go so that the compost and seeds remain in position. You will end up with a compact roll resembling a small snail.
Stand the roll upright in a dish or on a saucer. If necessary, use an elastic band to hold its shape. The open side of the roll should face upwards, as this is where the shoots will later emerge.
Care: keeping seed rolls growing well
The seed roll works like a mini greenhouse. To do its job, it needs three things: moisture, light and a reasonably stable temperature.
- Maintain moisture: Add a little water to the plate so that the lower edge of the roll sits lightly in it. Moisture will rise upwards, keeping the compost and paper evenly damp.
- Provide light: Put the arrangement in a bright window; an east- or west-facing window is ideal. Strong direct midday sun can scorch young seedlings.
- Watch the temperature: Most vegetables germinate reliably at 18 to 22°C.
Check the roll regularly. If the compost at the top feels dry, top up the water in the plate. If water remains in the saucer for days, pour some away, as mould may otherwise develop.
The right time to plant out
After around two to three weeks, the first plants will be ready to move. A useful guide is when the first true leaves, characteristic of the variety, appear alongside the seed leaves.
Carefully and slowly unroll the seed roll. Work from one end to the other, keeping the roots in as much of their compost as possible. Then plant the individual seedlings into pots or straight into the bed, depending on the weather.
“Anyone who patiently unrolls the roll will save the plants from root damage and themselves from losses.”
After moving, young plants need a little protection: a shaded spot for a few days, regular but gentle watering, and no direct midday sun.
Which plants are particularly suitable
Not every crop responds equally well to a seed roll. Some cope with it extremely well, while others are less suitable. Good choices include:
- lettuces and Asian salad leaves
- tomatoes, peppers and chillies
- kohlrabi, broccoli and cauliflower
- herbs such as basil, parsley and dill
- flowers such as French marigolds, zinnias and pot marigolds
Varieties with very delicate taproots, such as carrots or parsnips, are less ideal. It is better to sow these directly in the bed, as transplanting later disturbs the main root too much.
Common mistakes and how to avoid them
The method is simple, but a few pitfalls come up repeatedly:
| Problem | Likely cause | Solution |
|---|---|---|
| Mould on the compost | too much water, poor ventilation | water more sparingly, air it occasionally and do not suffocate the roll in a closed box |
| long, thin seedlings | too little light, surroundings too warm | move it to a different spot, place it closer to the window or use a grow light if needed |
| seedlings fall over | sown too closely or pricked out too late | transplant crowded plants earlier and thin them out more firmly |
Why this method suits the times so well
Many home gardeners now want to save money and produce less plastic waste. The seed roll meets precisely these needs. It makes use of available materials, saves space and lowers the barrier to entry for beginners without extensive equipment.
At the same time, keeping seeds close together creates a kind of “control centre” for the start of the growing season: all delicate young plants are in the same place, respond in similar ways and can be compared easily. Anyone making several seed rolls with different varieties will soon get a sense of how much germination speed and growth can vary.
The technique is particularly suitable for families with children. The little rolls are easy to watch, and seedlings visibly grow out of the open upper edge day by day. In this way, a leftover piece of plastic becomes an engaging windowsill gardening project.
Comments
No comments yet. Be the first to comment!
Leave a Comment