
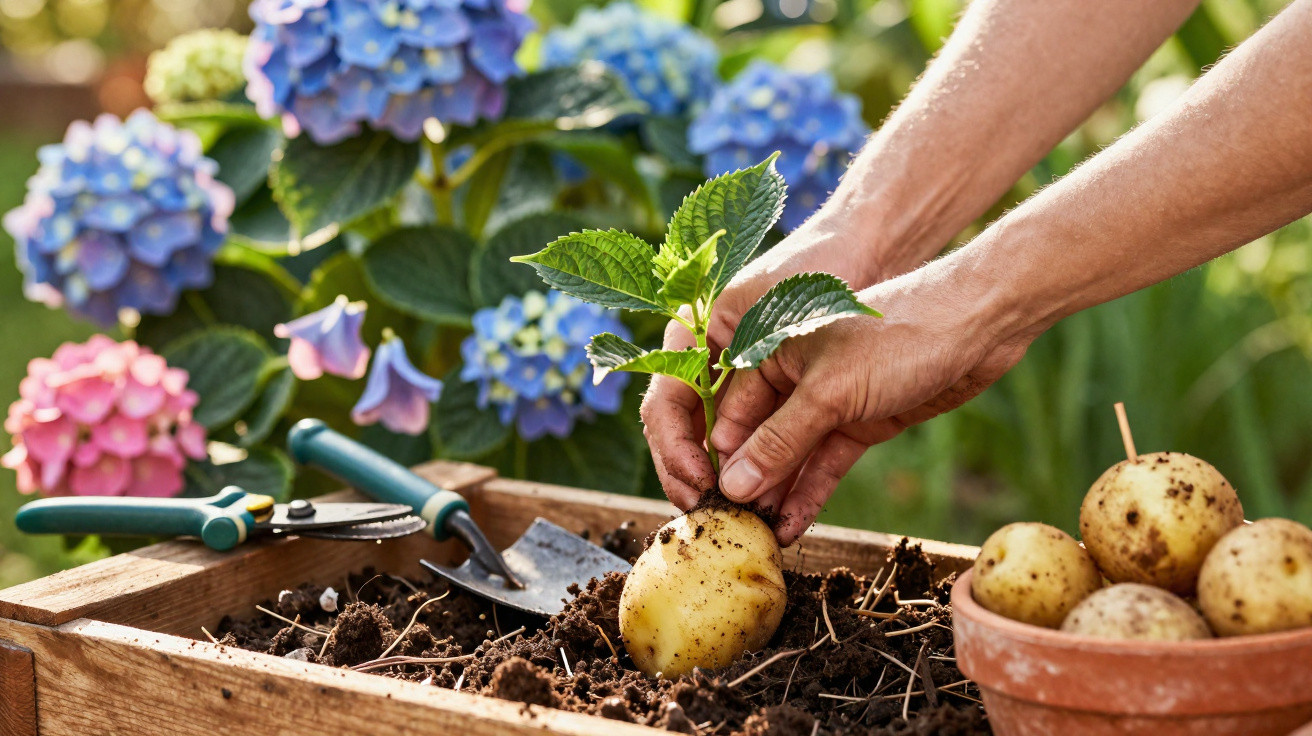
When hydrangeas look brown, limp and scorched after a harsh winter, they are often ruthlessly thrown onto the compost heap. Many amateur gardeners give up, even though there may still be life inside the stems. A surprisingly simple method using an ordinary potato can help turn the last healthy branches into strong new plants – at virtually no cost.
Why hydrangeas seem to die but may still survive
Hydrangeas are sensitive to frost, intense sunshine and drought. Their leaves yellow and drop, while the stems can appear burnt. Although the shrub may look dead from the outside, living tissue is often still hidden inside the wood.
It is particularly worth inspecting the plant carefully after a cold winter:
- Cut into a suspect stem: if the inside is still green, the shrub is alive.
- If the bark feels flexible rather than brittle, the plant still has some vigour left.
- These healthy remaining sections can be used to propagate new hydrangeas without difficulty.
“Anyone who does not throw away struggling hydrangeas but propagates them deliberately can fill their garden with plants again for no cost.”
This is where the potato comes in. It acts as a small natural water store and provides a helping hand for new roots.
How a potato helps a hydrangea make a fresh start
The idea may initially sound like a gardening myth, but it has a very practical basis. Potatoes retain plenty of moisture and contain nutrients. Both are urgently needed by cuttings, preventing them from drying out before roots have formed.
The moist potato stops the cut surface of hydrangea cuttings from drying out. At the same time, it holds the base of the young stems firmly in place rather than allowing them to shift in loose soil.
“The potato acts like a little incubator: moist, stable, nutrient-rich – ideal for allowing a cutting to form roots undisturbed.”
Hydrangeas and roses in particular benefit from this technique. They respond well when the lower part of their stems remains consistently slightly moist without sitting in wet conditions. A potato is not a replacement for good soil; it simply provides the crucial initial boost.
The best time for the potato experiment
This technique does not work equally well at every time of year. The greatest chance of success is from late spring into summer.
The ideal conditions are:
- The stems are green, flexible and not yet woody.
- The plant is preferably not in full flower.
- Temperatures remain consistently above 10°C.
This approach can create new life from a weak shrub, even if the parent plant eventually dies completely. Many gardeners use it as a safeguard before giving up on a severely weakened hydrangea bush.
Step by step: rooting hydrangea cuttings with a potato
1. Choose a suitable stem
Look for a branch on the hydrangea that appears healthy:
- Around 10 to 15 centimetres long.
- At least two clearly visible leaf nodes, or thickened points on the stem.
- No flowers on the stem, as blooms take too much energy from the young plant.
Remove the stem with sharp, clean secateurs. Making an angled cut just below a node improves the likelihood of producing strong roots.
2. Prepare the cutting
Strip off all leaves from the lower section so that the part which will later go into the potato is completely bare. Two small leaves can remain at the top; if they are very large, it is best to cut them in half to reduce water loss through evaporation.
If available, you can dip the cut end in rooting powder. This is not essential, but it often improves the success rate.
3. Prepare the potato correctly
Choose a firm, medium-sized potato with no rotten patches. There is no need to peel it. Use a pencil or thin wooden stick to make a hole around five centimetres deep in the potato.
“Important: the hole should be as snug as possible, so the cutting sits securely and is surrounded by the moist potato.”
Insert the lower part of the cutting into this hole. It should fit firmly and not wobble.
4. Plant the potato and cutting
Now comes the key stage: plant the entire potato in a bed or a pot.
- Choose loose soil with good drainage.
- Bury the potato completely, leaving only the green cutting above the surface.
- Water it thoroughly, but do not turn the soil into a swamp.
Keep the soil consistently slightly moist. Waterlogging quickly causes rot in both the cutting and the potato.
How to tell whether the trick is working
After around three to four weeks, it should become clear whether the method has worked. One simple test is enough:
- Hold the cutting carefully and give it a very gentle tug.
- If you feel resistance, roots have formed.
- If it pulls out easily, the attempt has not succeeded.
“No success the first time? Simply work with several cuttings at once – this increases the chance that at least some of them will form roots.”
As soon as fresh new leaves appear, the young hydrangea has passed the critical stage. From then on, it can support itself through its own root system.
Caring for a young hydrangea after rooting
Even once the cutting has rooted, the plant remains delicate at first. Moving it straight into full sun or an exposed, draughty part of the garden would be too harsh.
For the next stage, follow these steps:
- Keep the young hydrangea shrub in a pot at first.
- Choose a lightly shaded position with no direct midday sun.
- Keep the compost evenly moist, but do not allow it to remain constantly wet.
- Only start using a mild organic fertiliser once the plant is visibly growing.
The hydrangea should not be moved to its final position in the bed until the following spring. By then, it will have developed a strong root system that makes it more resilient to frost and drought.
Mistakes that ruin the potato trick
The method is straightforward, but there are a few pitfalls:
- Soil that is too wet causes the potato and cutting to rot.
- A position in full sun dries out the cutting despite the potato.
- Old, woody stems root far less successfully than young green ones.
- Trying it in autumn or winter, when the plant is dormant.
Anyone who avoids these mistakes has a much better chance with the potato method than with a bare cutting placed directly in soil or a glass of water.
Why this experiment is especially worthwhile for amateur gardeners
Hydrangeas are not particularly cheap to buy, especially larger or unusual varieties. A few cuttings and a few potatoes from the kitchen can quickly create a whole collection of plants.
The benefits are obvious:
- No extra expense: potatoes are found in almost every household.
- Very little risk: the experiment hardly harms the parent plant.
- More plants in a short time: ideal for new beds or hedges.
Anyone who enjoys gardening can also try the technique with other shrubs. Roses, lavender and some herbs often respond similarly well to their start in a potato bed.
A tip for impatient gardeners and beginners
Rather than setting up just one cutting, it is worth making a small “cutting station”: place several potatoes in a box, each with two to three stems. This improves the hit rate, and the wait feels less long.
This method is especially suitable for beginners because it is forgiving when watering is not perfectly managed. The potato cushions small mistakes in the amount of water and gives young hydrangeas the crucial head start they need for rooting.

Comments
No comments yet. Be the first to comment!
Leave a Comment