
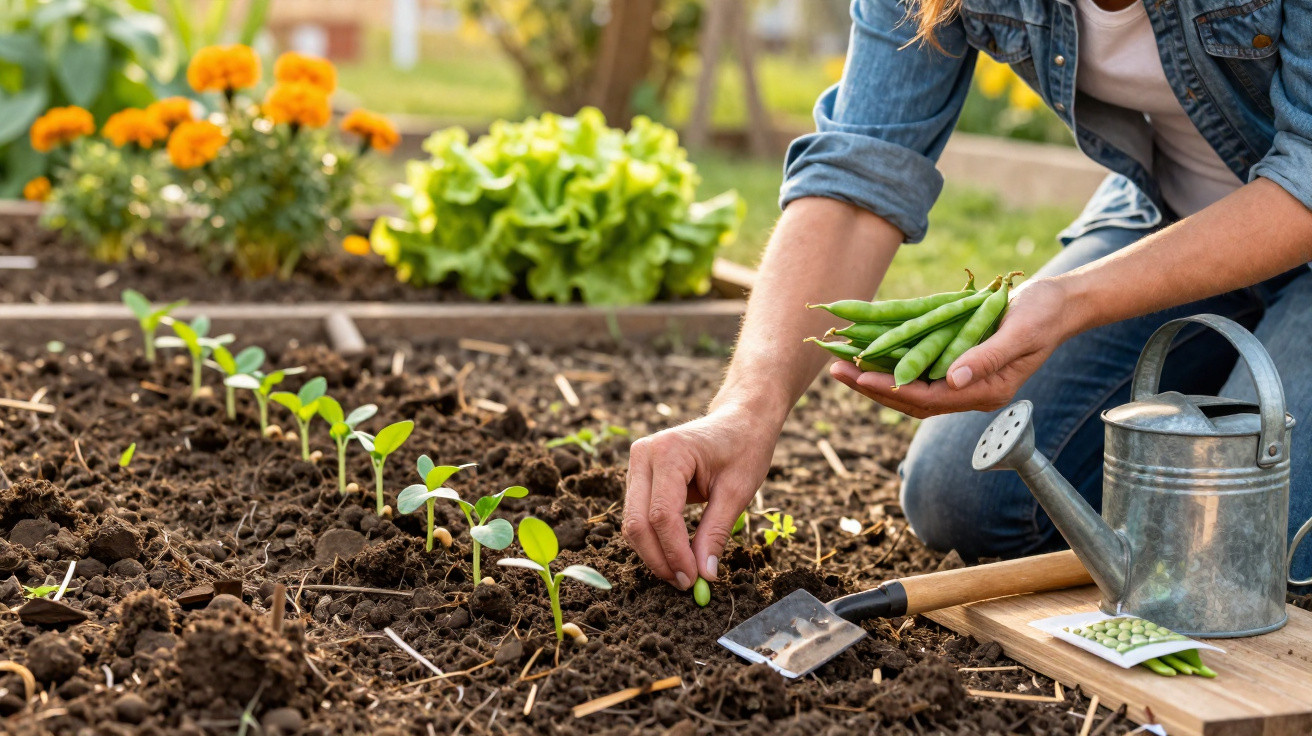
Anyone who has watched a line of delicate bean seedlings push through the soil and later become covered in crisp pods soon understands why this vegetable is so popular in the home garden. The secret is not costly seed or specialist fertiliser: it is choosing the right moment and following a few straightforward steps when sowing outdoors.
Why timing is crucial for green beans
Green beans originate in warmer areas and are sensitive to cold conditions. If the soil is cold and wet, seeds rot rather than germinate. Starting too early can cost weeks, or even an entire row.
“The soil should be at least 12°C, and ideally around 15°C, before beans are sown.”
In warmer southern parts of German-speaking Europe, such as the Upper Rhine, South Tyrol and areas with a Pannonian climate, the first outdoor sowing is usually possible from late March or during April. In moderate areas where late frosts occur, late April to late May is generally more suitable.
At higher elevations and in northern regions, experienced gardeners often wait until late May or early June. The sowing period can then extend comfortably until the end of July, and sometimes into the first week of August, depending on the local climate.
Examples of approximate sowing windows
- Warm areas / wine-growing climates: late March to July
- Moderate areas: late April to late July
- Mountain areas / cool locations: late May to late July
The calculation is simple: most dwarf French beans take roughly 50 to 60 days from sowing to the first harvest. Beans sown in early May can therefore produce their first pods in early July. A mid-July sowing will usually provide a crop in September.
Preparing the soil: keep it loose, not heavily fertilised
Beans are legumes. They form a partnership with specific soil bacteria and fix part of their own nitrogen. They therefore need only modest feeding, provided the soil remains loose and well aerated.
“Applying fresh farmyard manure immediately before sowing does more harm than good – it makes the soil too rich and wet.”
Getting the bed ready for beans
- Loosen the soil deeply with a garden fork or cultivator, without turning it over completely.
- Break up large clods and remove stones, thick roots and leftover weeds.
- If the soil is very heavy, work in a little sand or fine compost.
- Lightly rake over badly compacted surfaces before sowing.
If some mature compost was incorporated in autumn, the beans will have excellent starting conditions. The key is a free-draining soil that warms easily, retains moisture and does not become waterlogged.
How to sow green beans outdoors correctly
For a home garden, sowing in rows is the most straightforward approach. It also makes watering, maintenance and harvesting easier later on.
Step by step to the ideal bean row
- Make seed drills about 3 to 5 centimetres deep.
- Leave 40 to 50 centimetres between rows so that you can walk between them comfortably.
- Within each row, either:
- place one bean seed every 5 to 10 centimetres; or
- sow small clusters, known as “packs”, of 4 to 6 beans every 30 centimetres.
- Cover with fine soil and press it down gently so the seeds make good contact with the soil.
- Water the drill or sowing line thoroughly, then leave it alone.
In warm soil, germination is rapid: the first seedlings emerge between day five and day ten. Checking beforehand with a soil or hand thermometer makes it less likely that you will be caught out by low temperatures.
Watering green beans as they grow
Beans do not require permanently wet soil, but they are sensitive to prolonged dry spells when flowering and forming pods. In such conditions, pods remain small or may even drop off.
“Water as directly as possible around the root area, rather than over the foliage, to prevent fungal diseases.”
A practical tip is to create a small watering channel along the row. This holds the water well instead of allowing it to run away at the sides. During hot periods, watering in the morning is even more worthwhile than in the evening: fewer slugs are active, and the plants have water available throughout the day.
Earthing up and mulching for sturdier plants
Once bean plants are 15 to 20 centimetres tall, it is worth making a small ridge of soil around them:
- Use a rake or hoe to draw a little soil up around the stems.
- Spread a thin mulch layer, such as grass clippings, leaves or straw, between the rows.
This gives the plants greater stability and helps the soil stay moist and cool for longer. Mulch also suppresses some weeds.
Quick harvest: from seed to pod in a short time
When soil temperatures are ideal, beans quickly reach their full potential. Dwarf varieties are generally the first to crop:
| Type | Germination period | Until first harvest | Cropping period |
|---|---|---|---|
| Dwarf French beans | 5–10 days | approx. 50–60 days | several weeks |
| Climbing French beans | 5–10 days | slightly longer than dwarf French beans | longer, staggered harvest |
Dwarf varieties are ideal for gardeners wanting a quick, compact and manageable crop. Climbing varieties need a support structure, but provide a steady supply over a longer period.
Harvesting green beans throughout the season with careful planning
To avoid being overwhelmed by beans for two weeks and then having none left, use a staggered sowing plan:
- Start the season with dwarf varieties.
- Sow the next strip two to three weeks later.
- Sow climbing varieties at the same time or a little later; they will continue cropping well into late summer.
- Harvest every two days, as this encourages plants to keep producing new pods.
Using this method, you can pick fresh beans for many weeks in an average summer, without major gaps in the harvest calendar.
Mistakes that hold back green beans
Many difficulties can be prevented by following a few basic rules. Common pitfalls include:
- Sowing too early into cold soil: seeds rot or germinate only very slowly.
- Constantly wet soil: encourages rot and fungal diseases.
- A heavy application of fertiliser shortly before sowing: plants produce lots of foliage at the expense of pod formation.
- Failing to harvest: mature, thick pods slow the plant down, so new pods stop forming.
In a home garden, it is better to grow one extra row with moderate spacing than to overcrowd plants. Plants set too closely together dry out poorly after rain, encouraging fungi such as greasy spot disease.
Practical additions: companion planting, storage and choosing varieties
Green beans are vulnerable to frost but otherwise surprisingly easy to care for. They combine well with other crops in the bed. Low-growing dwarf varieties can fit between lettuce or early radishes, while climbing types can form a living “wall” at the end of the bed.
For families with limited space, compact-growing dwarf French beans are a good option. Those who enjoy preserving produce or freezing large supplies are better served by climbing varieties, as they crop for longer and often more heavily. For freezing, choose pods that are as slender and stringless as possible; blanch them briefly, cool them rapidly and freeze them dry.
Beginners in particular are often surprised by how little time passes before the first harvest. With warm soil, loose ground and some planning around the sowing date, a simple bed can become a wall of green beans within a few weeks – and the question changes from “whether” to “where to put the entire harvest?”.
Comments
No comments yet. Be the first to comment!
Leave a Comment