
Peonies have a reputation as the divas of the perennial border: in one neighbour’s garden they are covered in enormous flowers, while in the next they remain disappointingly small. The difference is not made in May, but several weeks earlier. By late March, it is decided whether your plants will merely flower or put on a truly spectacular display.
Why late March determines the future of your peonies
Peonies appreciate cold weather. Around six weeks of temperatures near four degrees helps them form sturdy buds. Tree peonies can even tolerate temperatures down to minus 15 to 20 degrees, while herbaceous peonies withstand roughly minus 10 degrees. Although this sounds hardy, plants can still become stressed quickly in late winter.
Alternating frost and thaw causes the soil to rise and fall. This can lift the shallow, fleshy roots and tear off their fine root tips. At the same time, cold water often lingers around the roots. Doing nothing now can cost you flowering performance, yet rough digging in the soil is equally harmful.
“During the final days of March, there is a short window of opportunity: one targeted action gently wakes the peony and directs all its energy into strong buds.”
Many amateur gardeners focus chiefly on pruning and compost. At this stage, however, peonies benefit above all from proper cultivation of the topsoil and a carefully balanced nutrient supply.
The one task that produces giant peony blooms
This key job has two parts: gently loosening the surface and applying targeted spring fertiliser. Nothing more is required.
Follow these steps
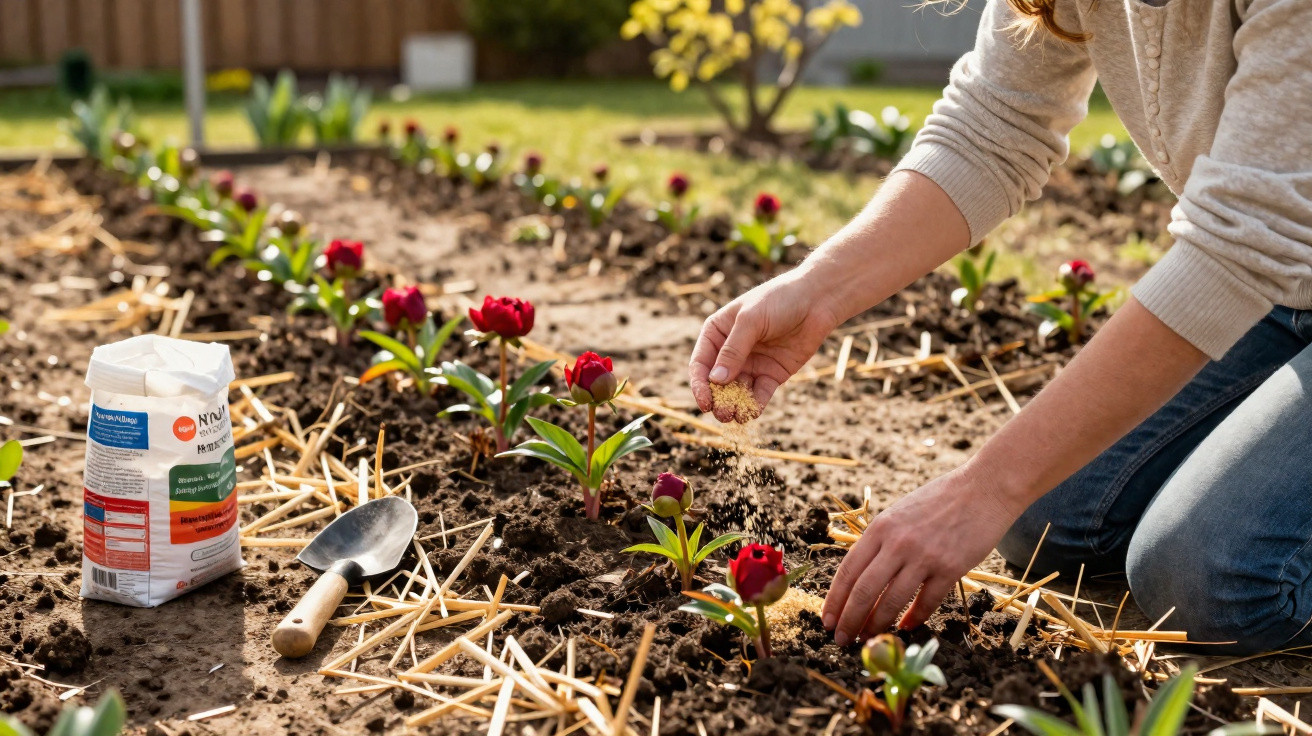
- Clear the soil: Remove old leaves and coarse mulch from around the plant, covering a radius of around 20 centimetres.
- Loosen the surface: Using a small rake or your fingers, lightly scratch only the uppermost 3 to 5 centimetres of soil. Do not go deeper, as the thick roots sit immediately below.
- Work in nutrients: Apply around 50 grams per plant of an organic combination containing readily available nitrogen and slow-release phosphorus. Gardeners traditionally use dried blood and horn shavings, or a comparable organic specialist product for flowering perennials.
- Water lightly: One litre of water is enough to dissolve the nutrients and settle the soil.
- Potassium boost: If you have access to clean, cold wood ash, work one tablespoon into the surface. Its potassium compounds strengthen cell walls and therefore improve the stems’ ability to remain upright.
The secret is not so much the quantity as the timing and the extremely shallow cultivation. The plants are just about to emerge, their fine roots are active and they can take up nutrients immediately.
“Nitrogen drives leaf growth, phosphorus supports flower formation, and potassium creates firm stems – this combination produces lush, large flower heads in May and June.”
Dosage, common mistakes and the role of mulch
Using a spade at this point can easily cause damage. Digging to a depth of up to 15 centimetres around the plant, or burying compost, cuts through countless fine roots. The peony must then repair itself instead of forming flowers, leaving buds small or causing them to fail altogether.
Another common mistake is reaching for a nitrogen-heavy general-purpose fertiliser. Anyone who has overdone it will know the result: plenty of rich green foliage but hardly any flowers. In spring, peonies need a balanced blend with a clearly noticeable phosphorus content, rather than food solely for leaves.
Mulch must also be used correctly and at the right time. In winter, a layer of leaves, bark or straw measuring five to ten centimetres thick forms a protective covering over the root area. It limits severe temperature fluctuations and, provided the soil has a good structure, helps prevent waterlogging.
As soon as the first red shoot tips appear, the priority changes: the soil must now be able to warm up. Thick layers of mulch become an obstacle.
- Gently pull mulch to one side without damaging the shoots.
- Keep the area directly above the root buds clear.
- Remove any mouldy or heavily decomposed material.
- Later, on warm days, spread the mulch back in a thin layer to retain moisture.
Careful work at this stage can result in flower diameters of 15 to 20 centimetres – figures otherwise seen only in catalogues.
How to adapt this peony technique to your garden
Young plants need less, but more consistently
Peonies during their first two years in position are more sensitive. Their roots do not yet reach as deeply and the rootstock is smaller. Use substantially lower amounts of fertiliser here. Work only a small handful of organic fertiliser into the surface, while paying greater attention to winter protection.
Young plants benefit from a slightly thicker mulch layer, which should be pulled back gradually during March. The method remains the same, simply gentler and more sparing.
Treating peonies in pots correctly
In containers, peonies respond more strongly to temperature fluctuations because the root ball is not insulated by the surrounding ground. Place pots against a sheltered house wall wherever possible, ideally beneath a slight roof overhang so that the root ball does not become constantly waterlogged.
Before fertilising, it is sufficient to carefully roughen the top layer of compost. Work in the nutrients with great care; watering will then distribute them through the container. Less is particularly important in pots: over-fertilising quickly leads to salt stress and reluctance to flower.
“For container-grown plants, use small doses regularly and precisely around the time of emergence. Timing matters even more here than it does in a border.”
What to do in late frost, at higher altitudes or when flowering is poor
In exposed areas, the timetable shifts. Rather than following the calendar rigidly, use the point of emergence as your guide: once the buds have swollen and are close to opening, it is time for the method described above – even if this is not until early April.
If flowering remains modest despite your efforts, check for three typical causes:
- Too little sun: Peonies need at least four to five hours of direct light each day.
- Planting too deeply: Herbaceous peonies in particular flower poorly when their buds are more than three to five centimetres below the surface.
- Persistently excessive nitrogen: Regular additions of fresh lawn clippings or generous amounts of artificial fertiliser nearby produce lush foliage but weak buds.
Why peonies are sensitive to planting depth and position
The best-known garden type, the herbaceous peony, develops a tuberous rootstock with so-called eyes close to the surface. If these “eyes” are planted too deeply or repeatedly covered with soil later on, the plant will produce leaves but scarcely any buds. Tree peonies are slightly more tolerant, but they too reward well-drained, lime-rich soil with abundant flowers.
Peonies strongly dislike being moved repeatedly. Once a suitable position has been found, it should remain unchanged for many years. The spring treatment described here cannot replace good starting conditions, but it helps a suitable site deliver its full potential.
How to increase the effect over the coming years
By following a similar routine each spring, you effectively build up a nutrient reserve in the soil. Organic fertilisers act gradually: some contribute to humus formation, while some remains available to the roots in the following year. Over time, this creates a stable balance that makes the plants considerably more resilient to dry spells and brief late frosts.
Many experienced gardeners pair the March task with two smaller measures: moderate pruning of old stems in late winter and a very thin, broad application of compost in late summer. This spreads nutrient supply throughout the year without disrupting the sensitive period of bud formation.
Once you understand these connections, you will see peonies differently: not as temperamental divas, but as grateful perennials that respond to a few carefully targeted minutes of work in March with spectacular flowers.



Comments
No comments yet. Be the first to comment!
Leave a Comment