
Nutsedge, known in English as “nutsedge”, may look like an innocuous type of grass, yet it spreads discreetly through underground tubers. Simply pulling it out quickly can often make the issue worse. With several targeted measures, however, this persistent weed can be substantially contained – and completely pushed back in many areas.
What makes nutsedge so persistent
Nutsedge resembles a finer, slightly paler grass. It grows more rapidly, often rises above the surrounding lawn and creates unattractive, irregular patches. Botany enthusiasts mainly distinguish between two varieties: yellow and purple nutsedge. Both favour wet soil with poor drainage.
Typical signs in the garden include:
- a triangular stem, which can be felt between your fingers
- leaves arranged in a V shape and noticeably stiffer than lawn grass
- visibly faster and taller growth than the rest of the lawn
- a frequently yellowish-green colour that looks slightly out of place
“Nutsedge is not an ordinary grass, but a sedge with underground tubers that can survive for several years.”
These tubers – small, nut-like swellings beneath the soil – are precisely what makes nutsedge so difficult to tackle. One plant can produce hundreds of them over the course of a season. Many remain viable for three to five years. Pulling off only the visible growth leaves a store of reserves underground, and fresh shoots can emerge from every remaining piece.
Site check: where nutsedge thrives
Nutsedge is a warning sign, indicating soil that is too wet and poorly aerated. Common trouble spots include:
- low-lying areas where rainwater collects
- sections with heavy, clay-rich soil
- areas watered too frequently or too lightly
- edges alongside paths or driveways with compacted ground
Unless the underlying causes are addressed, every weed-control effort merely creates space for the next flush of nutsedge. Improving drainage and changing watering practices are therefore just as important as using a spray or hoe.
Can nutsedge be removed by hand?
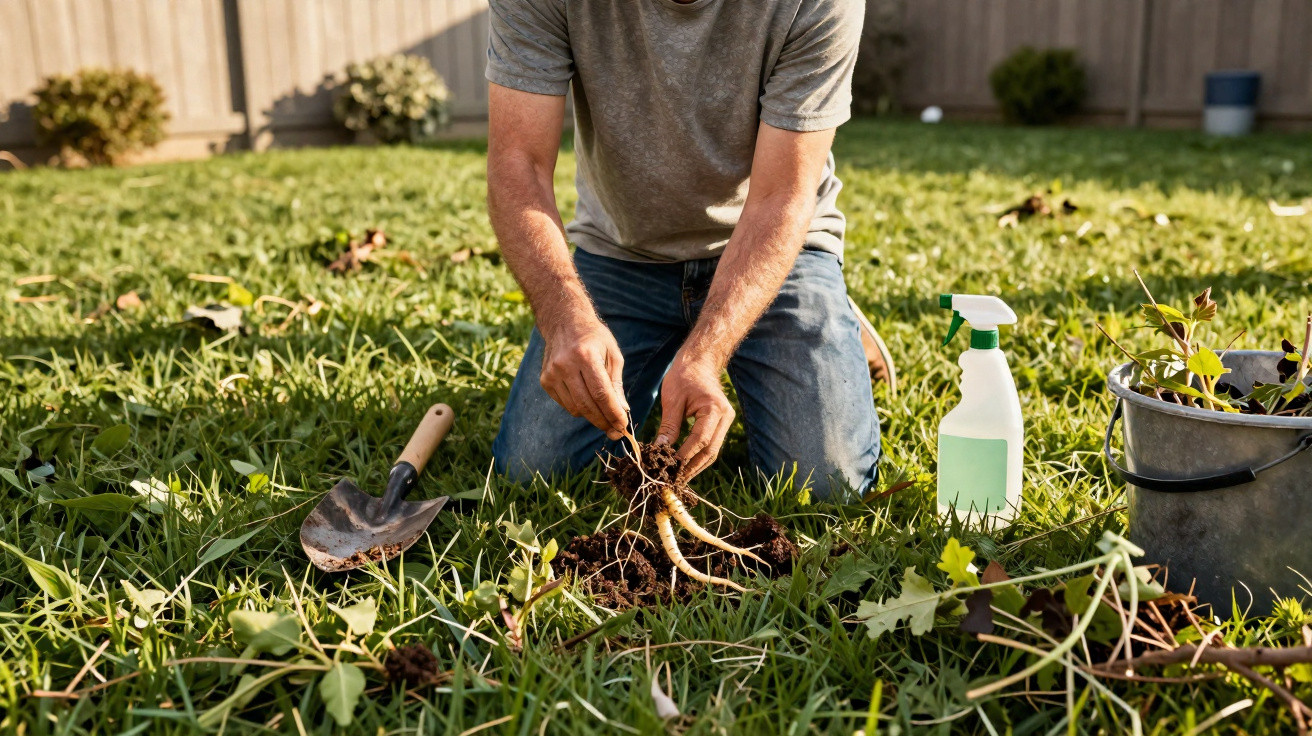
For small patches, manual work is worthwhile. Simply pulling the plants, however, achieves little, as the stem usually breaks off above the tubers. Targeted digging is much more effective.
How to dig out nutsedge
- Water the soil lightly the day before, so that it is loose but not muddy.
- Use a narrow spade or weeding tool to cut around the plant to a depth of around 10–15 cm.
- Lift out the entire root ball with its tubers rather than pulling on it.
- Check the surrounding soil for tubers and dig again if needed.
- Do not add plant material to the compost; dispose of it with household waste instead.
This is the preferred method in vegetable beds, around perennials and in areas where no weedkiller should be used. Although it takes time, it avoids chemical products and can effectively contain small infestations.
Using lawn care to suppress nutsedge
Strengthening the lawn reduces the opportunities available to nutsedge. Thick, healthy turf leaves little light or room for emerging seedlings. Several maintenance measures contribute directly to weed control.
Key cultivation measures at a glance
- Adjust watering: Water less often but more deeply, rather than giving the lawn a short daily watering. Allow the soil to dry slightly between watering sessions.
- Mow correctly: Avoid cutting too short. A mowing height of 4–5 cm is ideal for most lawn types, helping the grass shade out weeds.
- Apply fertiliser carefully: Balanced feeding strengthens lawn grasses, whereas excessive nitrogen applications also encourage nutsedge.
- Fill bare areas: Overseed or top-dress bare patches so nutsedge does not find a “free building plot”.
- Loosen the soil: Use an aerating fork or scarifier to break up compacted areas and reduce waterlogging.
“Every weakness in a lawn – nutrient deficiency, waterlogging or mowing too short – opens the door to nutsedge.”
In beds and beneath shrubs, a thick mulch layer is useful. Three to four centimetres of bark mulch or other organic material deprives emerging shoots of light. Where grass is not intended to grow, mulch is one of the easiest ways to keep nutsedge under control.
Herbicides for nutsedge: when chemical treatment is useful
Where infestations cover a large area, many home gardeners can scarcely avoid chemical products. The important point is to choose products that work specifically against nutsedge while largely protecting the lawn.
Important active ingredients and when to use them
| Active ingredient | Best application time | Interval between treatments | Suitable lawn types |
|---|---|---|---|
| Sulfentrazone | early growth stage | every 3–4 weeks | many warm-season lawn grasses |
| Halosulfuron | from the middle stage until flowering | every 5–7 weeks | suitable for most lawn types |
| Imazaquin | during active growth | every 4–6 weeks | certain warm-season varieties |
These products work best when nutsedge is growing vigorously, allowing the active ingredients to be transported into the tubers and roots. A single spray treatment is rarely enough, because dormant tubers in the soil repeatedly produce new shoots at different times.
Anyone using these preparations should read the label very carefully, including the recommended dosage, spray intervals, temperature ranges and notes on lawn suitability. Cool, wet weather or extreme heat can significantly alter their effectiveness.
When only a total herbicide will do
If an area has been completely overrun, a glyphosate-based total herbicide is sometimes the only option. Such products kill all green growth, including lawn grasses and ornamental plants. They are therefore suitable only for severely damaged areas that are to be completely renewed afterwards.
- Spray only in still conditions to prevent drift onto neighbouring plants.
- Use spray shields or apply with a brush when treating individual clumps.
- Once the vegetation has died, improve the soil structure and drainage.
- Only then sow a new lawn or lay turf.
The best nutsedge strategy: combine methods
For lasting results, use a combination of different measures. The aim is less about eradicating nutsedge in a single year and more about making its habitat progressively less appealing.
“Manual removal, improved soil conditions and targeted herbicides complement each other – no single measure solves the problem on its own.”
A possible plan for gardens with a heavy infestation:
- Assess damp problem areas, reduce waterlogging and adjust the watering routine.
- Treat larger clumps with a suitable herbicide.
- Dig out individual plants and remaining patches, particularly near beds.
- Strengthen the lawn: fertilise, overseed and maintain the right mowing height.
- Check regularly in subsequent years and remove newly emerging shoots early.
Why patience is the most important “active ingredient”
Nutsedge is not a weed that can be defeated with quick fixes. The tubers stored in the soil sprout over several years. Those who stop after one successful season will usually soon see yellow-green patches returning to the lawn.
A small garden diary can help: where did the first shoots appear? When was spraying or digging carried out? Which areas keep recurring? This makes patterns easier to identify – and they are often found exactly where the soil stays wetter than elsewhere.
Practical points and risks to keep in mind
Many home gardeners initially mistake nutsedge for clover or ordinary grass weeds. Running a hand over the stem quickly clarifies matters: a triangular shape indicates nutsedge. Acting straight away can save years of frustration.
Protective clothing is essential when handling herbicides: gloves, closed footwear and, ideally, safety glasses. Children and pets should not return to treated areas until the spray solution has dried completely. In vegetable beds or near edible plants, use only products expressly approved for that purpose; if in doubt, digging plants out remains the safer option.
By working consistently on soil conditions, lawn care and timely control, even heavily infested lawns can be reclaimed step by step. Perfection is rarely possible, but every additional patch brought under control makes this persistent weed less comfortable – and brings the garden much closer to the well-kept green space you want.





Comments
No comments yet. Be the first to comment!
Leave a Comment