
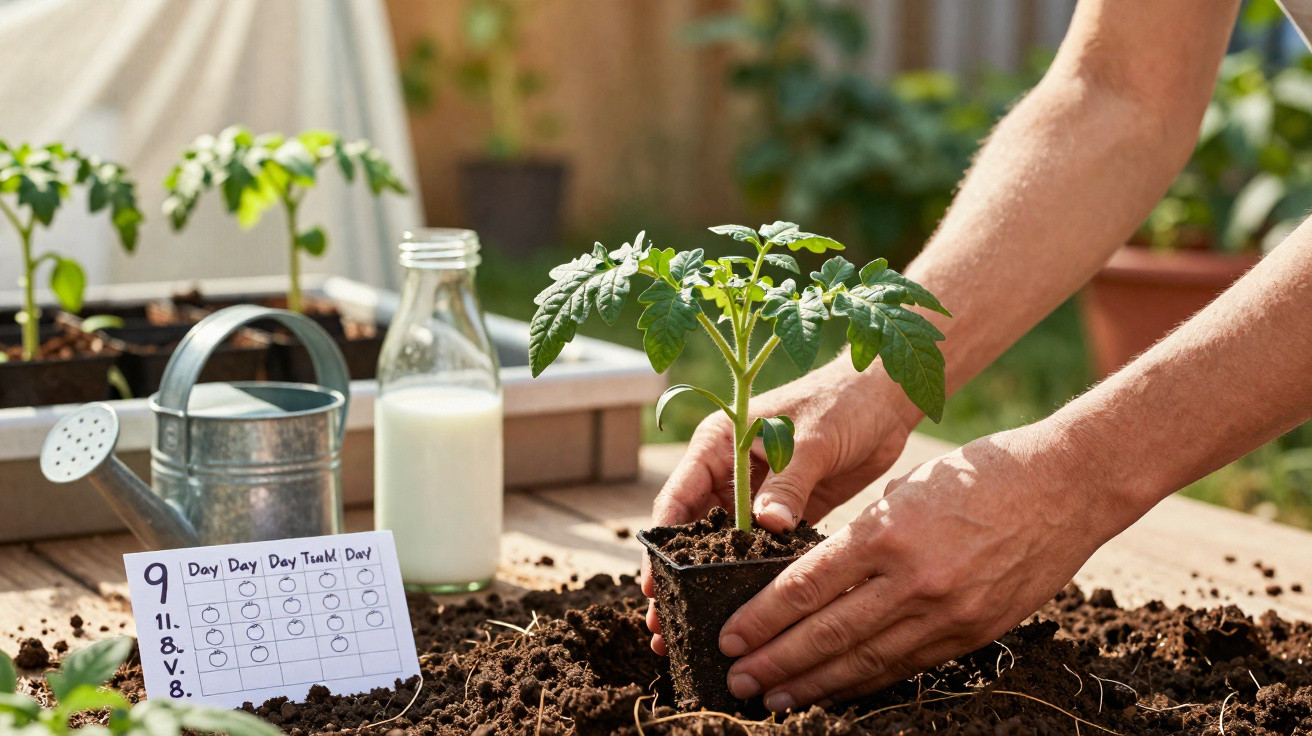
The calendar says: “It is planting time now.” The sun is shining, and the young plants indoors look sturdy and deep green. So it is tempting to take them straight into the garden, put the tomatoes in the soil and declare the season under way. Yet this is precisely where many harvests are undermined without gardeners realising it. The culprit is not the variety or the fertiliser, but an inconspicuous intermediate step that is often missed.
Why tomatoes suddenly wilt after planting out
Tomatoes, peppers, chillies, aubergines and basil are classic warmth-loving crops. They are usually raised in a living room, on a windowsill, in a conservatory or in a small greenhouse. These places offer ideal conditions: hardly any wind, filtered light and steady temperatures of around 20°C.
Although these comfortable conditions produce lush green foliage, the plants are physiologically very sheltered:
- their leaves are exceptionally tender
- the protective layer on the leaves is thin
- their stomata are not yet able to regulate water balance effectively
- their roots have explored only a limited root ball within the pot
If plants are moved into the garden without preparation, they face an abrupt change:
- intense UV radiation
- wind that dries out their leaves
- sharp temperature changes between day and night
- often very moist soil that is still cold
Many gardeners see the consequences two days later:
Leaves turn whitish or beige and look scorched, stems become soft, growth stops – and some plants die completely.
When this happens for the first time, it is easy to suspect frost damage or disease. In most cases, however, it is a classic “climate shock” caused by a lack of acclimatisation to outdoor conditions.
The overlooked stage: hardening off tomatoes correctly
The technical term is “hardening off” young plants. This stage determines whether tomatoes establish quickly during the first weeks after planting out or remain stalled for weeks.
The principle is straightforward: expose plants to a little more of real garden conditions each day. This thickens their tissues, encourages leaves to produce more protective pigments and makes the roots work more vigorously.
When to start hardening off
The right starting point depends on the weather, not the date printed on the seed packet. Useful indicators include:
- daytime temperatures reliably at about 15°C or above
- no night frosts forecast
- planting out planned for roughly one week later
Begin the acclimatisation period around seven to ten days before planting into the bed. For most tomatoes, a simple nine-day plan is entirely sufficient.
Nine-day plan for hardening off your tomatoes
- Days 1 to 3: Place them outdoors for 1–2 hours in shade and out of the wind. Then return them indoors or to a sheltered greenhouse.
- Days 4 to 6: Leave them in the garden for 4–5 hours, ideally in gentle morning sunshine. Move them back into shade or indoors from midday.
- Days 7 to 9: Keep them for 6–8 hours in the location where they will eventually grow. Leave them outside overnight only if temperatures do not become too low.
Anyone who gradually familiarises their tomatoes with sun, wind and fluctuating temperatures halves the risk of scorched leaves and stunted plants.
Without a garden, place plants on a balcony or beside an open window instead. What matters is daily, controlled exposure to genuine outdoor light and fresh air.
How to plant tomatoes in the garden without stressing them
Once hardening off is complete, the next critical point is planting. Here too, time pressure often leads to small mistakes that weaken tomatoes unnecessarily.
Step-by-step guide to strong tomato plants
- Saturate the root ball: Water the pots thoroughly before planting, until the entire root ball is fully moist. Otherwise, dry root balls will initially draw water away from the surrounding soil.
- Prepare the planting hole: Dig a hole around 20 centimetres deep and loosen the soil slightly. Heavy soils can be improved with compost or sand.
- Plant deeply: Set tomatoes deep enough for around 10 centimetres of stem to be below the soil. Extra roots will form along this buried stem section, making the plant more stable and resilient.
- Install a support: Push the cane into the ground at planting time rather than later. Doing it afterwards can damage newly developing roots.
- Water in: Water generously but direct the water at the root area, not over the leaves.
- Apply a mulch layer: Spread straw, dried grass clippings or leaves around the plant.
This mulch layer keeps soil moisture and temperature steadier, suppresses weeds and maintains activity in the fine roots near the soil surface.
Moisture, fungal diseases and the milk trick
Tomatoes thrive in warmth and light, but they are highly sensitive to permanently wet leaves and stale air. In many gardens, fungal infection rather than frost is the real harvest destroyer.
Common problems include:
- blight and brown rot
- powdery mildew
- grey mould
- bacterial leaf spot
Three measures can substantially reduce the risk:
| Problem | Measure |
|---|---|
| wet foliage | water only at soil level, in the morning or evening |
| stagnant air | do not plant too closely together; remove side shoots selectively |
| temperature fluctuations | use a mulch layer and, where possible, a roof or rain cover |
Many experienced home gardeners also swear by a simple household remedy: milk. A spray made from ordinary cow’s milk (whole or reduced-fat), diluted with water at a ratio of about 1:5 to 1:10 and applied regularly, can slow fungal spores while improving leaf health.
A fine mist of milk and water applied over the leaves every 10 to 15 days acts like a light protective film against many fungal diseases.
Important: make up the mixture fresh each time and spray on rain-free days so that it has time to take effect.
Which crops cope with stress better – and why
The contrast with vegetables sown directly into the bed, such as radishes or carrots, is revealing. They germinate outdoors from the outset and automatically adapt to light, temperature and wind. Their leaves are more robust from the beginning, while their roots naturally follow the structure of the soil.
By comparison, tomatoes, peppers and aubergines raised indoors begin life in a protected “comfort zone”. Without hardening off, the transfer to the garden can hit like a cold culture shock. Because these crops are much more warmth-loving, they are particularly sensitive to chilly nights and strong winds.
Practical tips for everyday garden situations
Not everyone can spend nine days diligently carrying plants in and out. A few adjustments can help prevent damage even when time is limited:
- use two or three larger crates to move several plants at once
- plan longer outdoor periods on cloudy days and shorter ones in very sunny weather
- designate a partially shaded, wind-protected spot as a “training zone”, for example beside a house wall
- bring plants temporarily back indoors or into a shed when the first major temperature drop arrives
If you already use a tomato house or a small polytunnel system, you can begin hardening off there: start with the sides and doors slightly open, then open them fully after a few days.
Why this intermediate step pays off twice
Hardened-off tomatoes establish far more quickly after planting out. They produce new leaves sooner, flower earlier and fall ill less often. Many gardeners report that properly prepared plants not only look healthier by the end of the season, but also bear visibly larger and more numerous fruits.
It also reduces frustration: instead of spending the first warm spring day in a rush to plant everything out, using it deliberately for hardening off spreads the work more calmly across several days. The garden rewards this with stable, vigorous tomato plants that tolerate far more throughout the summer.

Comments
No comments yet. Be the first to comment!
Leave a Comment